Compatibilità con WPBakery Page Builder
How to add on your page the Vik Booking widgets with WPBakery Page Builder.
Vik Booking is a stand-alone plugin compatible with all themes for WordPress. You can use WPBakery Page Builder to build all your website generic pages and add the shortcodes of Vik Booking in any part of your page through WPBakery.
Although, to create all the internal contents of Vik Booking (such as the description inside each Room page) you need to use the WordPress native editor (the standard one or the new Gutemberg).
WPBakery is one of the leaders of the Layout Builder plugins for WordPress and with it adding a widget to your page is a very easy task.
To learn how to add a widget inside the page builder, you can follow these simple steps:
-
Add your widget inside a sidebar
First of all you need to add your widget, i.e. the "Vik Booking Search Form" one inside a sidebar.
You can do it from the admin menu of your WordPress website Appearance > Widgets.
Do not have any sidebar in your theme or you need to create a new one? Go to the specific chapter to learn how to create a custom one and then come back here when you have a new wonderful sidebar :) -
Edit your page with WPBakery
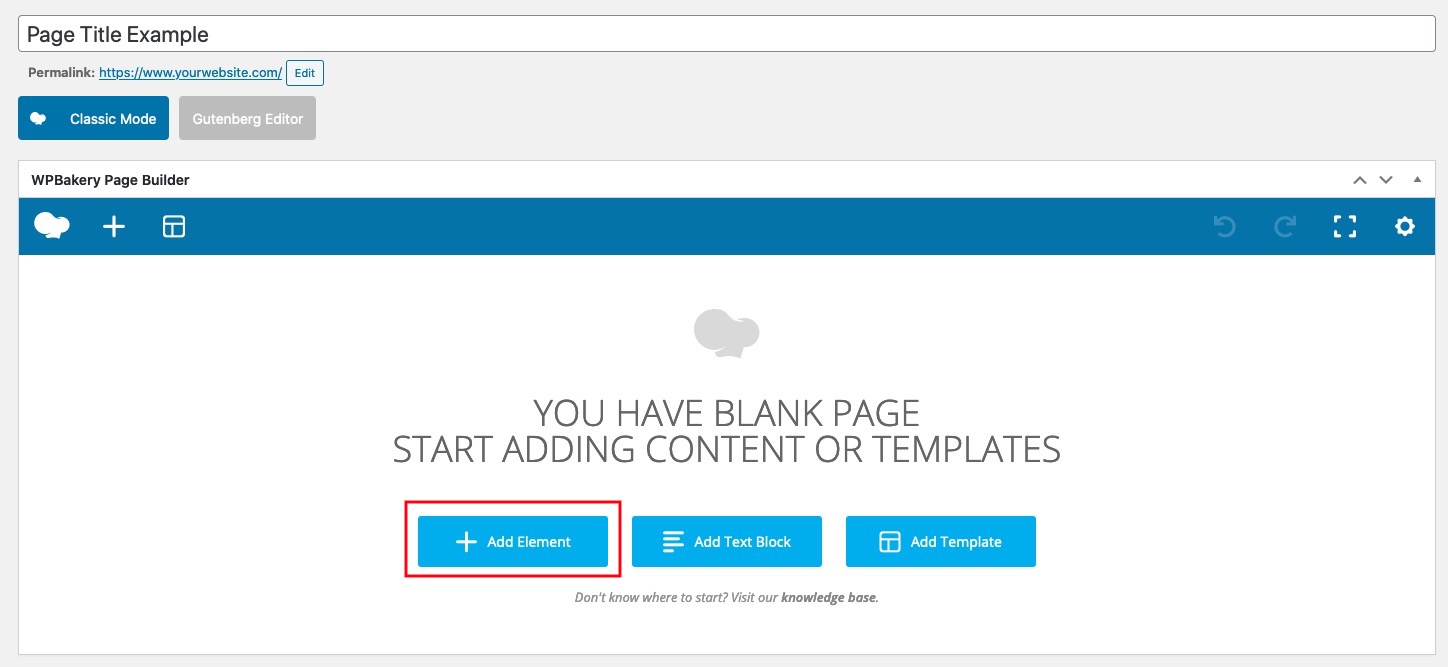
Now you need to modify or create your page by using WPBakery.
From the button "Add Element" you can choose a content type to add inside your page. -
Add the Widget Area element
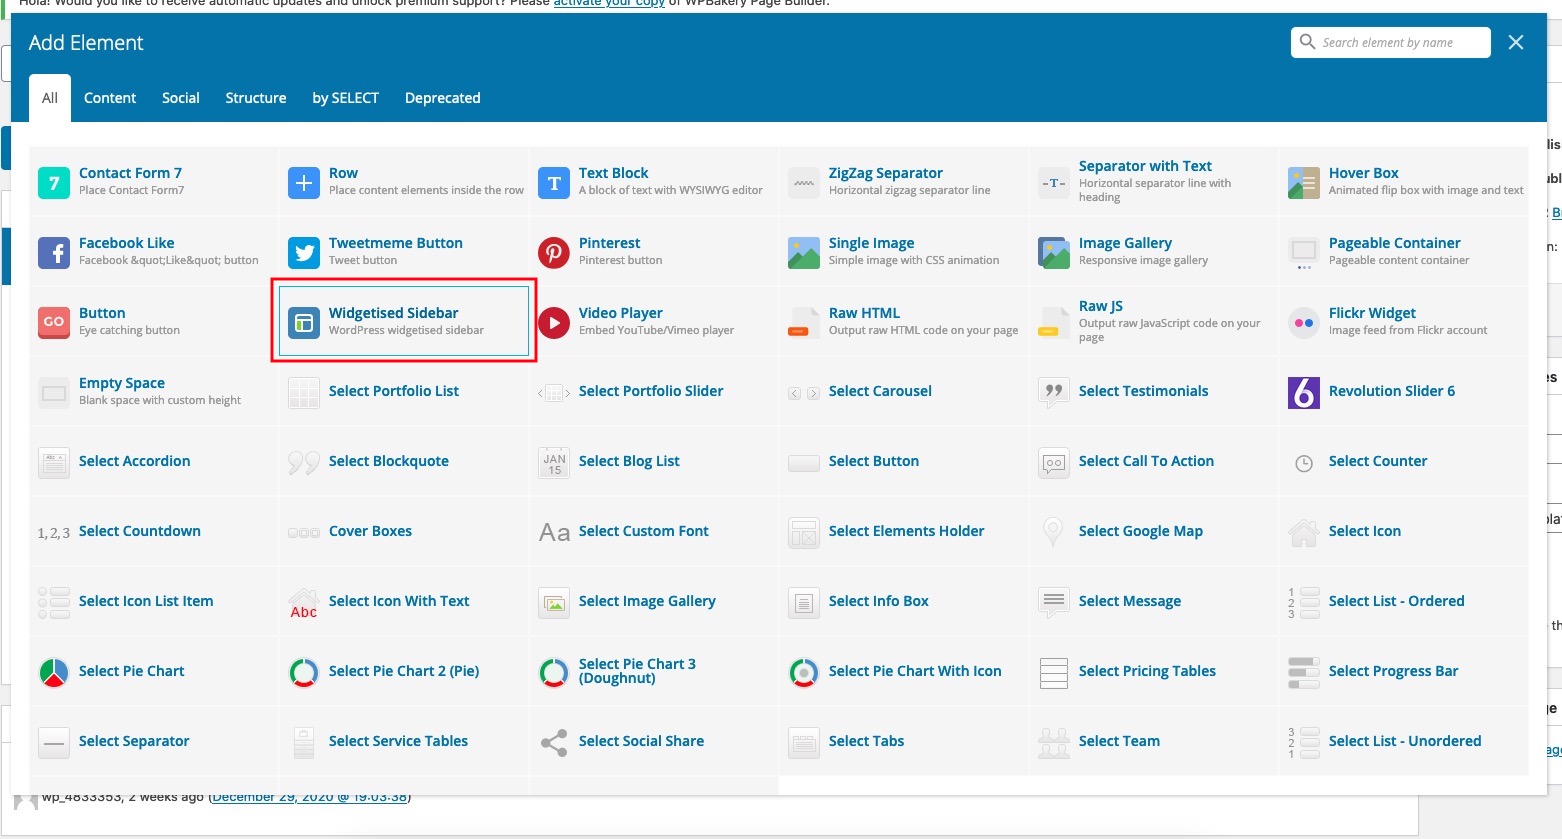
In the overlay window that list all the elements of the page builder, you need to search for the "Widgetised Sidebar" element.
It is a native element of the page builder and you can find it in the list or you could also search for it by using the search filter in the top:
-
Create your Widget Area for the Vik Booking Search Form widget
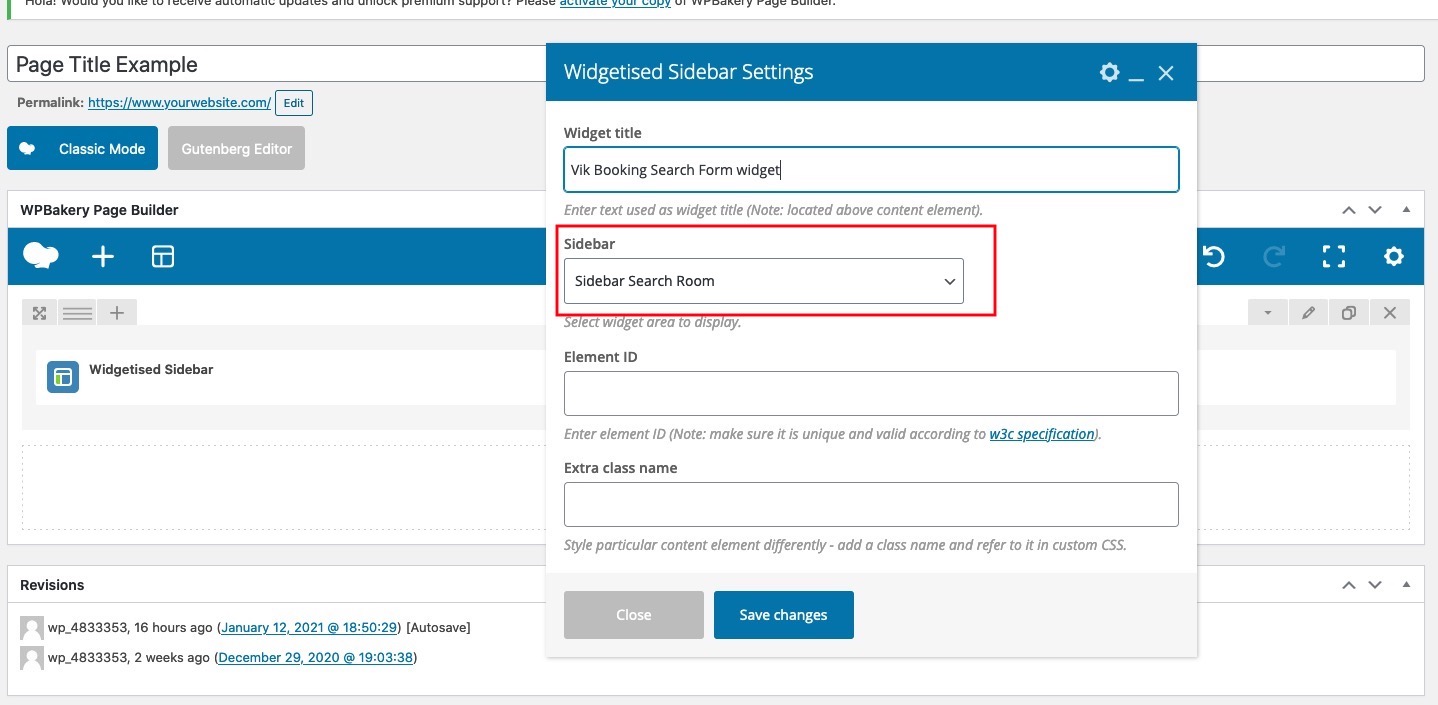
Now you can add a generic widget area name, and most important, you ned to select the sidebar where you added the "Vik Booking Search Form" widget.
Please, notice that WPBakery will print all the widgets inside the sidebar selected, we suggest to add just this widget inside this sidebar. -
Save your page and that's it!
Don't you have a sidebar or you need to create a new one?
Sometimes happens that your theme doesn't have a list of sidebars or you just have all of them already occupied with other useful widgets for your website.
In this case, you need to create a custom sidebar.
Unfortunately, WordPress doesn't have a native function for custom sidebars, it means that you need to use an external plugin.
There are loads of plugins for this, although we suggest to use the very popular Custom Sidebars - Dynamic Widget Area Manager plugin.
We are going to explain here how to create a custom sidebar by using this plugin:
-
Download and install the Custom Sidebars plugin.
Click here to download the plugin and then install it from the "Plugins > Add New" menu of your WordPress admin side.
-
Create a new sidebar
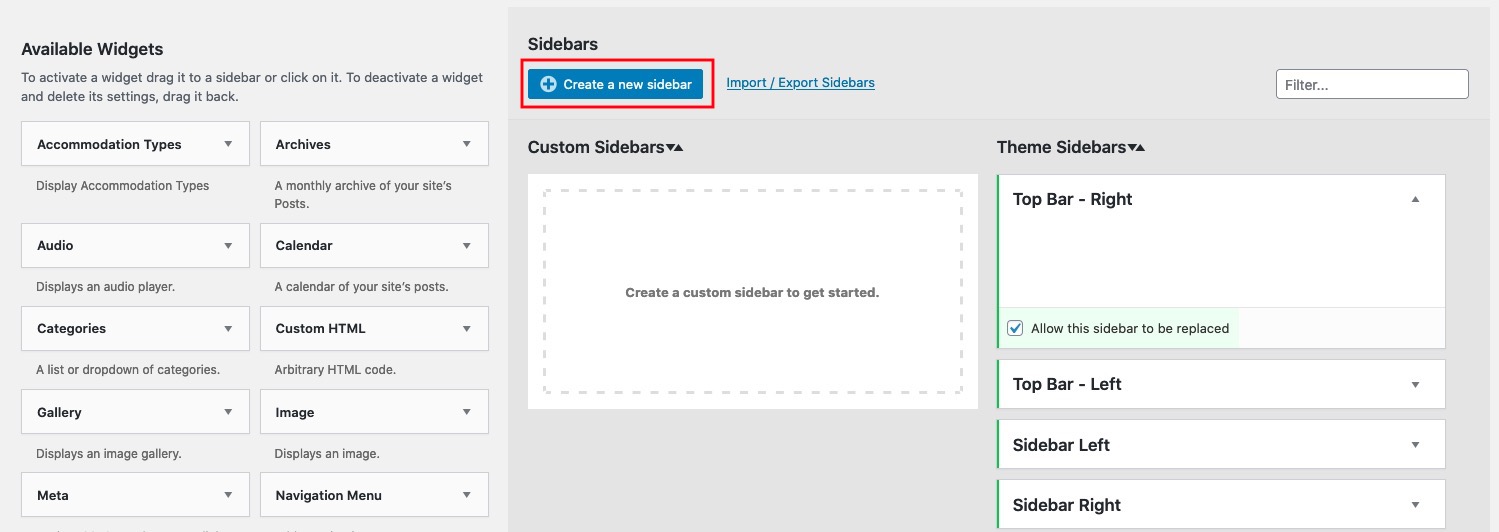
From the Appearance > Widgets page you can now see the Custom Sidebars plugin in action.
Click on the blue button "Create a new sidebar" to create your custom sidebar. -
Give it a name
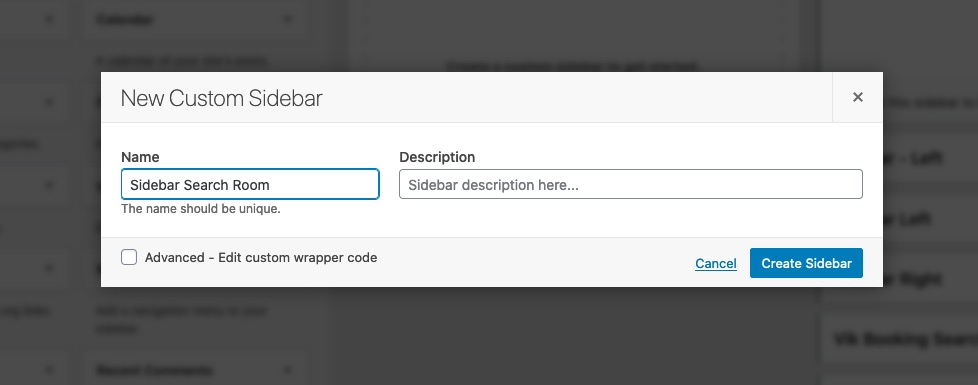
Here you can add a title for your custom sidebar.
-
Add your widget to the new sidebar

Add your widget, in our example it is "Vik Booking Search Form" widget to your new custom sidebar.
Now that you have created your sidebar, you can select it from the WPBakery "Widgetised Sidebar" function explained on the point 2 and keep going with the following steps.