Il tuo carrello è vuoto!
Configurazione Menu WordPress
Creating a Menu in WordPress:
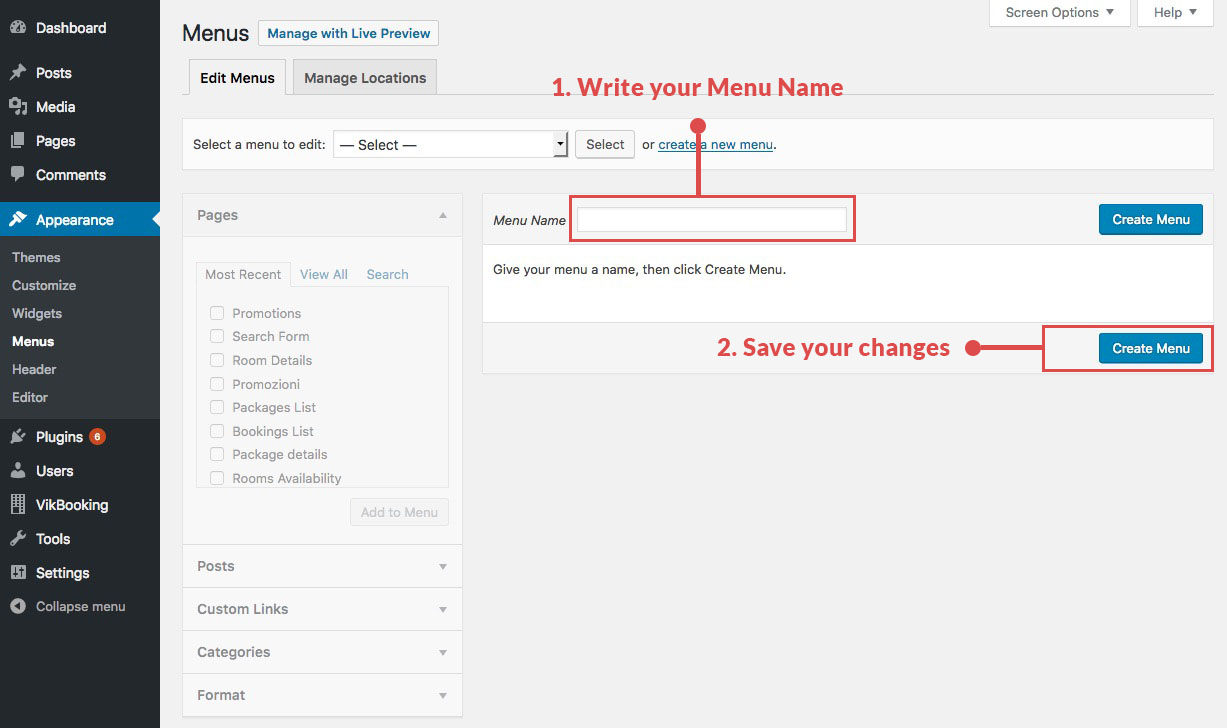
- From the Dashboard go to Appearance > Menus
- In the Menus panel you can see the area where you can create your first menu.
- Fill the Menu Name field with your name, an example "First Menu".
- Click on Create Menu to save you changes.

Add your items:
You can add different type items to your menu, you can add Pages, Posts, General links, and much more. In our case we'll add a Page:
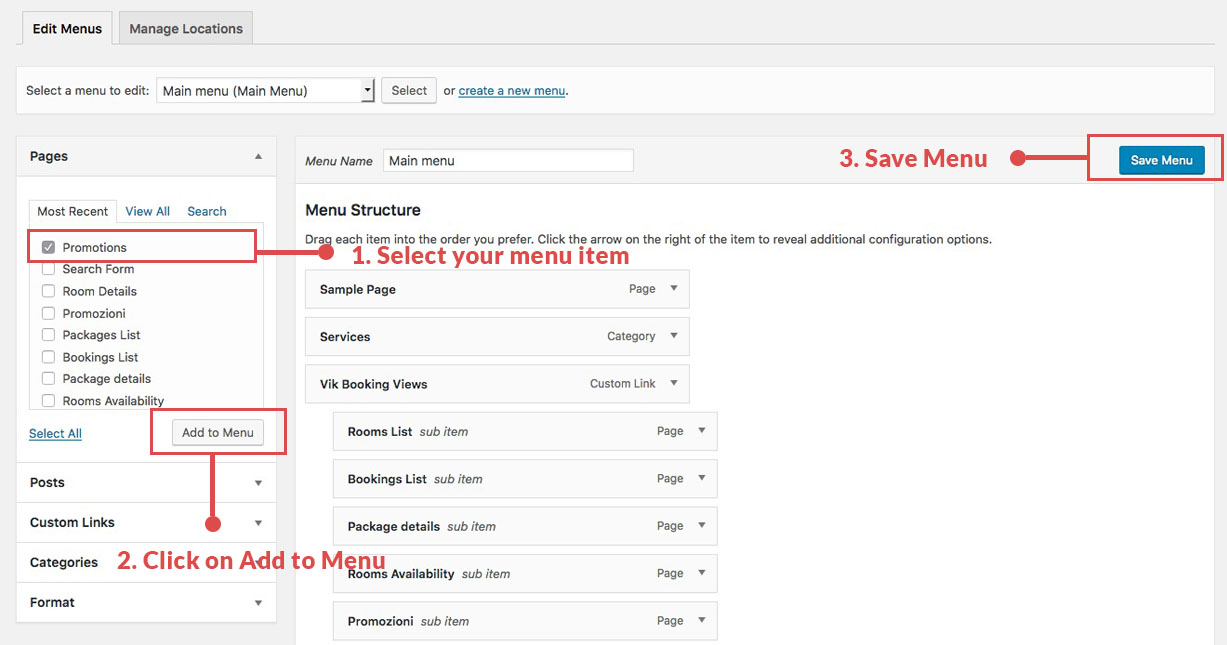
- Open the Pages panel on the left.
- In the "Most Recent" tab you'll find the last pages created, if you can't find your page on it, please clikc in the tab "View All" to see all your pages.
- To add you page to the menu, click on Add to Menu.
- Automatically your new item will be displayed on the Menu Structure panel.
- Once you have insert all the items you need, click on the button Save Menu to apply your changes and see them on the Front Page of your site.

You can also organize differently your menu items, change their order or set them as a child of an existing item menu.
To change the order you should just drag the menu item that you want to order and move it in the position you want.
To have a item as a submenu of a main one, you should drag the relative item hover the main one, you'll a dotted rectangle just above the future parent item, it is the position that will have your item once you'll released.
How to customize a specific menu item with a custom class:
- Click on the top label "Screen Options".

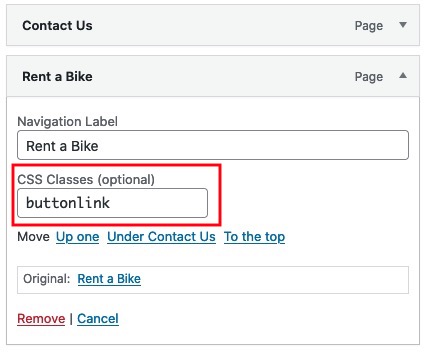
- Check the CSS Classes parameter.

- Come back to the item menu and you can now see a new "CSS Classes" field, write you custom CSS class and save it.
You can now add your CSS Custom Class with your custom styles in the Theme Customizer.

Ultimo aggiornamento: 2021-05-03
Utile?
50% delle persone lo ha trovato utile.