Il tuo carrello è vuoto!
Globale
The Global section of VikRestaurants contains the Custom Fields, the Payment Gateways, the Media Manager and the Reservation Codes.
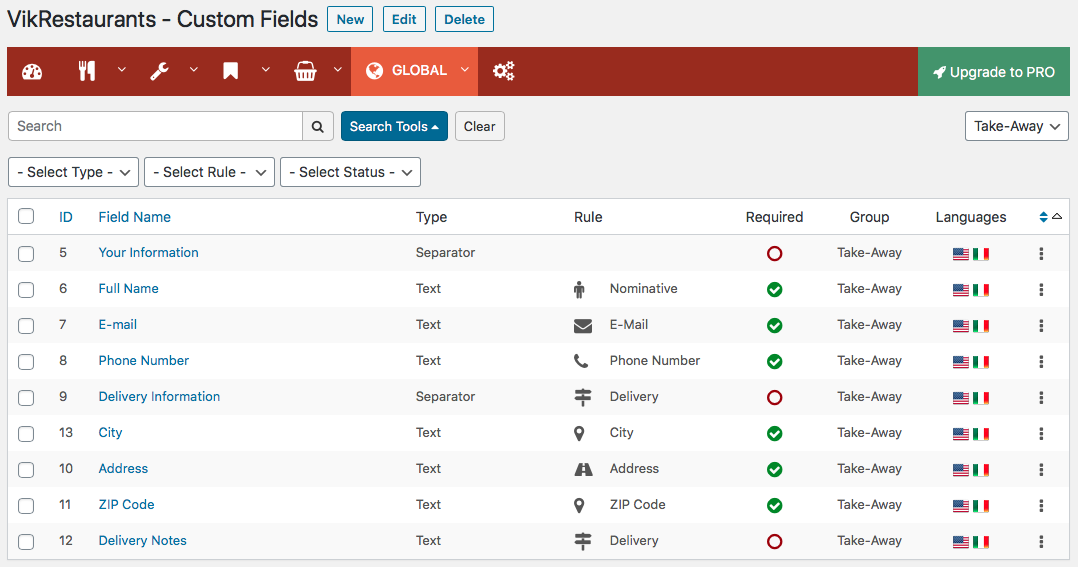
Custom Fields
The custom fields are used to receive all the information you need about your customers.
They are displayed within the confirmation page of both the restaurant and take-away reservations/orders.
During the installation of VikRestaurants, some fields are created by the program but it is always possible to change or delete these fields.
It is possible to sort the custom fields by dragging them from the handle.
Any custom fields translations can be made by clicking the flag of a record, under the Languages column.
The list lets you search the custom fields by name. In addition, it is possible to filter the custom fields with the following values.
- Group - take all the fields that belong to the selected group (restaurant or take-away).
- Type - take all the fields that belong to the selected type (text, textarea, date, etc...).
- Rule - take all the fields that belong to the selected rule (nominative, e-mail, phone number, etc...).
- Status - filter the fields by status (published or unpublished).
Here's a list of supported parameters.
- Group - the group for which the custom field have to be used (restaurant or take-away).
- Field Name - the text to display within the label, next to the input field (e.g. First Name). This field can be translated in multiple languages.
- Type - the type of input to use. The system supports all the following input types: Text, TextArea, Date, Select, Checkbox, Separator.
- Required - enable this option if customers cannot skip this field. The order will be stored only when all the required custom fields will be filled-in. The label of the required options will contain the * symbol. If the custom field is used for the Take-Away group, you can decide to make the field required only if the delivery/pickup service is selected. For example, customers may skip the Address field in case they wanted to pickup the order at the restaurant.
- Rule - the rule that the field must assume. The system supports all the following rules: Nominative, E-Mail, Phone Number, City, Address, ZIP Code, Delivery, Pickup, Reservation Notes, Delivery Notes.
Below are listed all the supported types of input and how the system uses them.
Text Type
The Text type displays a custom HTML text input tag. It is used to receive short texts and numbers.
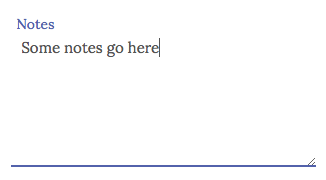
Textarea Type
The TextArea type displays a custom HTML textarea tag. It is used to receive medium & long texts, thanks to the resizable right-bottom corner.
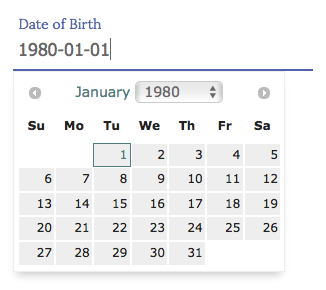
Date Type
The Date type displays a custom calendar field. When the input gains the focus, a datepicker will be opened, which it is used to pick formatted dates from the calendar.
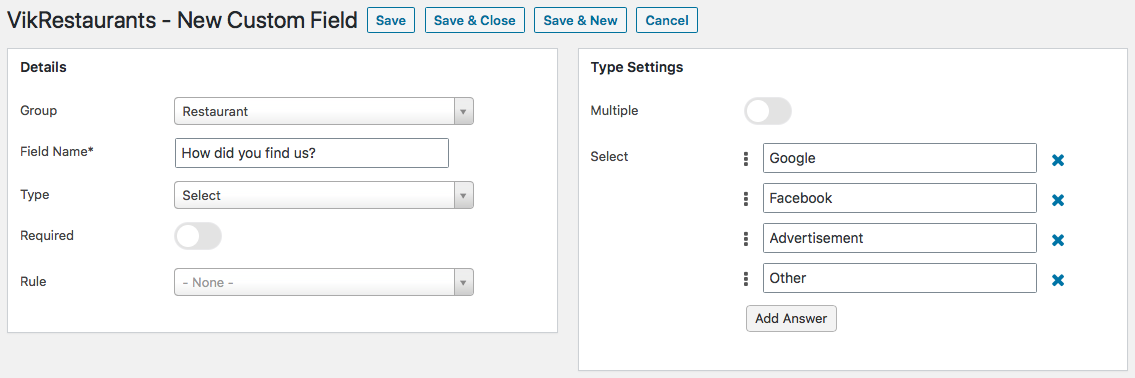
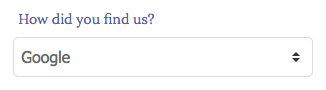
Select Type
The Select type displays a custom HTML select tag. The options of the dropdown can be created, sorted and translated from the management page of the custom field.
When this type is selected, the custom field will be able to define additional settings.
- Multiple - enable this option if the customers can select more than one value.
In addition, it is possible to use the ADD ANSWER button to insert all the values that can be selected by the customers. By dragging the icon next to the values will change the ordering of the options. All the options can be translated in multiple languages.
Checkbox Type
The Checkbox type displays a custom HTML checkbox input tag. It is used to receive only true/false values (1/0 or yes/no). The value of the required checkboxes, such as terms and conditions, is not stored because they can assume only one value (TRUE).

When this type is selected, the custom field will be able to define additional settings.
- Popup Link - the url of the page you want to show as popup. By clicking the label of the field, it will be displayed a popup containing the specified URL. If you are using one of our themes, it is suggested to use the tmpl=component attribute (in query string) to ignore the theme and to show only the page content. This option is useful for Terms & Conditions checkboxes.
Separator Type
The Separator type displays only the name of the custom field. This custom field cannot be used to receive information from the customers.
It is possible to change the style of the separator by editing the CSS rules of the class .vrseparatorcf.
When this type is selected, the custom field will be able to define additional settings.
- Class Suffix - a suffix to be applied to the CSS class of the field. This allows for individual field styling.
Below are listed all the supported rules that the custom fields can own.
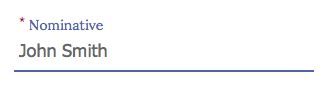
Nominative Rule
This rule is used to collect a nominative, such as First Name, Last Name or Full Name. All the nominative custom fields will be merged together with a space in the middle. The resulting nominative will be assigned to the purchaser nominative field of the reservation.
E-Mail Rule
This rule is used to collect an e-mail address. Only one field should own this rule, otherwise only the last specified e-mail address will be considered for notifications. The resulting e-mail will be assigned to the purchaser mail field of the reservation.
Phone Number Rule
This rule is used to collect a phone number. This rules lets you choose the dial code of the phone number through an apposite dropdown. After entering the phone number, the field will auto-format it according to the standards of the selected country. The list of supported dial codes includes a few preferred countries, so that usual customers won't have to scroll down the list. The preferred countries are based on the default country code and the installed languages.
Only one field should have this rule enabled, otherwise only the last specified phone number will be considered for notifications. The resulting phone number will be assigned to the purchaser phone field of the reservation.

When this rule is selected, the custom field will be able to define additional settings.
- Default Country Code - the selected country code will be used as preferred dial code.
It is possible to turn off the selection of the dial code from the global configuration of VikRestaurants, by disabling the Phone Prefix Selection setting.
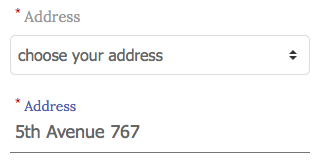
Address Rule
This rule is used to collect the address for the delivery (available only for take-away custom fields). This field is required in order to validate the position of your customer against the delivery areas you have created from the back-end of VikRestaurants.
Only one field should have this rule enabled, otherwise only the last specified address will be considered.
In case you don't want to restrict the address of your customers, you MUST NOT use this rule.
When the customer is logged in and it owns more than one delivery address, the system will show a list of addresses that the customer can pick.
The Address custom field is meant to be filled-in with the following details: street name + street number + city name. If one (or more) of these information is not specified, the system may recognize a wrong address, probably not related to your country. It is possible to omit the city name only in case there is at least a different custom field using one of these rules: City or ZIP Code.
After filling the address, the system will validate it and it will return an appropriate message depending on the case.
- In case the delivery address is valid, nothing will be reported.
- In case the delivery address is valid, but it requires an additional charge, it will be displayed the example message below:

- In case the delivery address is valid, but the total cost of the order is not enough high, it will be displayed the example error message below:

- In case the delivery address is not valid (probably because it is missing the route or the street number), it will be displayed the error message below:

- In case the delivery address is valid but it is not accepted for delivery, it will be displayed the error message below:

The address rule inherits the same effect performed by the delivery rule.
City Rule
This rule is used to collect the City for the delivery (available only for take-away custom fields). This field can be used if you don't want to let the customers insert the CITY within the address field.
Only one field should have this rule enabled, otherwise only the last specified city will be considered.
The city rule inherits the same effect performed by the delivery rule.
ZIP Code Rule
This rule is used to collect the ZIP Code for the delivery (available only for take-away custom fields). This field is required in order to validate the position of your customer against the ZIP Code delivery areas you have created from the back-end of VikRestaurants.
Only one field should have this rule enabled, otherwise only the last specified ZIP Code will be considered.
The ZIP code rule inherits the same effect performed by the delivery rule.
Delivery Rule
This rule is used to show the custom fields only when the delivery service is selected (available only for take-away custom fields).
For example, all the fields that should be compiled only for a delivery (e.g. Address, ZIP Code, Delivery Notes...) MUST own this rule.
Pickup Rule
This rule is used to show the custom fields only when the pickup service is selected (available only for take-away custom fields).
For example, all the fields that should be compiled only for a pickup MUST own this rule.
Reservation Notes
The fields that own this rule will be used to automatically fill the notes of a reservation/order.
In example, in case someone writes "No soy sauce please", you'll see that text within the notes of the order.
Delivery Notes
The fields that own this rule will be used to automatically fill the notes of a delivery location of the customer. The text will be reported within the global reservation notes too, because the location won't be saved in case the user is not registered.
In example, in case someone writes "Door Name: SMITH", you'll see that text within both the notes of the order and the location.
How to override a custom field
If you are looking for a way to change the HTML of a custom field in the front-end, you should know that the custom fields use specific layouts.
For example, if you need to change the layout of the TEXT input, you have just to follow these steps:
- reach via FTP the path
/wp-content/plugins/vikrestaurants/site/layouts/form/fields/text.php - download locally the text.php file
- start editing the file to create your own layout
- upload the file via FTP onto
/wp-content/uploads/vikrestaurants/layouts/site/form/fields/
Payments
The payment gateways are used to collect credit/debit cards payments from your website.
There are 2 different types of gateways: Seamless and Hosted.
With seamless payment gateways your customers won't leave your website because the credit card details will be filled through an apposite form. For this type of payment, the SSL certificate is required.
The hosted payment gateways will redirect the customers to a payment page hosted on your bank website. At the end of the transaction they will come back on your website and they will see the status of the order changed (only in case of success).
In the package you can find 3 pre-installed payment gateways: PayPal, Offline Credit Card, Bank Transfer.
The payment gateways will be used when the total cost of the order is higher than 0.00 and there will be at least a published gateway.
It is possible to make a payment only when the status of the order is PENDING.
It is possible to sort the payments by dragging them from the handle.
Any payments translations can be made by clicking the flag of a record, under the Languages column.
The list lets you search the payments by name. In addition, it is possible to filter the payment gateways with the following fields.
- Group - take all the payments that belong to the selected group (restaurant or take-away).
- Status - filter the payments by status (published or unpublished).
Here's a list of supported parameters.
- Payment Name - the name of the payment to display in the front-end (translatable).
- File Class - the driver PHP file of the gateway. The file is mandatory, otherwise the system won't be able to show the payment form and to process the transaction. When you change the value from the dropdown, it will be loaded a form containing the settings of the payment.
- Published - disable this option if you don't want to allow customers to make payments through this gateway. Unpublished payments are still selectable when editing a reservation from the back-end.
- Cost - an additional charge/discount for this gateway. The selected amount will be displayed next to the name of the payment (when it is different than 0.00). This value can be used to cover fees or to apply little discounts. When a gateway with additional cost is selected, the total cost of the order will change. The cost can be a percentage amount (based on the total gross) or a fixed amount.
- Auto-Set Order Confirmed - enable this value if you want to confirm the order by ignoring the payment transaction. This value should be enabled only for the pre-installed class bank_transfer.php.
- Self-Confirmation - when this value is turned on, a confirmation link will be sent to the e-mail address specified by the customer. This parameter is visible only when Auto-Set Order Confirmed setting is enabled.
- Icon - an icon to show before the payment name, during the selection of the gateway. The icon can be a Font Icon to choose or an Image to upload.
- Output Position - choose in which position the payment form should be displayed. This value is considering inside the Order Details page. The supported positions are Top and Bottom. Leave this field empty to ignore the output position and display the form within the default position of the template.
- Trusted Customer - when this option is enabled, the payment gateway will be accessible only by those customers with a count of reservations/orders higher than the specified amount. After activating it, an input number will be displayed for the selection of the threshold.
- Restrictions - a few restrictions to make a payment selectable only in certain cases. A payment can be always selectable or selectable only when the total cost is higher/lower than a certain amount.
- Group - the group for which the payment can be used (restaurant or take-away). Leave this field empty to use the payment on both the sections of the program.
- Notes Before Purchase - these notes are displayed during the selection of the payment and above the payment form within the order details page, only if the status of the order is still PENDING. This field is translatable. In addition, it supports the READ MORE separator. In case it is specified, the first chunk of text will be used within the confirmation page, the second one will be used within the order summary.
- Notes After Purchase - these notes are displayed only within the order details page, after a successful transaction (order status CONFIRMED). This field is translatable.
PayPal
The PayPal payment gateway (hosted) prints the standard orange PayPal button to start the transaction. The payment will come on PayPal website and, only after the transaction, the customers will be redirected to the order page on your website.
Here's a list of supported parameters.
- PayPal Account - the e-mail address assigned to your PayPal account. Do NOT specify the number related to the merchant account. This value is mandatory.
- Test Mode - when enabled, the PayPal SANDBOX will be used. Turn OFF this option to collect PRODUCTION payments. Notice that, when trying to complete a test purchase (sandbox ON), your account might not be recognized.
- Safe Connection - when enabled, the connection to PayPal will be established only through the TLS 1.2 protocol.
- Image URL - here it is possible to change the image that will be used to display the Pay Now button.
- Auto-Submit - when enabled, the system will automatically submit the payment form after reaching the summary page.

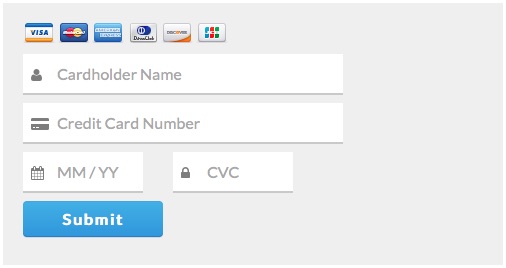
Offline Credit Card
The Offline Credit Card payment gateway (seamless) is not a real method of payment. This gateway collects the credit card details of your customers in order to make the transaction with an offline POS.
Here's a list of supported parameters.
- Order Status - use PENDING in case you want to manually verify the credit card. Otherwise the order will be automatically confirmed after submitting the credit card details.
- Use SSL - in case this parameter is enabled and the website is currently not using a SSL connection, the payment will redirect the website to use a safe connection through HTTPS (if supported).
- Accepted Brands - select all the credit card brands that you are able to charge. Leave empty to accept any brands.
For security reasons, you won't be able to see all the credit card details simultaneously.
In fact, after the form submission, the system will send a notification e-mail to the administrator containing a portion of the credit card number (e.g. 4242 4242 4242 ****) and a link to see the remaining details of the credit card.
The link points to the reservations/orders page in the administrator section, in which you have to click the See Credit Card button. This page contains all the following details:
- Credit Card Brand (Visa, MasterCard, American Express, JCB, Discover, Diners Club)
- Cardholder Name
- Credit Card Number (stored partially, e.g. **** **** **** 4242)
- Valid Through (month / year)
- CVC (or CVV or CV2)
The details stored in the database are encrypted to be not visible in case of unauthorized accesses to the database.
Notice that the details of the credit card will be removed from the database automatically one day after the checkin of the reservation/order.
This gateway is PCI compliant.
Bank Transfer
The Bank Transfer (or Pay upon Arrival) payment gateway is used to skip the payment method process when you have other gateways published. This gateway usually means you will receive the payment by cash when the customer will come to your company.
If you want to automatically confirm the order with this payment gateway, you have to enable the Set-Auto Order Confirmed option from the parameters of the gateway (it should be already active by default).
Contrarily, by leaving that parameter turned off, you could use it is as a BANK TRANSFER. The instructions to complete the payment and the bank account details (such as the IBAN) can be specified within the Notes Before Purchase parameter.
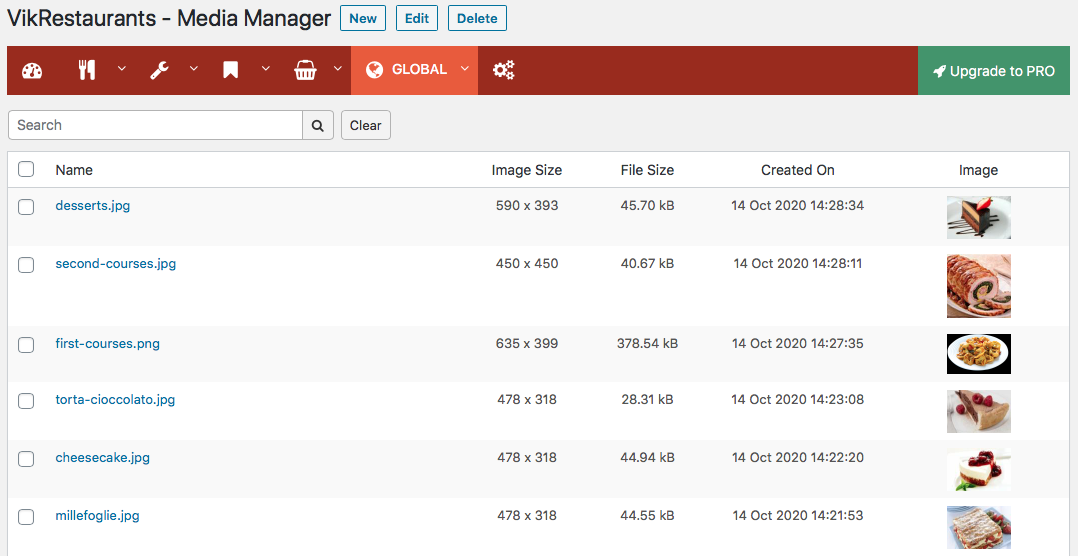
Media Manager
The Media Manager page contains all the uploaded images, which are used by the whole program.
A media is the representation of an image and its thumbnail. The original images are located into this folder:
/wp-content/plugins/vikrestaurants/site/assets/media/While the thumbnails are located in the folder
/wp-content/plugins/vikrestaurants/site/assets/media@small/The media files can be filtered only by name.
It is not possible to use the images stored within the WordPress Media Manager, unless you re-upload them into the folders used by VikRestaurants.
Usually, you are not forced to upload a new image through the Media Manager page, because a smart dialog (when an image can be used) will allow you to upload an image without leaving the page where you are.
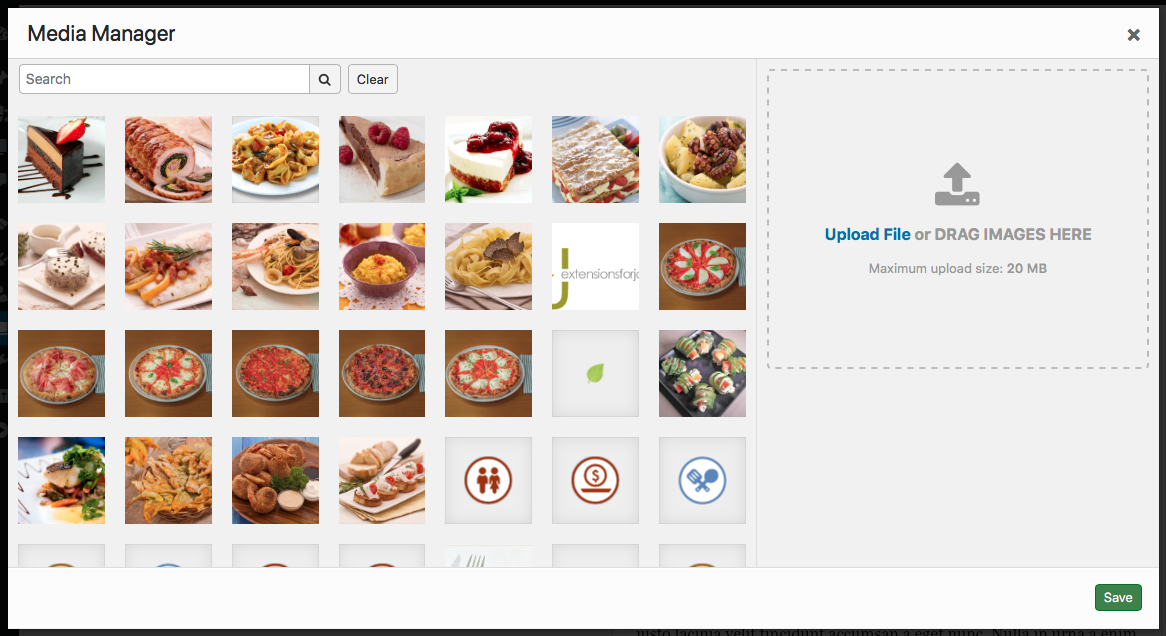
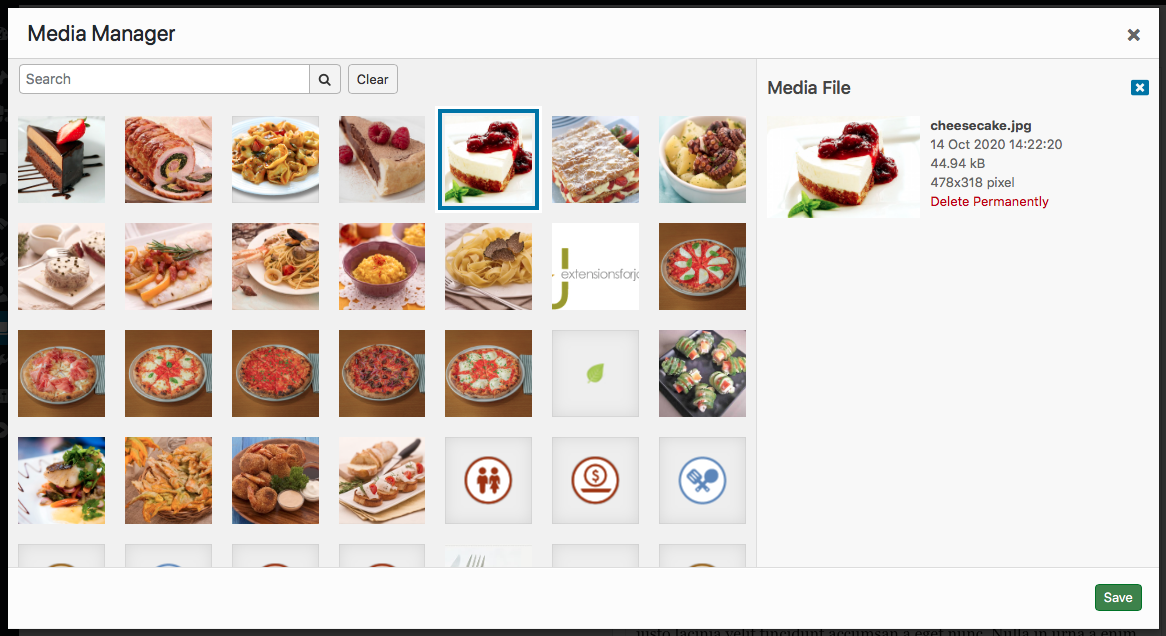
It is possible to select an existing image by picking it from the gallery. By clicking an image currently selected, the image will be cleared for the selected record.
The selected image will report a few details about the related file. In addition, it is possible to permanently delete the image by clicking the apposite button.
It is needed to hit the SAVE button in order to apply any changes.
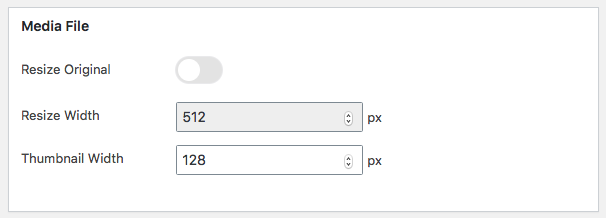
Media Properties
Before to upload a media, you should check the media properties to make sure it will be cropped in the right way.
- Resize Original - enable this option if you want to resize the original image.
- Resize Width - crop the original image with the specified width (the height will be resized proportionally). Cropping is applied only if the Resize Original option is enabled.
- Thumbnail Width - copy the uploaded image and crop it with the specified width (the height will be resized proportionally).
If you save a media without specifying a file, only the media properties will be changed.
Quick Upload
It is possible to upload multiple images in a quick way by using the Drag&Drop. Otherwise, by clicking the Upload File link, the system will show a popup from which it is possible to choose the file(s) to upload.

In the media creation page, you have to drag one or more files from your computer and drop them within the dashed gray box. All the images will be added in a queue and will be uploaded simultaneously.
All the images will be uploaded following the specified media properties.
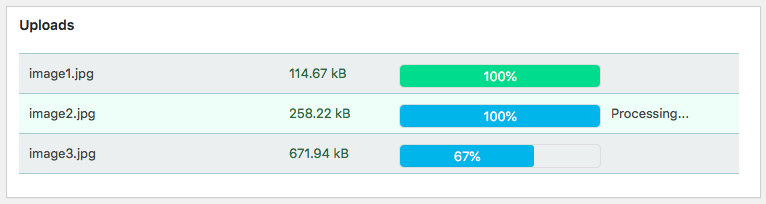
The images with 100% green status are successfully uploaded as media. The images with 100% blue status are completing the cropping of the thumbnail. The images with status lower than 100% are completing the upload of the original image. You can cancel the upload of an image by clicking the Abort button. It is possible to abort an upload only when the original image hasn't been uploaded yet.
When you upload a new image with the same name of an existing image, it will be concatenated a progressive number to the name of the new one.
Manage Media
It is possible to manage a media by selecting the select the image you need to handle and clicking the Edit button from the toolbar.
From this page it is possible to rename the media file and to replace the original and/or thumbnail images.
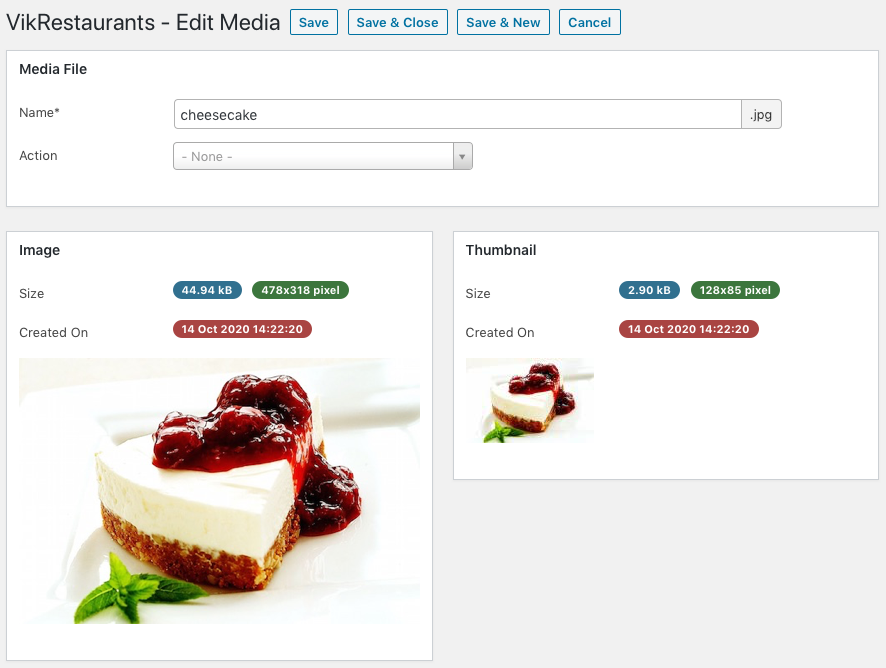
- Name - the name of the media.
- Action - the action to perform after saving the media. The possible actions are: do nothing, replace image, replace thumb, replace image & thumb.
Do Nothing
The action won't affect the images and only the name will be updated.
Replace Image
The action will replace the existing original image with the specified one.
Replace Thumb
The action will replace the existing thumbnail image with the specified one.
Replace Image & Thumb
The action will replace both the images related to this media. In this case, you will have to specify the media properties you need to use.
If an image doesn't own a thumbnail image, you should download the original image and use the Replace Image & Thumb action in order to re-create the thumbnail.
Reservation Codes
The reservation codes can be used to improve the reservations management.
The reservation codes can be used to create a status history of the reservations/orders, which the customers might be able to check (take-away only). For example, "the order is in preparation" or "the order has been delivered".
These codes might be also assigned to certain rules in order to trigger specific events when they are selected.
It is possible to sort the reservation codes by dragging them from the handle.
Any reservation codes translations can be made by clicking the flag of a record, under the Languages column.
The list lets you search the reservation codes by name. In addition, it is possible to filter the codes with the following fields.
- Group - filter the reservation codes by group (restaurant, take-away or food).
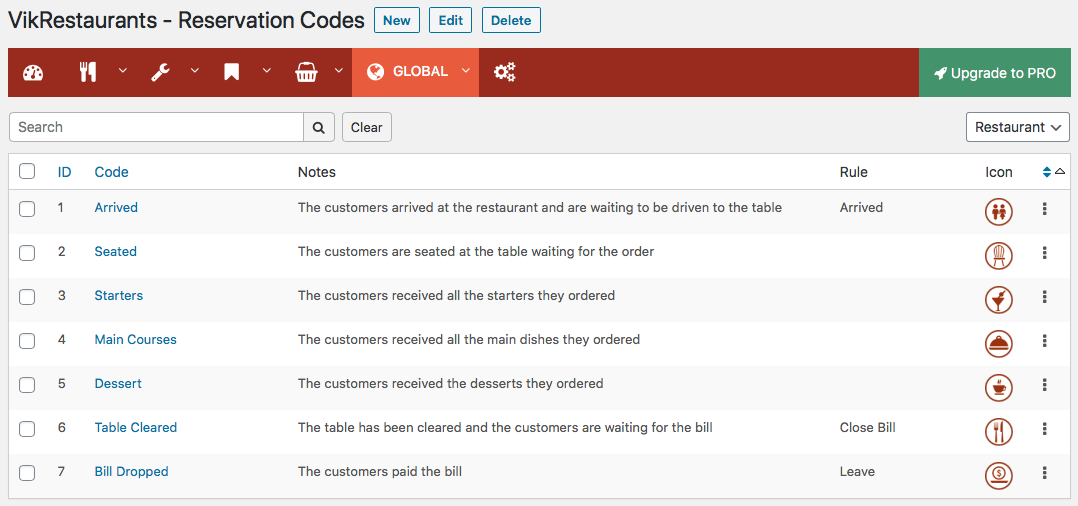
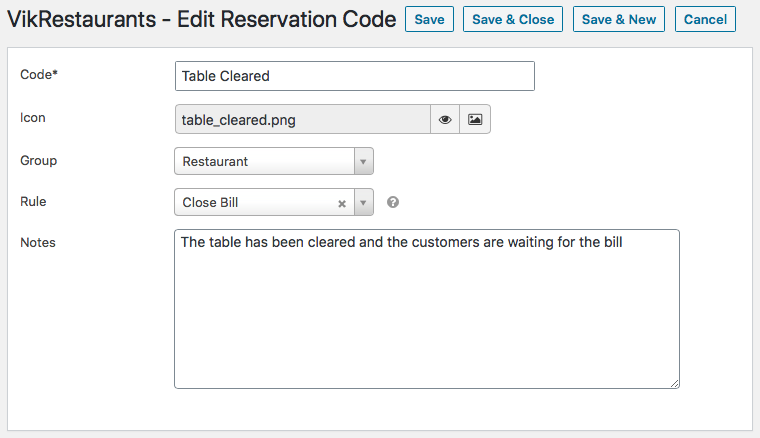
Here's a list of supported parameters.
- Code - the name of the reservation code.
- Icon - the icon of the reservation code. In case of no icon, only the name will be displayed.
- Group - the group to which the reservation code belongs. A code can be used only for the restaurant reservations, for the take-away orders or for the food (of the restaurant).
- Rule - an event to trigger every time the reservation code is selected.
- Notes - a short description of the reservation code. This text can be seen by the customers to check the status of their orders.
Arrived
This rule can be used to flag the customers of the reservation as arrived at the restaurant.
In case the customers leave the table before to established check-out, the stay time of the reservation will be automatically shortened to immediately free the table.
This rule can be assigned to the reservation codes that belong to the Restaurant group.
Close Bill
This rule can be used to automatically close the bill of a reservation.
When a bill has been closed, the customers of that reservation are no more allowed to order further dishes (see Allow Courses Ordering setting).
This rule can be assigned to the reservation codes that belong to the Restaurant group.
Completed
This rule can be used to flag certain orders as already completed (delivered or picked up).
Orders flagged as completed will be immediately removed from the Current widget of the dashboard. The orders will be removed only at the next dashboard refresh.
This rule can be assigned to the reservation codes that belong to the Take-Away group.
Cooking
This rule can be used to flag a certain food of a restaurant reservation as under preparation.
As long as a dish is under preparation, it will be kept within the Kitchen widget. In addition, customers won't be able to edit/remove anymore a dish when it is being cooked (see Allow Dishes Ordering setting).
This rule can be assigned to the reservation codes that belong to the Food group.
Invoices
This rule can be used to automatically issue an invoice for the related reservation/order. The invoice will be issued only if the grand total is higher than 0. The invoice will be also sent to the e-mail address of the customer, if specified.
This rule can be assigned to the reservation codes that belong to the Restaurant and Take-Away groups.
Leave
This rule can be used to automatically update the stay time of the reservation.
In case the group of a reservation leaves the table before the check-out time, the stay-time will be adjusted to the current time and the table will become immediately available.
This rule can be assigned to the reservation codes that belong to the Restaurant group.
Order Dishes
This rule can be used to send a notification to the customer to start ordering the dishes. The notification is sent via e-mail and with a SMS (if configured).
This rule should be assigned to reservation codes that represent the customer arriving at the restaurant or when they sit at the table.
This rule can be assigned to the reservation codes that belong to the Restaurant group.
Prepared
This rule can be used to flag a certain food of a restaurant reservation as already prepared.
The waiters can see a list of dishes flagged with prepared status, so that they can pick and deliver them to the customers. All these dishes are shown under the Outgoing Dishes section within the Kitchen widget.
This rule can be assigned to the reservation codes that belong to the Food group.
Preparing
This rule can be used to flag a take-away order as under preparation.
As long as an order is under preparation, it will be kept within the Current widget of the dashboard, even if it shouldn't be displayed anymore. This is useful in case the kitchen is facing any delays with the preparation of the orders, because it won't be possible to lose sight of them.
This rule can be assigned to the reservation codes that belong to the Take-Away group.
Waiter
This rule can be used to flag a certain food of a restaurant reservation as picked by the waiter. Every time a food assumes this status, it won't be displayed anymore within the Kitchen widget.
This rule can be assigned to the reservation codes that belong to the Food group.