Theme Seasons Documentation
(based on VikBooking plugin)
Once you purchase the “Seasons” theme, you will get a “.zip” package. By accessing the control panel of your WordPress site, you will be able to install the “Seasons” theme by directly uploading the .zip file to the WordPress Upload Theme dashboard. When it is properly installed, you will need to activate it to move on to the next step.
In order to have the theme as our demo website, you can install the Sample Data in a very easy way by following these steps:
- Go on Appearance > Customize
- Install and Activate to the VikWidgetLoader plugin suggested in the Cutomizer.
- Once installed the plucing, return on the Appearance > Customize and click on Install our Sample Data
VikWidgetsLoader
IMPORTANT: Before to start using the theme, you need to install and activate the VikWidgetsLoader plugin.
This plugin contains all the widgets that you can use with our themes. Please, click here to install the plugin, otherwise you can find a download link in the Theme Customizer.
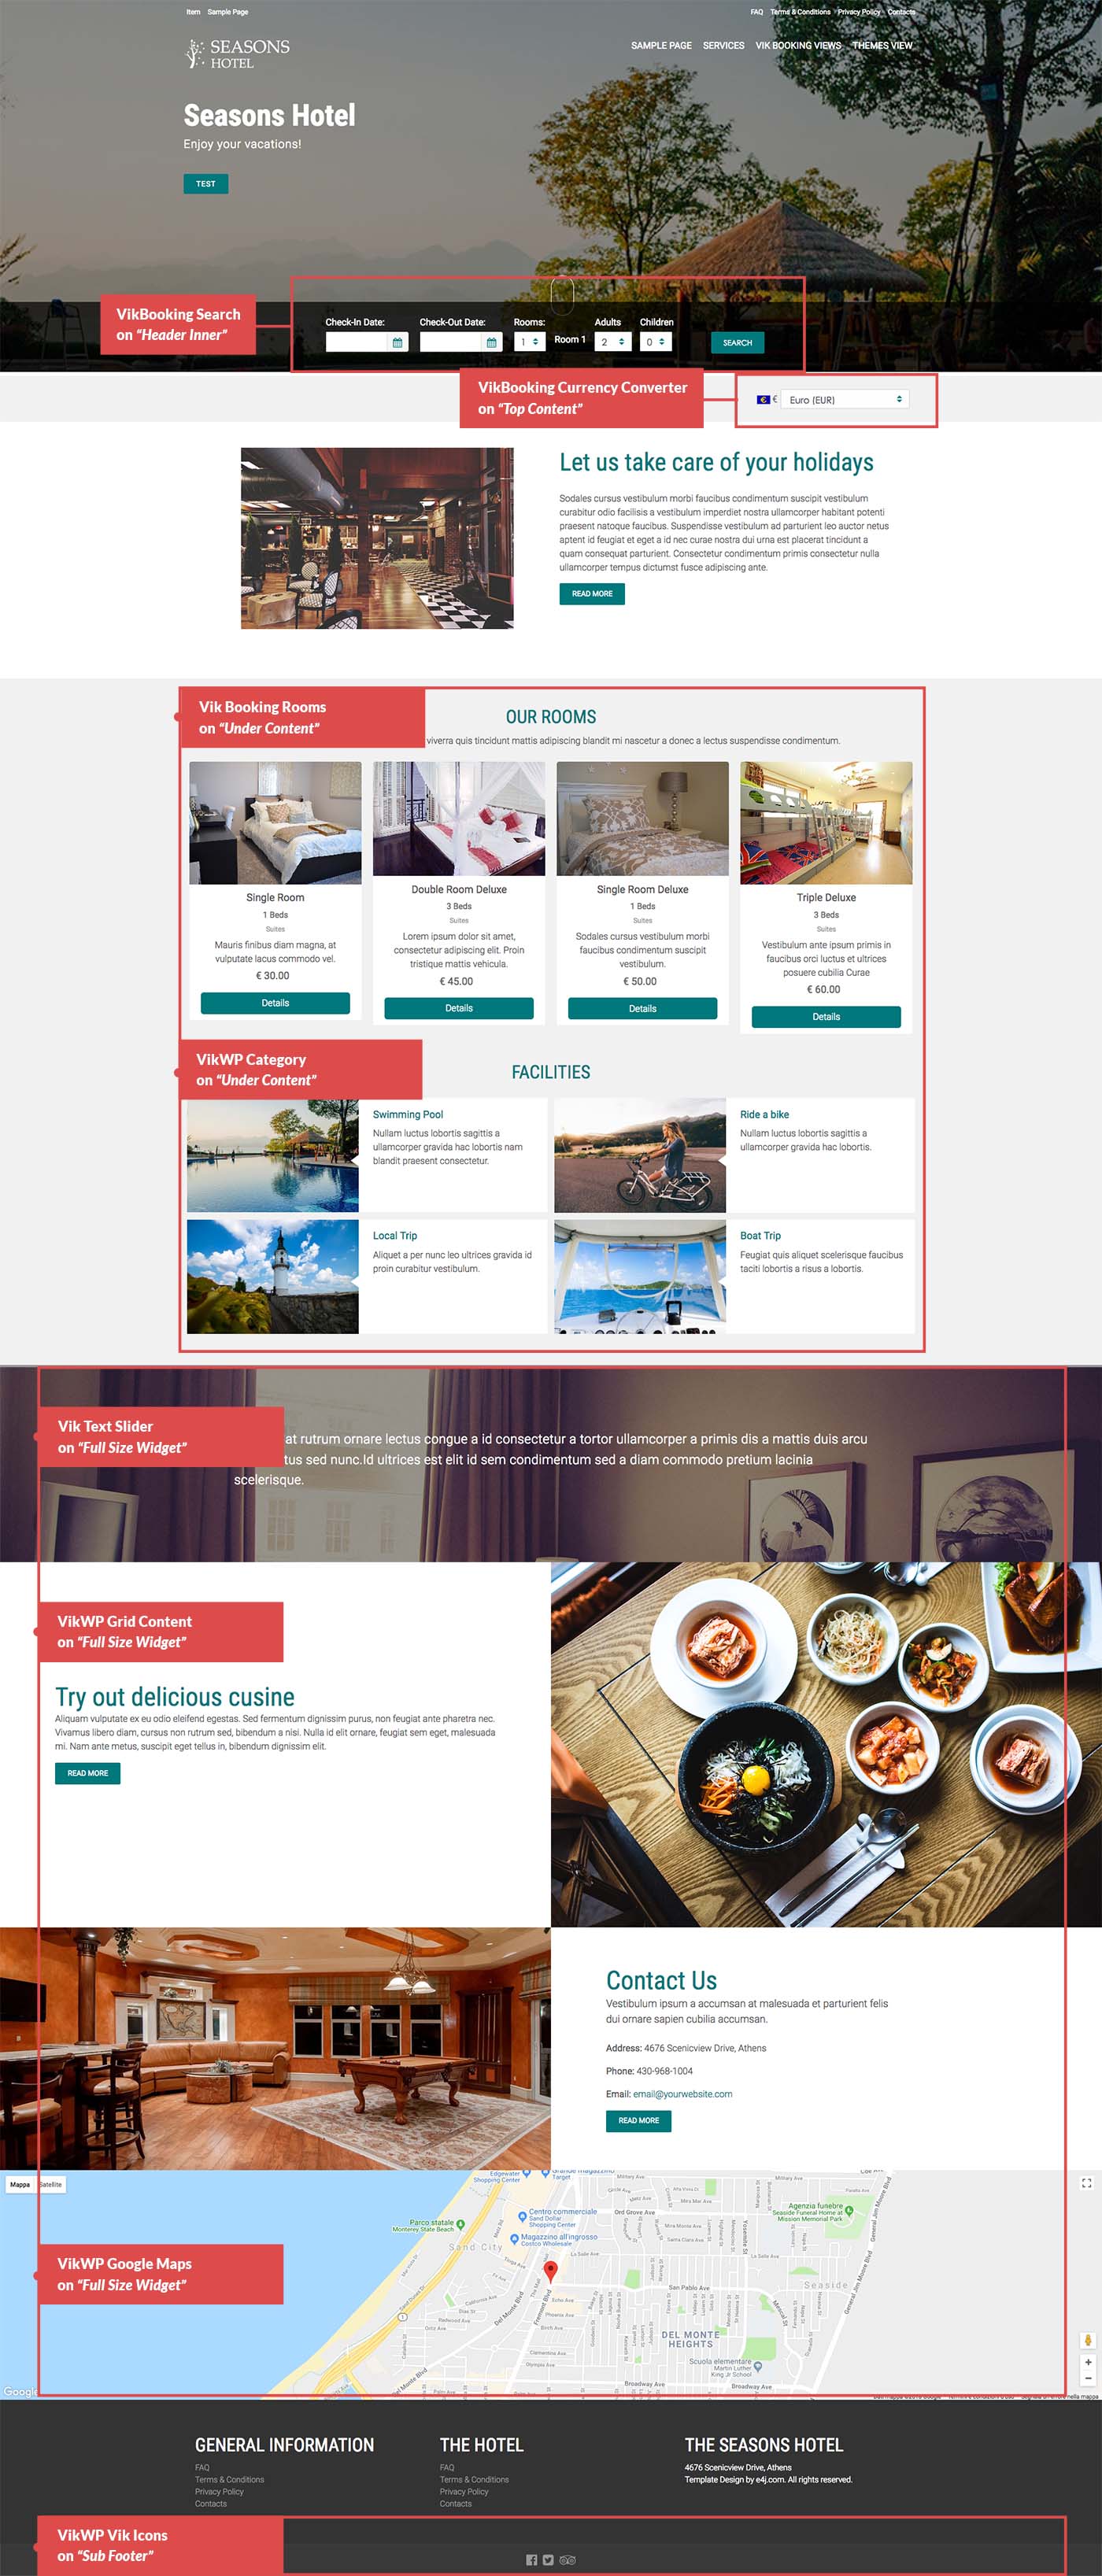
Here the list of the VikWidgetsLoader widgets used in our Seasons theme, inside the brackets you'll find the sidebar name where to set them up:
- VikWP Category (Under Content)
- VikWP Text Slide (Full Size Widget)
- VikWP Grid Content (Full Size Widget)
- VikWP Google Maps (Full Size Widget)
Because the theme has been made for our Vik Booking plugin, some of the widgets used on this theme are related to this plugin and they will be installed and activated with it.
Here the list of the Vik Booking widgets used on this theme, inside the brackets you'll find the sidebar name where to set them up.
- VikBooking Search Form (Header inner)
- VikBooking Currency Converter (Top Content)
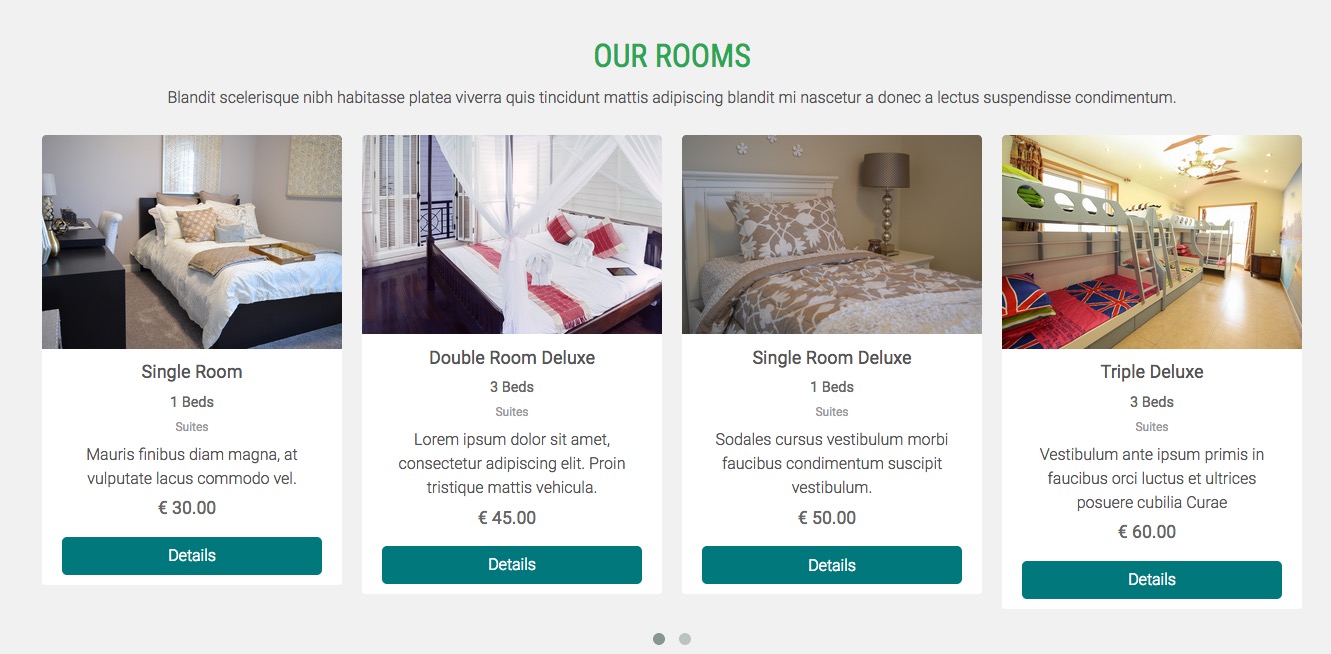
- VikBooking Rooms (Under Content)
This theme supports the default Site Identity section provided by the WordPress, this theme allows to add a second logo for internal pages. You can set it up from the Setting panel of the theme customizer, it has been explained on this chapter.
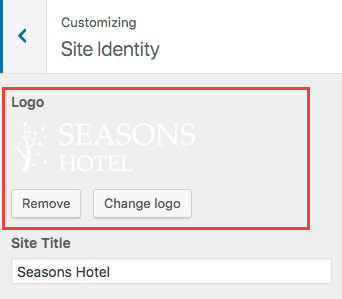
To setup your main logo, please follow those steps:
- From the Dashboard go to Appearance > Customize > Site Identity (remember to activate our theme).
- Click on Select logo to load your image in the media directory and select it.
- Click on Publish to save your settings.
This theme provides you the option to create a static Front Page by using a single page or a Fronte Page with a blog posts layout.
In our demo website you use the static Front Page.
To display a static front page follow these steps:
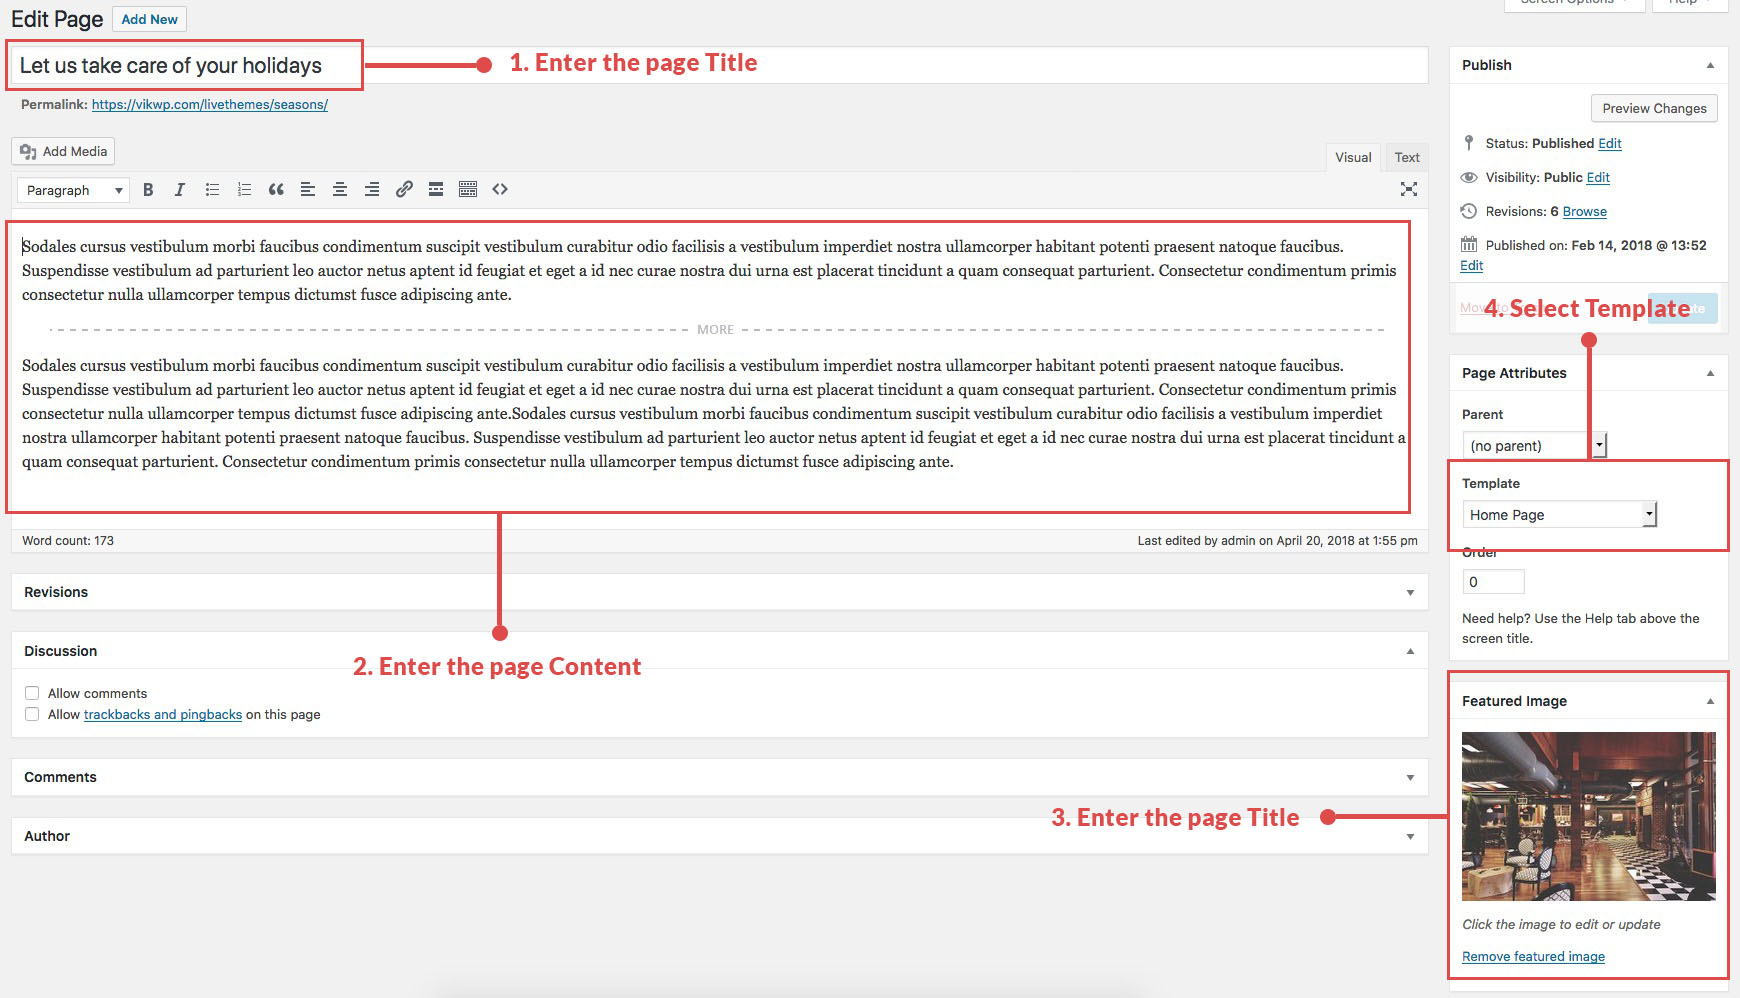
Create a home page
- Go to your WordPress Dashboard > Pages > Add New.
- Enter the title for the page.
- Enter the text for the page in content area.
- Enter and load your Featured Image.
- Select Home Page as a page template from Template drop-down option.
- Click on Publish/Update button.
To set up static page as Front Page
- From your WordPress Dashboard go to Settings > Reading.
- In the Front page displays set the option to A static page.
- Select the page created previously from the Homepage dropdown.
- Click on Save Changes to apply your setup.
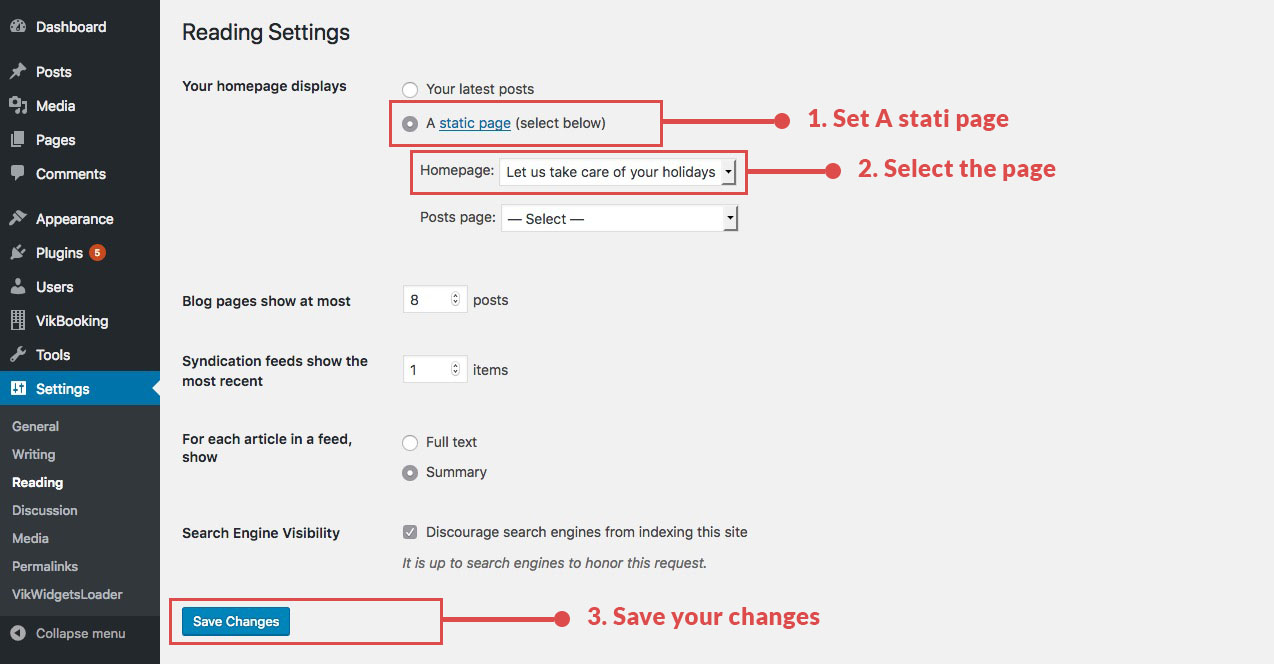
To display instead a list of Posts for your Front Page, follow those steps:
- From your WordPress Dashboard go to Settings > Reading.
- In the Front page displays set the option to Your latest posts.
- From the set the number of post you'd like to show in your Front Page.
- Click on Save Changes to apply your setup.
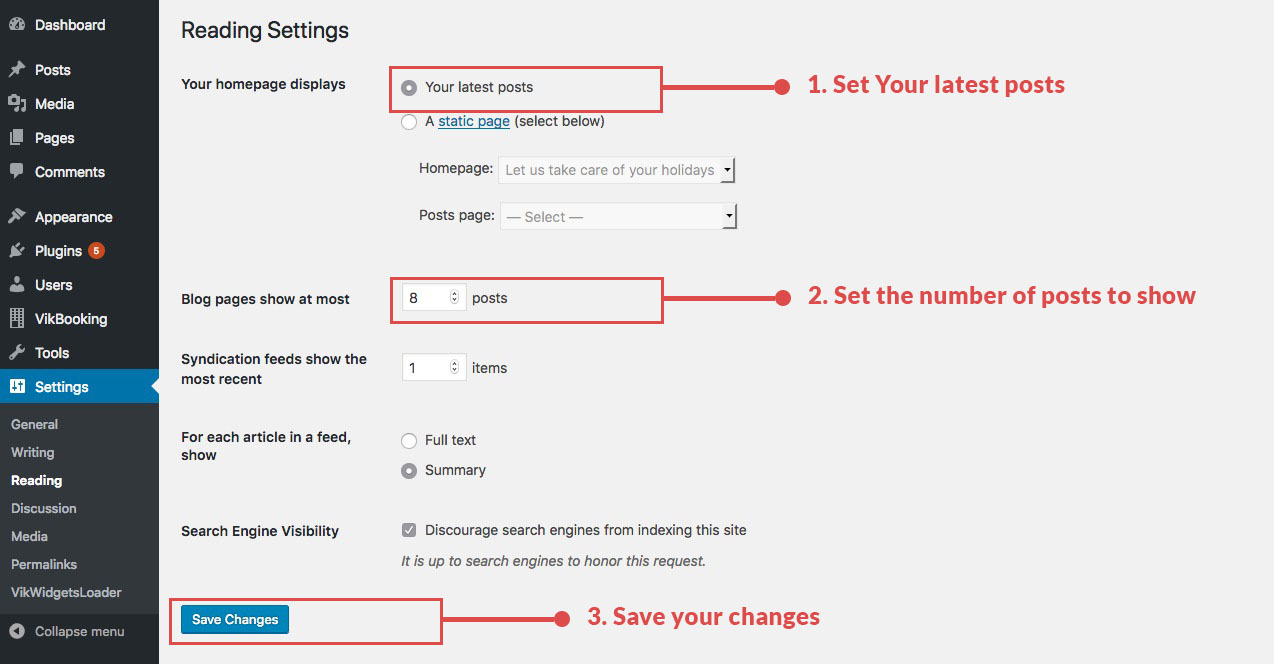
To pick what is shown in the Header of the theme, you need to use the 'Customizer' view.
In it, you will find a section called 'Header Settings', which allows you to pick whether you prefer using a static image or a sequence of sliding images in your header. It also contains the settings for the header image.
- From the WordPress Dashboard > Appearance > Customize > Header Settings
First of all, if you prefer using a Static image as the header of your website, you will need to head in the 'Header Options' subsection.
- From the WordPress Dashboard > Appearance > Customize > Header Settings > Header Options > Static Image
The 'Header Type' field will allow you to select which type of header you wish to display. This should be set to 'Static Image'. You will find a link under it which will redirect you to the 'Static Image Options' subsection.
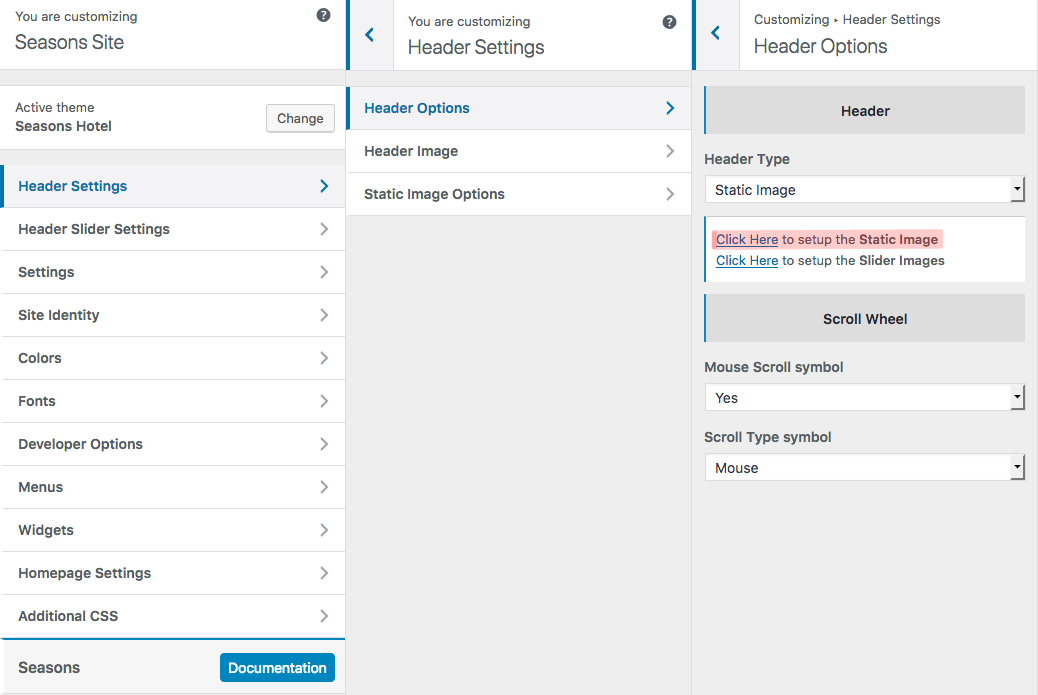
Make sure you publish the changes before you click on it, as you will be redirected, and the current changes will be lost. If you click on it, you should be able to see three fields:
- Title - The title to be displayed over the static background image
- Image Caption - The caption to be displayed over the static background image
- Header Image Arrangement - "Cover" sets the cover image to slide along with your website, when your website is scrolled, "Fixed" leaves it static in place.
As for setting the actual image to be displayed, you should head into the subsection 'Header Image'. From it you will be able to upload a new header, or you will be able to pick from previously uploaded headers or from suggested images already present on your site.
You’ll also be able to crop your image once you upload it for a perfect fit.
To pick what is shown in the Header of the theme, you need to use the 'Customizer' view. In it, you will find a section called 'Header Settings', which allows you to pick whether you prefer using a slider of images or a static image. If you prefer using a slider of images as the header of your website, you will need to head in the 'Header Options' subsection. The 'Header Type' field will allow you to select which type of header you wish to display. This should be set to 'Slider'. You will find a link under it which will redirect you to the 'Header Slider Settings' subsection.
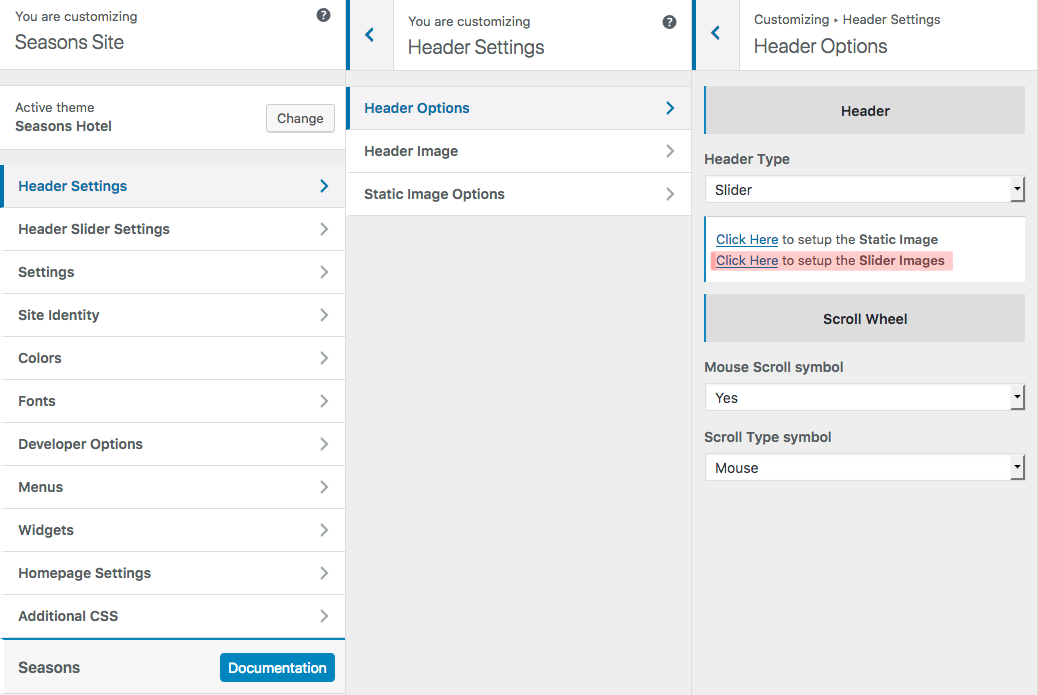
In the 'Header Slider Settings' subsection, you will be able to set each individual image (from 1 to 5), including their settings, or you can modify the whole slider's settings from the 'Slider Settings' section. In the 'Slider Settings' section you can set the following parameters of the slider:
- Fullscreen - Set if the slider should be displayed in full screen.
- - Set how high should the slider be if it's not fullscreen.
- Text Font - Choose the text font used for each image's title and description.
- Title/Caption/Read More Effect - The animation effect for the title/caption/read more transition.
- Text Align - The alignment of the Title,Caption and Read More text.
- Enable Navigation - If enabled, displays the navigation arrows on the sides of the slider.
- Enable Navigation Dots - If enabled, displays the navigation dots on the bottom of the slider.
You can also set some parameters for each image individually. You can do so from each 'Slider Image' subsection. The parameters available are the following:
- Slider Image - The image to be displayed in the slider.
- Title - The title to be placed over the image when it appears.
- Description - The description to be placed over the image when it appears.
- Read More - The text placed inside the button that appears over the image.
- Read More Link - The link the button placed over the image redirects to.
Our livedemo contains some widgets which recommend you use on your website. Here are more informations on how to install them and set them up.
This is a plugin available on the Wordpress Repository, which adds several new widgets on to your website, some of which are used by this Theme.
To download VikWidgetLoader click here.
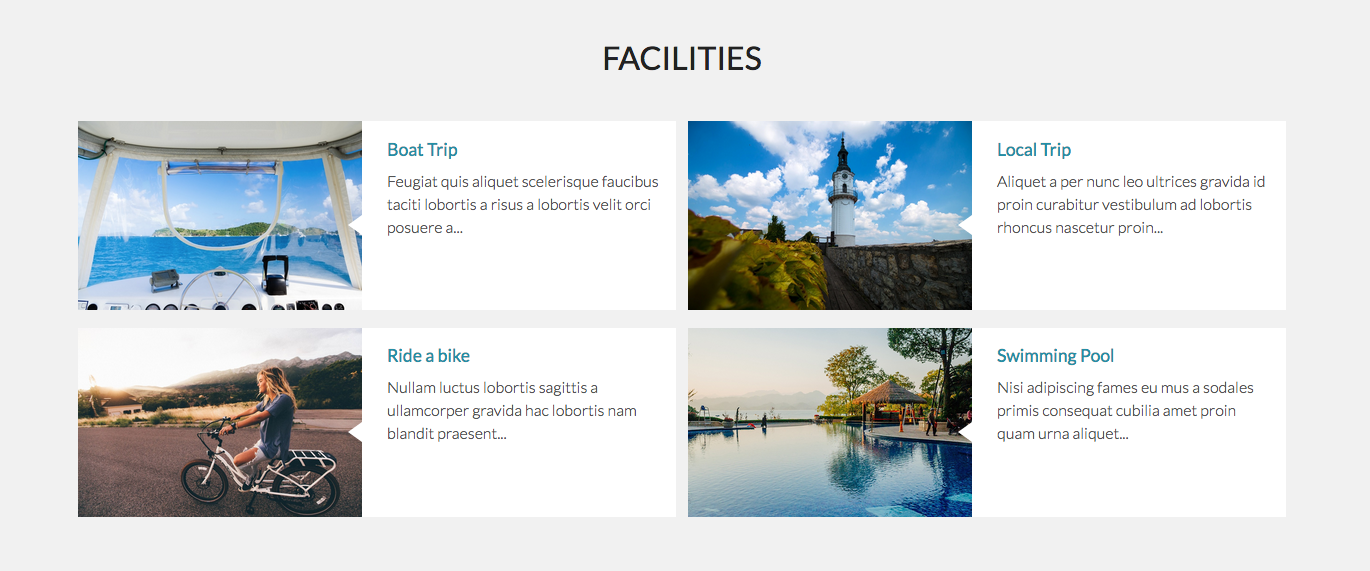
This widget displays your last posts filtered by Category. Here's how it looks on the front-end:
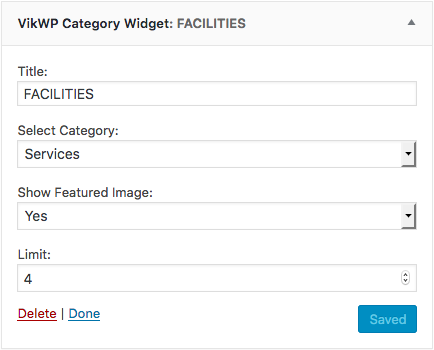
This is the administrator view, in which you can choose the number of posts to be displayed, and the category you wish to display. You can also choose whether to display a 'Read More' link to the rest of the post or not.
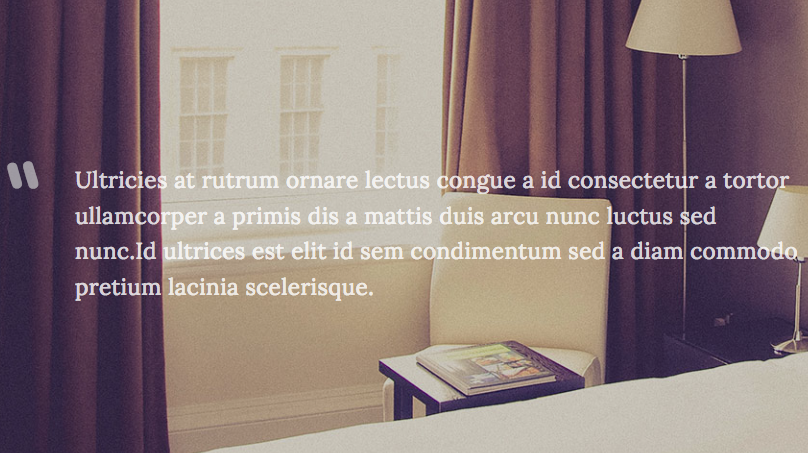
The VikWP TextSlide widget displays a slider which shows text from a post category. The text fades in and out on regular intervals, and it is placed on top of an image.
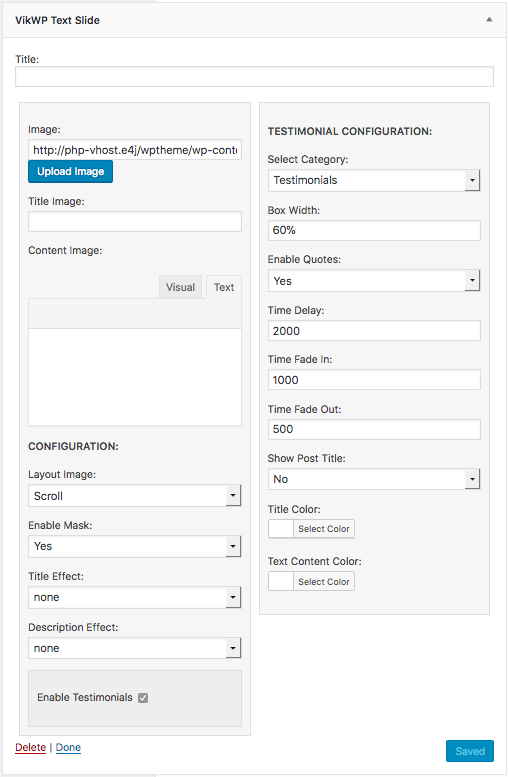
In the administrator section you will be able to set several things about the background image:
- The image path
- A title for the image
- A description for the image
- The image layout - Choose whether the background will scroll with the page or if it should be fixed
- If a mask is used - If the mask is enabled a black overlayed will be put on the image
- Enable Testimonials - It enables the multiple text fading layout, and will enable the below part.
As for the text settings (Testimonials part):
- Posts Category - Select the category where your testimonials text have been saved.
- Title & Description effects - You can set easing animations for both titles and effects. You can check all animations here.
- Time Delay - The amount of time in milliseconds for which the text is displayed.
- Time Fade In/Out - The amount of time in milliseconds for which the text fades in/out.
- Show Post Title - Allows you to choose if you wish to display the post title or not.
- Title/Text Content Color - Choose the color of your texts.
VikWP Grid Content is a widget loaded by the VikWidgetsLoader plugin, which allows you to display your last posts in a grid layout.
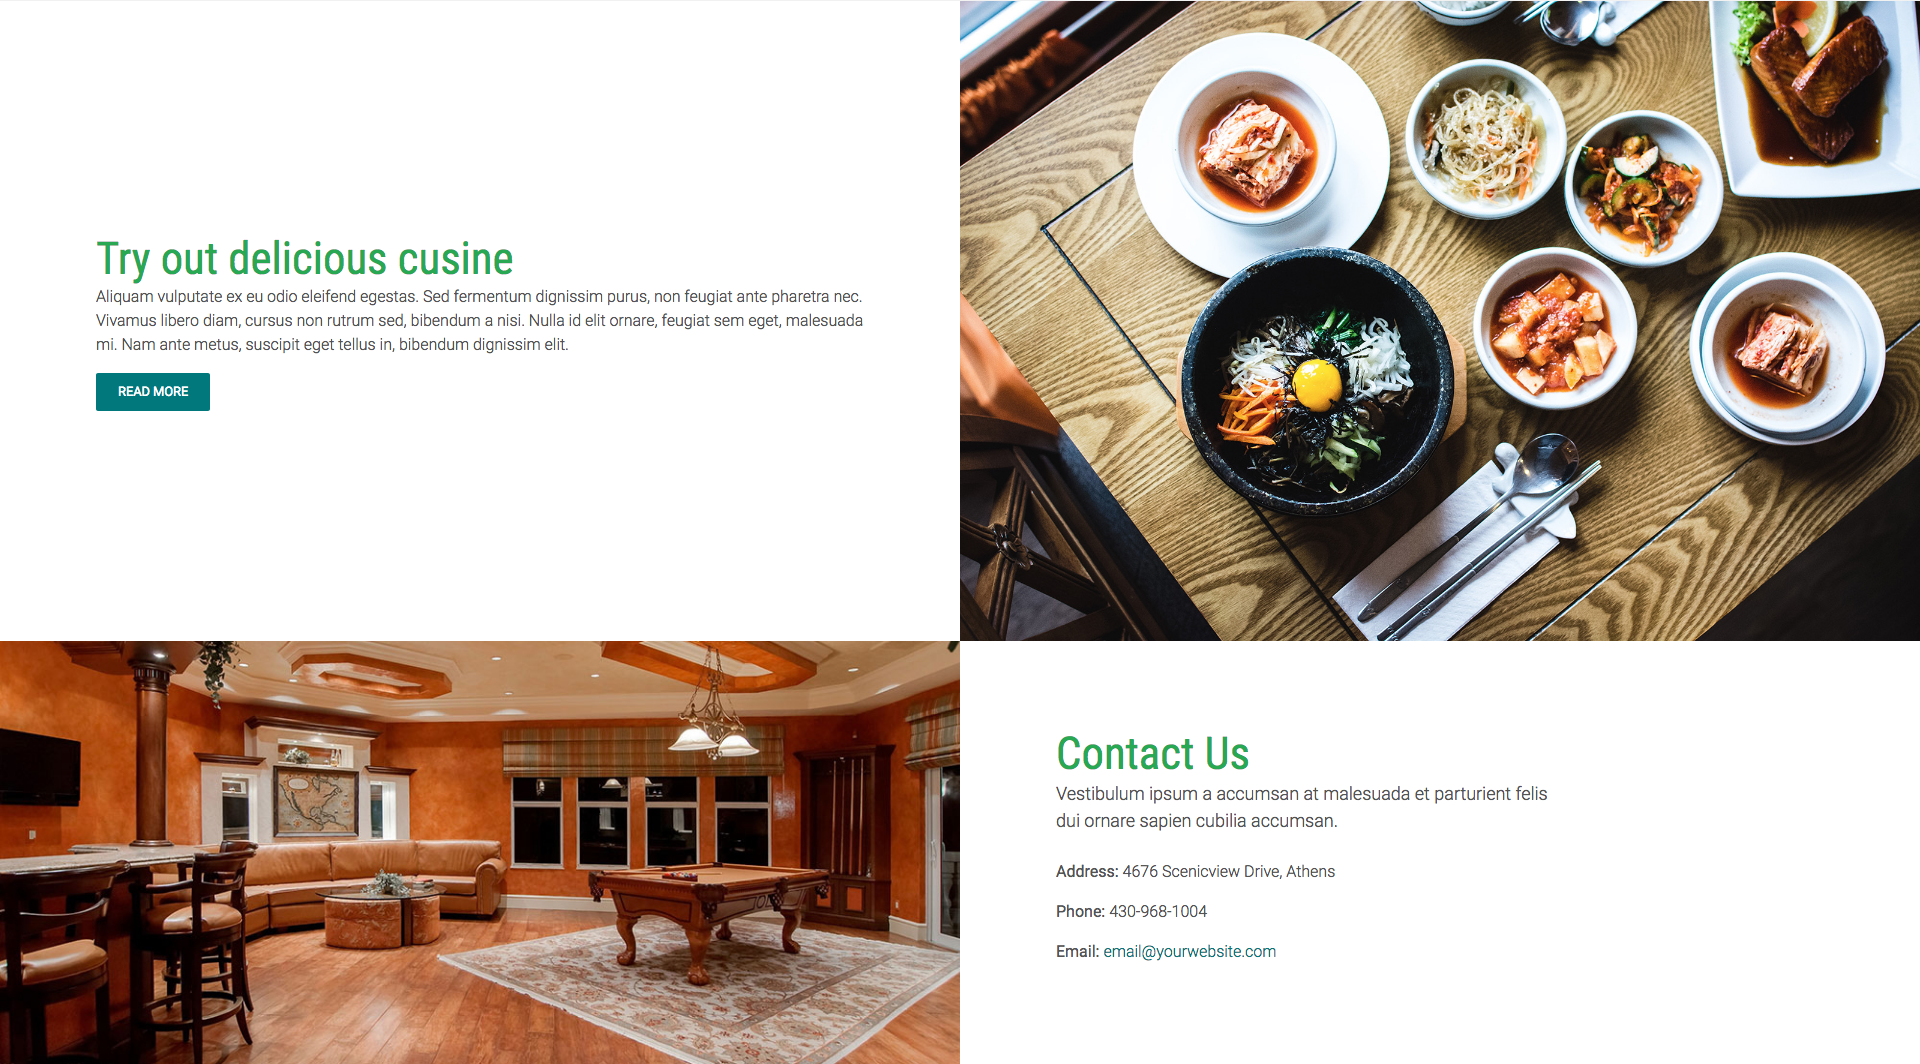
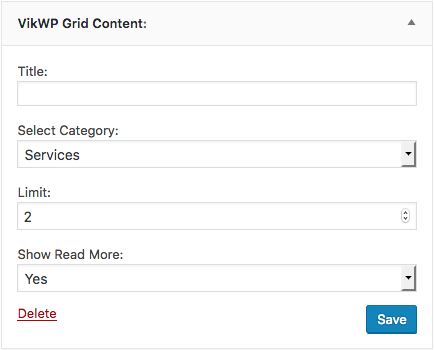
In the widgets page of your administrator section you can specify the number of posts you wish to see, and select the category of posts to be shown. You can also choose whether to display some read more text that links to the full post, or not.
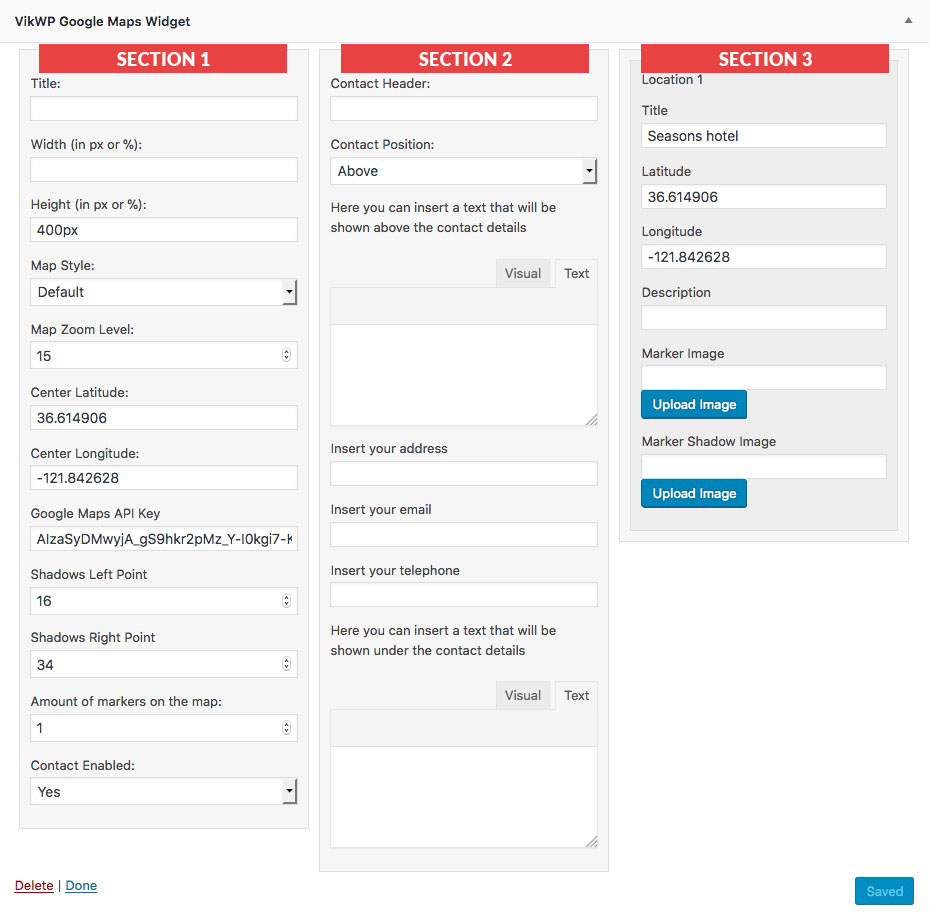
With this widget you can locate your important points with Google Maps, the widget allows you to customize every point with a marker, title and description.
Set the latitude and the longitude coordinates of your locations and optionally add a text, a description and a customized image and shadow for the marker.
Here a front end example:

In the administrator section you will be able to set several things, the most important are:
SECTION 1:
- Width and Height - The map width by default is 100%.
- Map Style - Here you can choose different map style for your website.
- Center Latitude/Longitude and Zoom level - This three parameters are very important to center your map and give it a properly view, you need to set up to see correctly your map. These are the coordinates that Google needs just to center your map, you need to insert your Locations coordinates from relative part (Section 3 on the screenshot). Without the Locations coordinates the map will not show up.
- Google Maps API Key - Insert your Google Maps API Key, you can create one in this way:
- Go on this link: https://cloud.google.com/maps-platform/
- Create a New Project
- Go in the Credentials tab and Create New credentials for Browser key.
- Follow the simple instructions, create your Api Key and copy it in the above field (we would suggest to insert your website url in this way: http://www.yourwebsite.com/* )
- Amount of markers on the map - Insert the number of locations you need to insert on the widget.
- Contact Enabled - Select if you want to add your contact details hover your map, based on this choice the Section 2 will be displayed.
SECTION 3
- Latitude and Longitude - Those are your location coordinates, they can be the same of the Center Latitude and Longitude.
- - You can customize your marker uploading your own image. Leave this field empty to use the default marker.
Here the Administrator side of the widget:
The Icons widget is used to display several icons, optionally with individual links and text. They can be used in the middle of your page to represent different functionalities, or as links for your social accounts.
![]()
The widget is very flexible, it allows you to select icons from a selection of FontAwesome icons, and order them in different rows with different text for each row. The parameters for the widget are:
![]()
- Title - Title of the widget
- Icons Displayed - Number of icons shown in the widget. Save the number of icons to see them get added to the right.
- Icons Size - Pick for the icons.
- Icons Style - You can choose between regular icons or icons with a circle around them.
- Container Size - Size of each icon's container.
- Icons Style - Padding of each icons.
- Read More Text - Text of the Read More button.
- Icons Alignment - Alignment of the icons in their own component
- Above-Icons Text - Text that will displayed placed above the icons
You can then select the following from each icon:
- Icon Selected - The icon to be displayed
- Icon Title - Title for the icon
- Icon Text - Text for the icon
- Icon Read Link - Link of the icon, it can redirect wherever you want
All the widgets of the VikBooking part of this documentation, are part of the VikBooking plugin package. You need to install the VikBooking plugin to have them on your website.
Because VikBooking and the template are two different products, we can't made the sample data for those widget, please, setup them just following the related Sidebar name that you can find just under the image sample in the widget description.
This widget is part of the VikBooking plugin package.
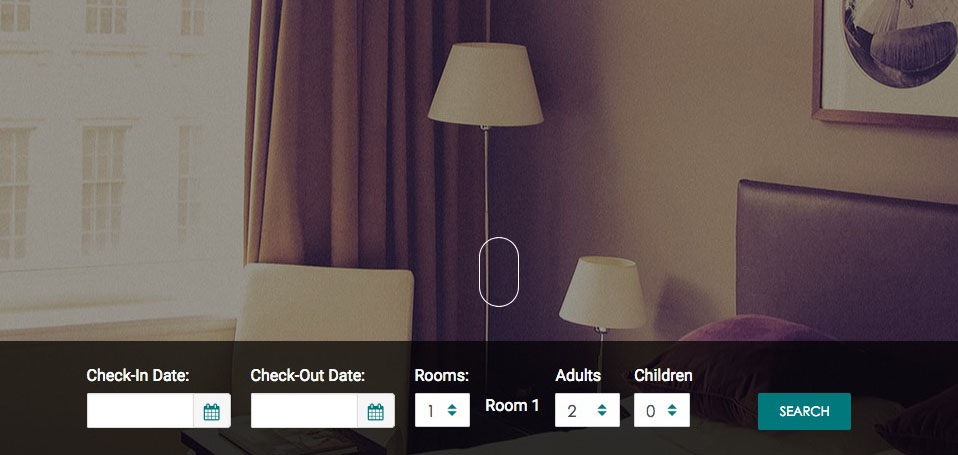
This widget is part of the VikBooking plugin package.

This widget is part of the VikBooking plugin package.
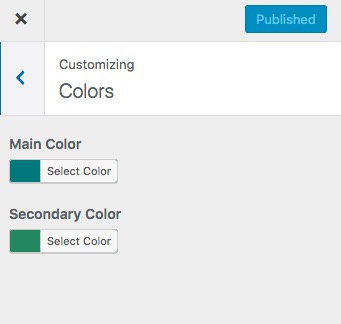
Choose your favourite color for your website with our theme.
Change the colors scheme of your theme through the Customizer Theme.
- From your WordPress Dashboard, go to Appearance > Customize > Colors
MAIN COLOR: This color will set the main color of your theme, all the links, button, headers, color borders and any coloured element, is based on this color.
SECONDARY COLOR: This color is the variant of the first one, every element that can have a hover status (buttons, links, etc.) and every element that need to have a different color from the main one, it will have the secondary.
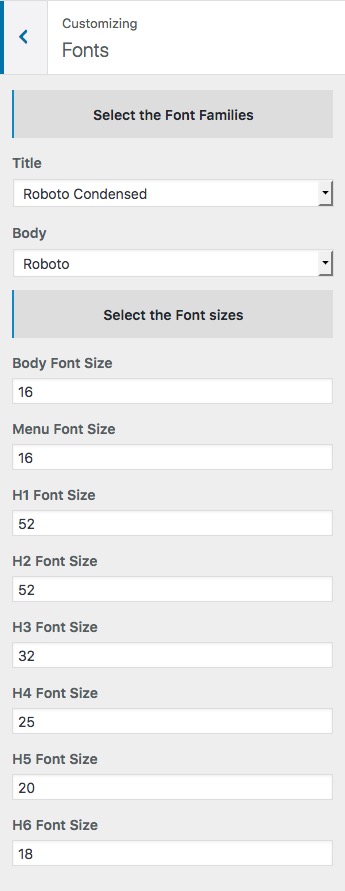
With our theme you can setup as you want the fonts of your website.
To setup the fonts go on:
- WordPress Dashboard > Appearance > Customize > Fonts
On this panel you can change the font family just for your Titles or even for the general text Body.
You can also select the font size of your Body text, the Menu and for each Heading type.
Here the panel compated image:
From the version 1.9.4.
We added the Google Custom font family section. Please check the related tutorial to know how to add your Google Font family: https://vikwp.com/support/knowledge-base/themes/custom-google-font
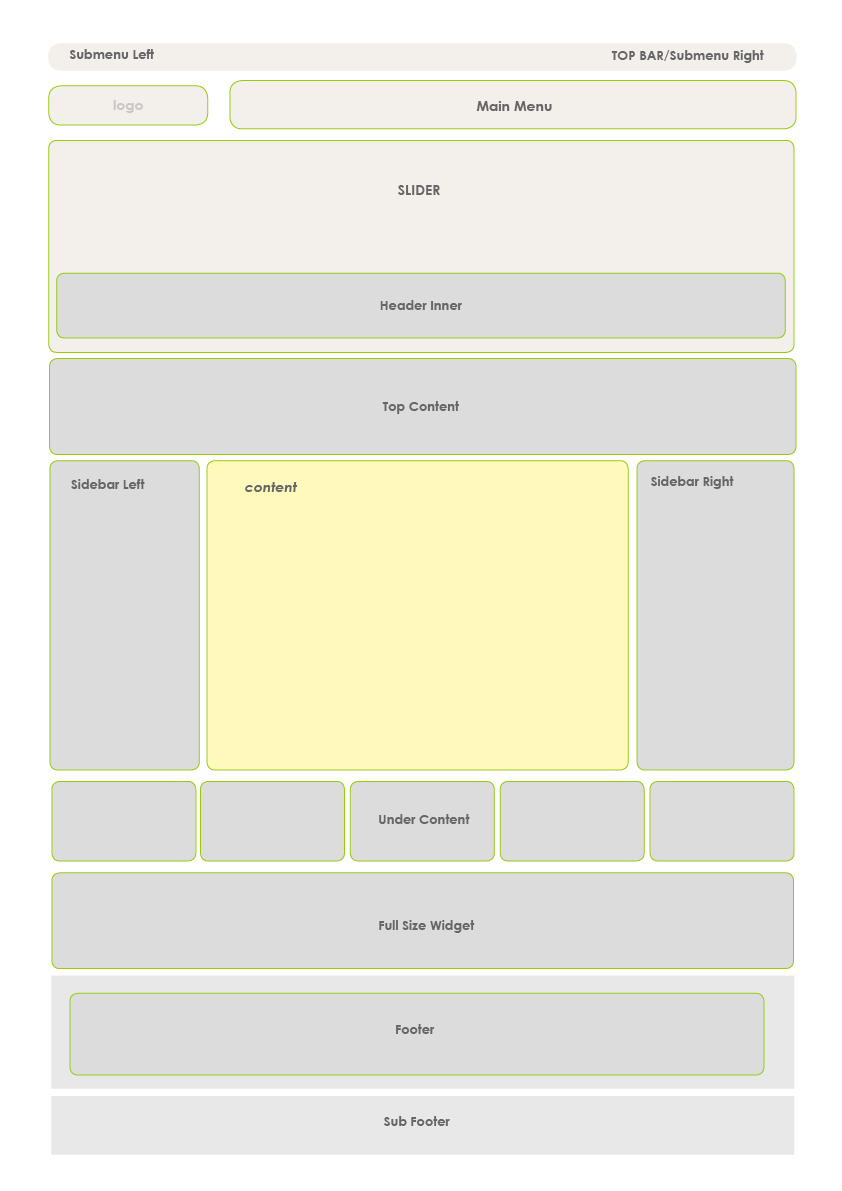
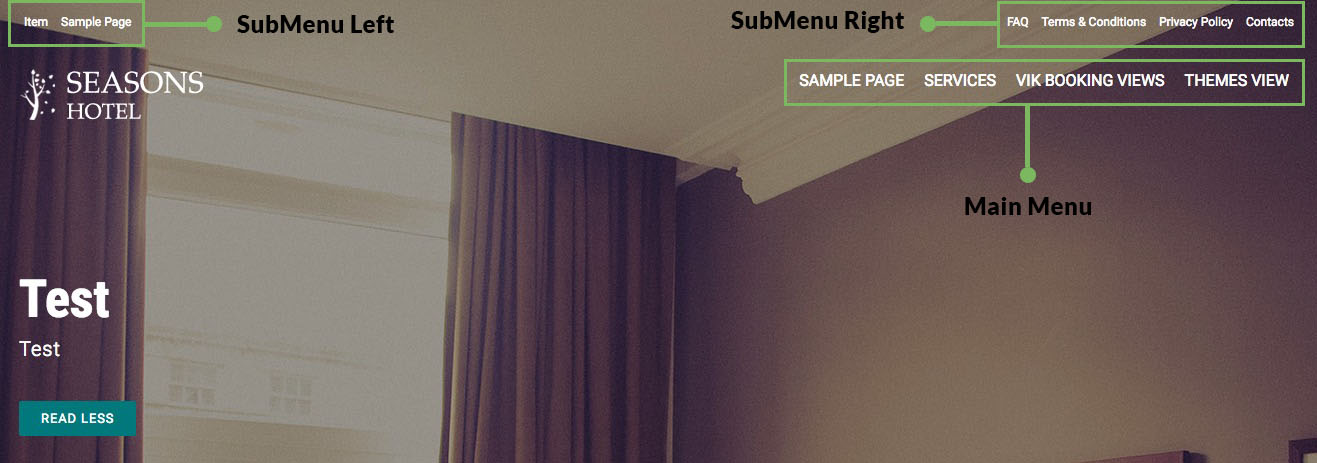
On this theme you can have 3 menu locations:
- Main Menu (it is the main position)
- Submenu Left
- Submenu Right
On the screenshot below you can see all the location theme:
You can use the 'Settings' section of the customizer to handle the layout of the pages of your site, and other theme settings, as well as settings for the Cookies Policy settings.
In the Layout Settings subsection, you can alter some of the Theme's settings. The following can be modified:
- Internal Logo - Pick and use a logo for your internal pages, by using the Full Slider it'd be easier to have two different type of logo.
- Display Homepage Title - If set to yes then the title of the homepage article will be shown.
- Menu Sticky - If set to yes then the menù will stick to the top of the page when scrolling.
- Display Cookies Policy - If set to yes, then the cookies policy bottom banner will be displayed to those who have not agreed to it yet.
There is also a section of the page dedicated to setting up parameters for the Meta of the pages:
- Meta information in all the pages - Choose whether to display Meta information (such as publication date, author, tags) related to the page on each page.
- Homepage Meta Information - Choose whether to display Meta information (such as publication date, author, tags) related to the homepage.
You can set different parameters related to your Cookies Policy, most of which will be displayed in a banner at the bottom of your site, which your clients will be able to see until they view and accept your Cookies Policies. The following parameters can be set:
- Cookies Description - The text displayed in the cookies banner at the bottom of the page.
- Further Information Button - The text displayed in the button that redirects your clients to your Cookies article page.
- Agree Button - The text displayed in the button that makes your clients accept your Cookies Policies.
- Page Linked - The page linked to by the Further Information Button.
This customizer section allows you to set up the widgets you are using on your page, just like you would in the widgets view in the administrator section.
It's sufficient to pick the position you would like to place the widget in, then click on the top right button ' + Add a Widget ', which will then let you pick from a list of all available widgets.
The widget will appear in the customizer view, and you will be able to modify its settings, like you would from the Widgets view.
However, even if this function is available and working, we recommend always using the dedicated WordPress widgets view in the administrator section.
With this theme you can show and manage the page layout of your page. Based on the chosen template structure you'll display different layouts.
To select the right structure for your page, please follow this steps:
- WordPress Dashboard > Pages.
- Select the page your want to modify.
- From the Page Attributes panel select the Template you want from the dropdown.
- Click on Update.
You can't see the Page Attributes panel? Enable it from the above Screen Options panel.
Here the Templates Page list, and a small description and example of every template:
- Default Template
- Home Page
- Page with Sidebars
- With all Sidebars
- With Top Content
- With Under Content
- Without Sidebars and Title
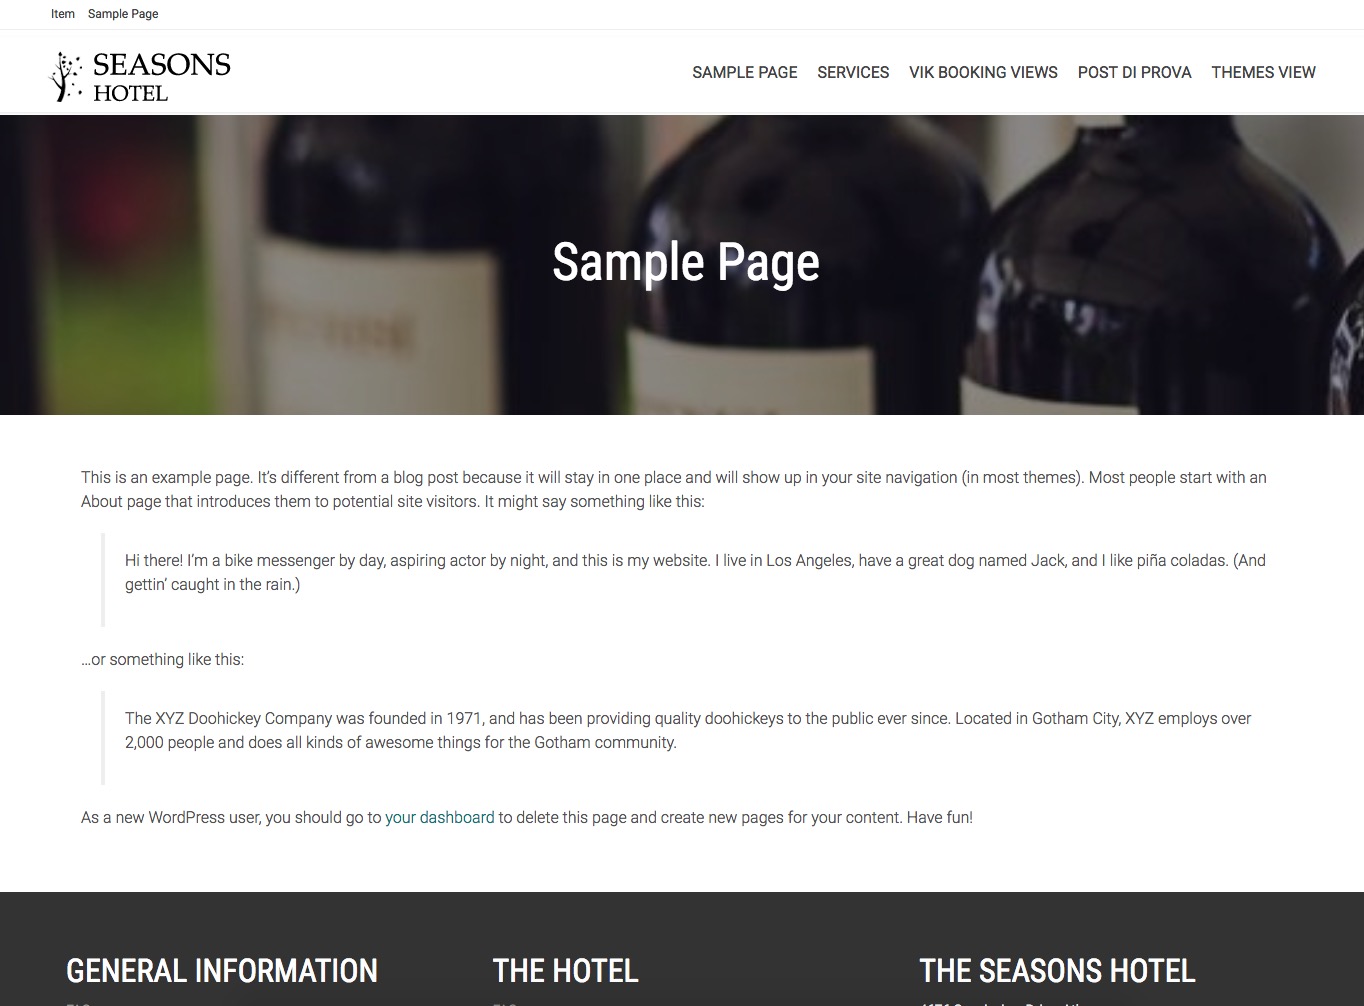
This is the default structure for you page. A part from the Homepage you'll have no sidebars in the page with this template selected.
Example here:
This template has all the sidebars enabled and it'll print the content beside the featured image. We suggest to use this structure for your Home Page.
Example here:

This template you'll load the widgets inside the Sidebar Left and Right on your page.
Example here:
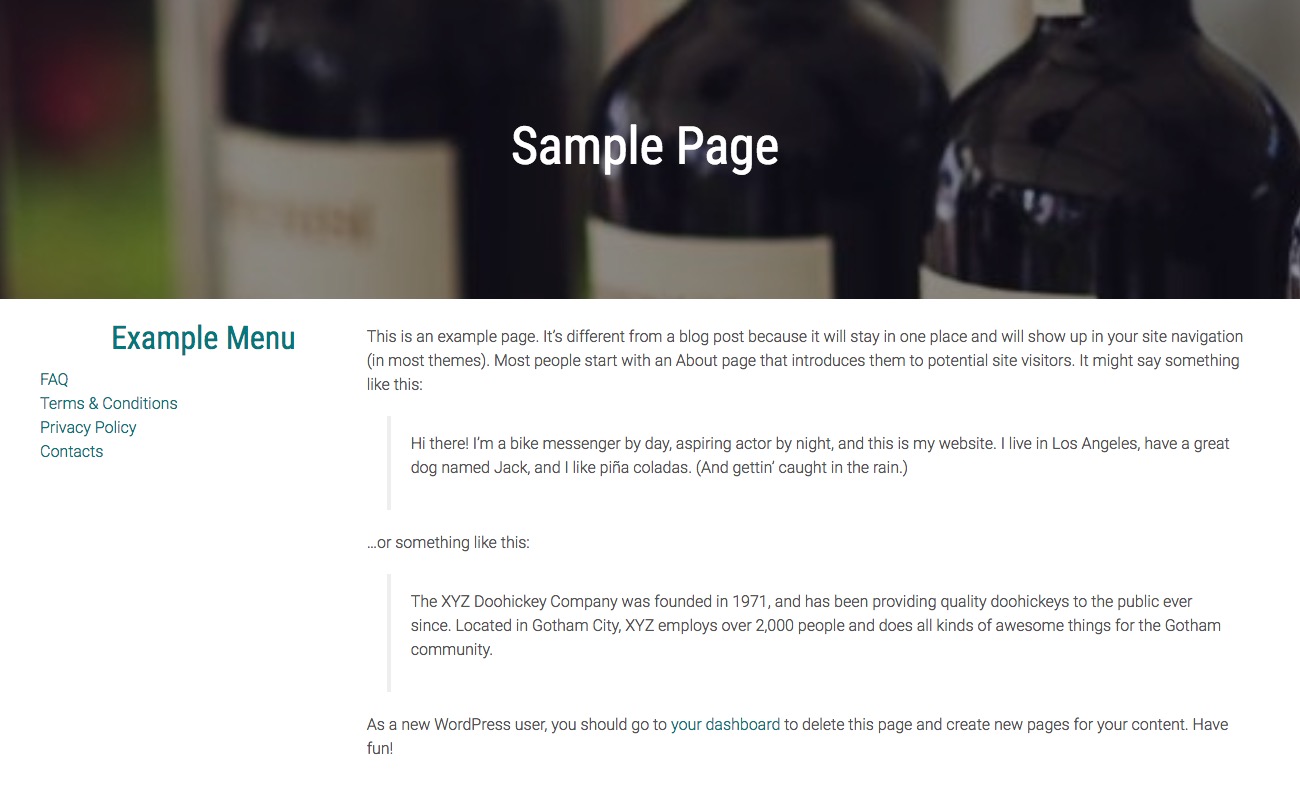
This template you'll load all the Sidebars that contains widgets, you'll have the same widgets of your Front Page.
In the case you need just the Top Content Sidebars you can use this template.
Example here:
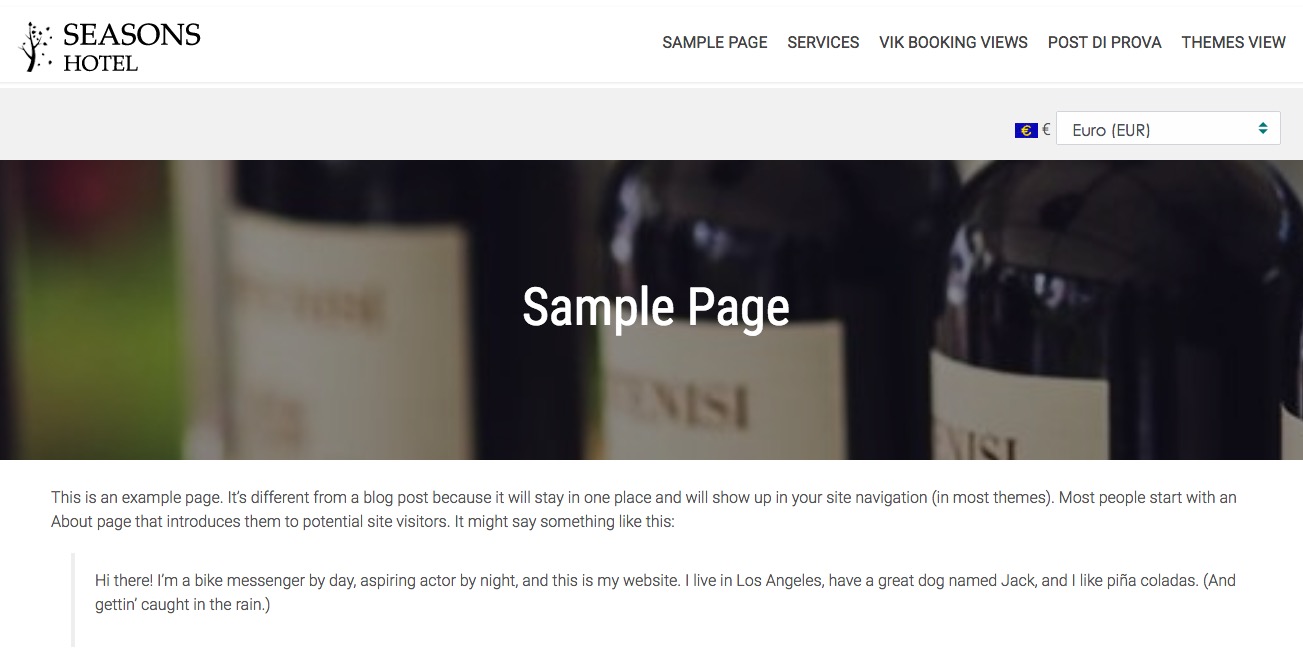
This template load all the widgets in the Under Content sidebar.
This template will show a page without the title and Sidebars (in our case we are still using the featured image).
Here an example:
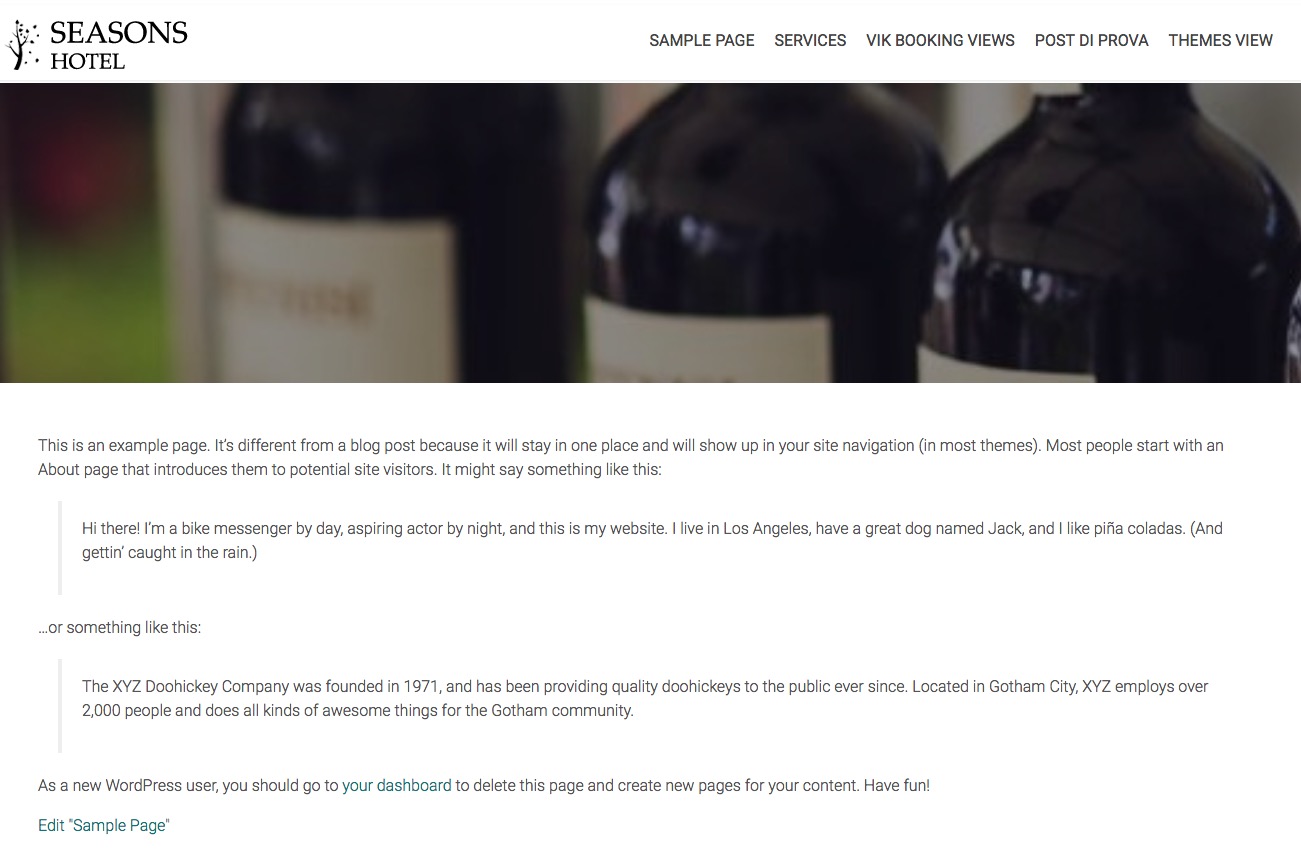
You can manage and setup your Footer through the Footer Sidebar, please, follow these steps:
- From the WordPress Dashboard go to Appareance > Widgets.
- Select the type of widget you'd like to show on your Footer and from the dropdown choose the Footer sidebar (in our case we want to show all Navigation Menu).
The widget size will be automatically calculate based on the number of widget to show on this sidebar.

To know how to setup a WordPress Menu, please follow our relative Knowledge Base: WordPress Menu Setup.
On WordPress is not possible for a theme or for the cms itself to setup different widgets for different pages by default.
Please, read this article of our Knowledge Base to have some tips how to solve the problem.
To keep your theme updated, you should install and use the VikUpdater plugin. Please, check in our knowledge base article what is and how to use the VikUpdater plugin: https://vikwp.com/support/knowledge-base/vikupdater.
