Your cart is empty!
How to install Plugin & Widgets
To begin working with the VikRentCar plugin, you will first need to install the VikRentCar Free Plugin from the WordPress Plugins Repository. The Free version of VikRentCar is a limited version, that contains only some functionalities of the complete plugin. It is entirely free, available to download in the WordPress Plugins Repository. The Free Version contains only a couple of widgets. After you have installed it from the repository, you will need to enable the plugin from your 'Plugins' view:
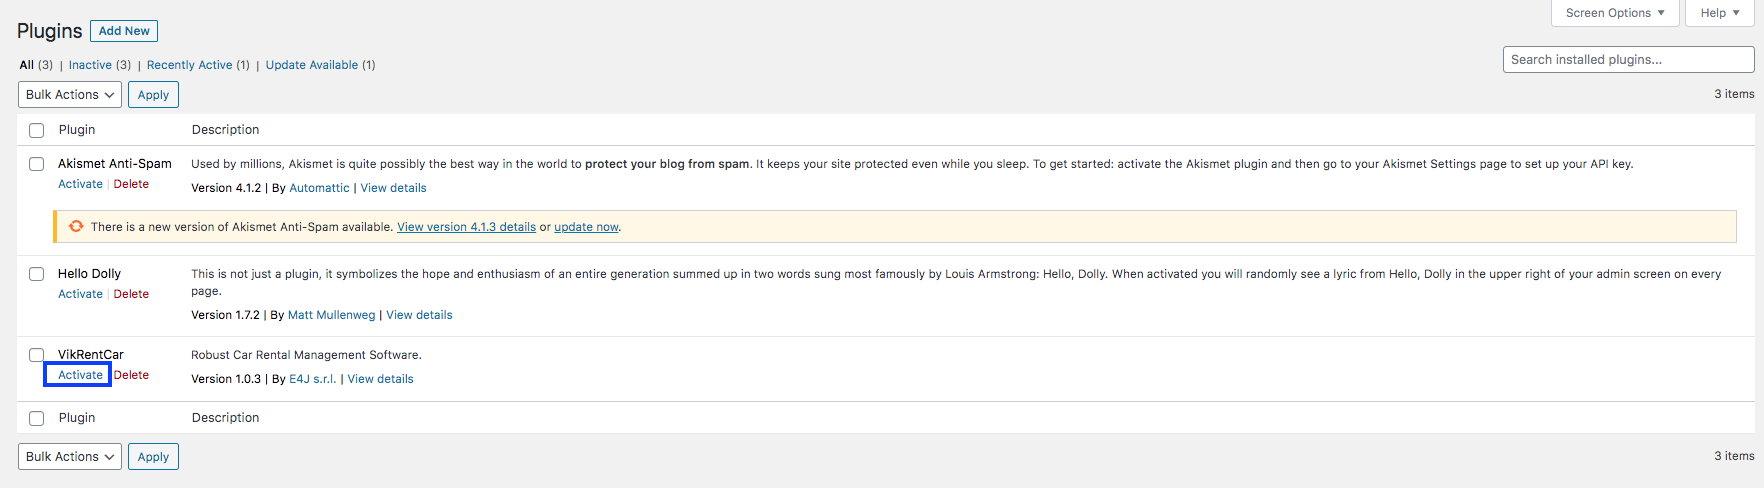
After you have enabled the plugin, a new VikRentCar menu should appear in the side menu. Clicking on it will display the VikRentCar Dashboard. You're all set to start working with VikRentCar Free. However, if you wish to start using VikRentCar PRO, you will need to click on the 'Upgrade to PRO' green button on the right in the VikRentCar menu:
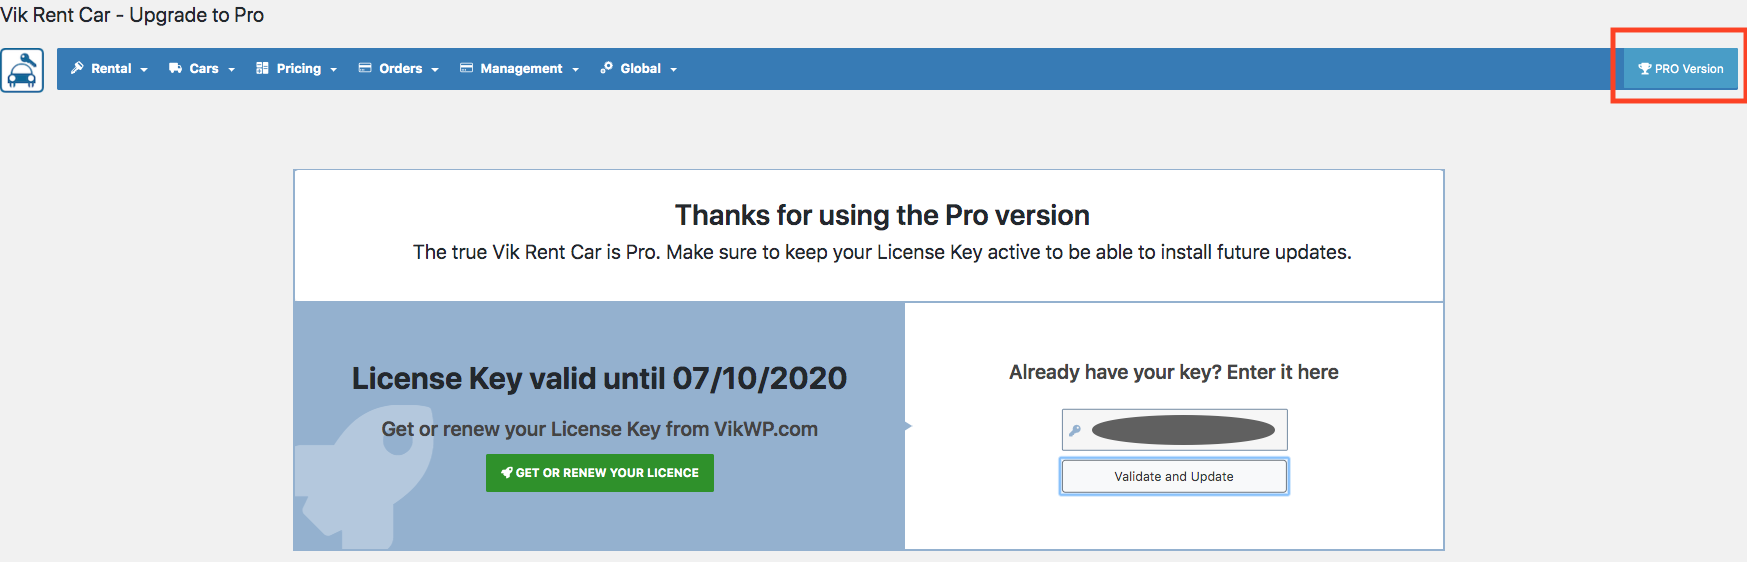
This will display a view with all the advantages of switching to PRO. At the bottom of the page you will find an input field to insert your License Key, which you can purchase on this website.

After you have inserted your key, you should click on 'Validate and Install', and if it gets validated succesfully, the plugin will automatically install the PRO settings to enable all the features. All the existing configurations and contents won't be replaced. Visiting the 'Upgrade to PRO' page again will display a message that shows that you are using the PRO version, and the 'Upgrade to PRO' button should now contain: 'PRO Version'.
You're now ready to work with VikRentCar PRO! Once you have switched to PRO, you will also see in the WordPress 'Widgets' page all of the available VikRentCar Widgets.
Last Update: 2020-01-24
Helpful?
55% of people found this helpful.