Your cart is empty!
Task Manager
The Task Manager was introduced in version 1.8 of Vik Booking. To access this feature, both Vik Channel Manager and an active E4jConnect subscription are required.
This tool enables you to create and manage multiple boards, helping you organize operational tasks more efficiently across different departments or areas.
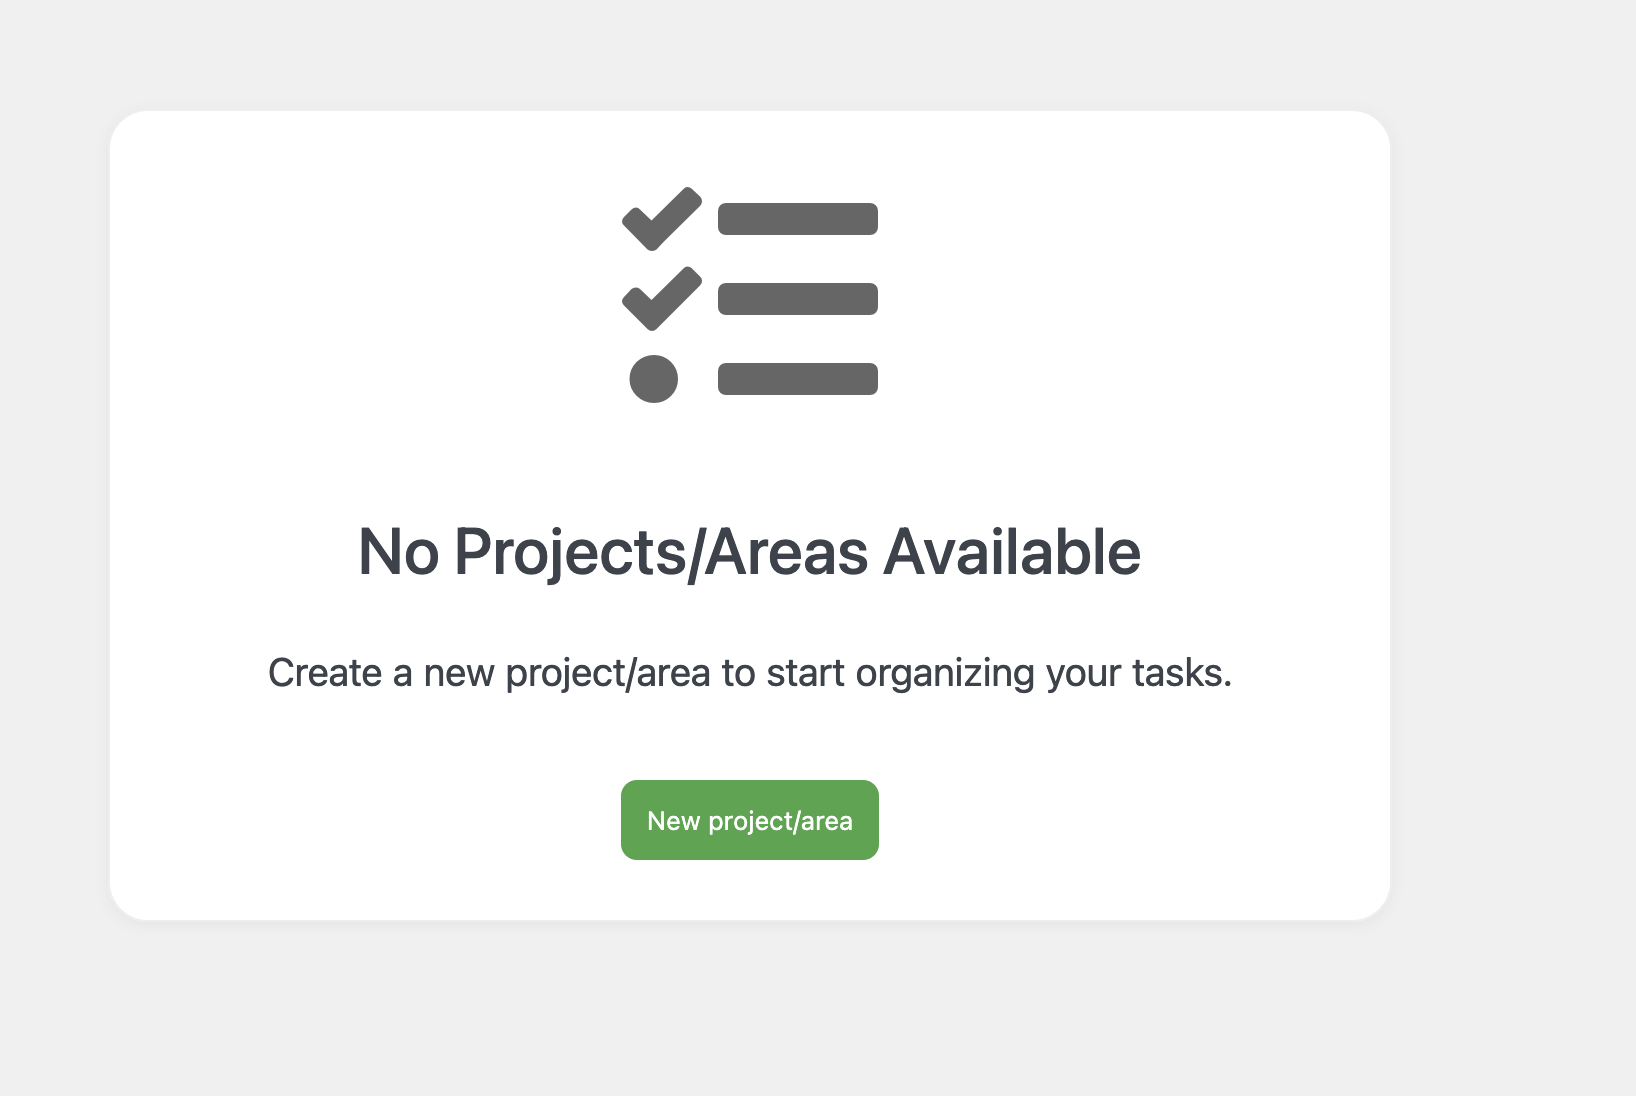
When you open the Task Manager page for the first time, you will be taken to a welcome screen indicating that no Projects/Areas have been created yet.
New Project/Area
Creating a new Project/Area is quick and intuitive. Simply click the green button labeled “New Project/Area”. A modal window will appear, allowing you to configure the settings of your new board.
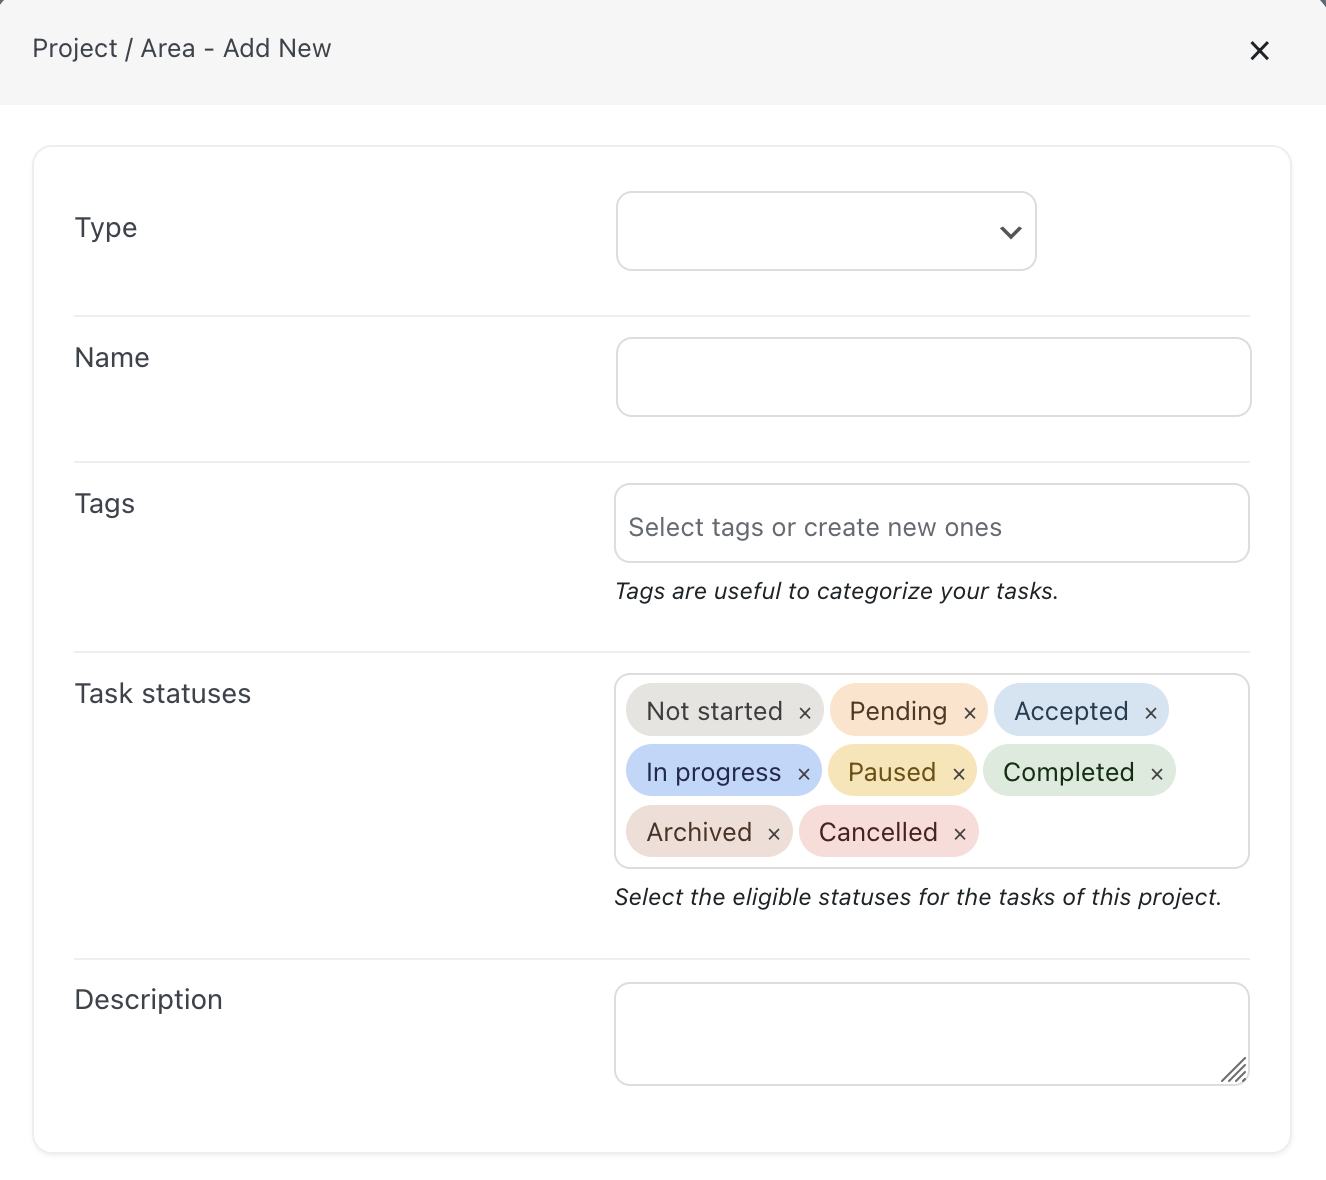
Following a short description of each parameter:
- Type: Select the type of project/area based on its purpose. This helps keep different workflows separated and well organized. Available types include: Housekeeping & Cleaning, Maintenance and Sprint Board. Details about each type will be provided later in this guide.
- Name: Choose a name for the project/area. This can be anything that helps you identify it easily.
- Tags: Tags allow you to categorize tasks and improve task filtering and prioritization. The system includes a few default tags, such as: High-priority, Deep Cleaning, Guest Request, Change Linens etc. You can create custom tags as needed and assign multiple tags to a single task.
- Task Statuses: Define the statuses that tasks within this board can have. These statuses represent the progress of each task (e.g. Not Started, Pending, In Progress, Completed, etc.).
- Description: Optionally, you can add a description for the Project/Area. This field is for internal reference only and has no functional impact.
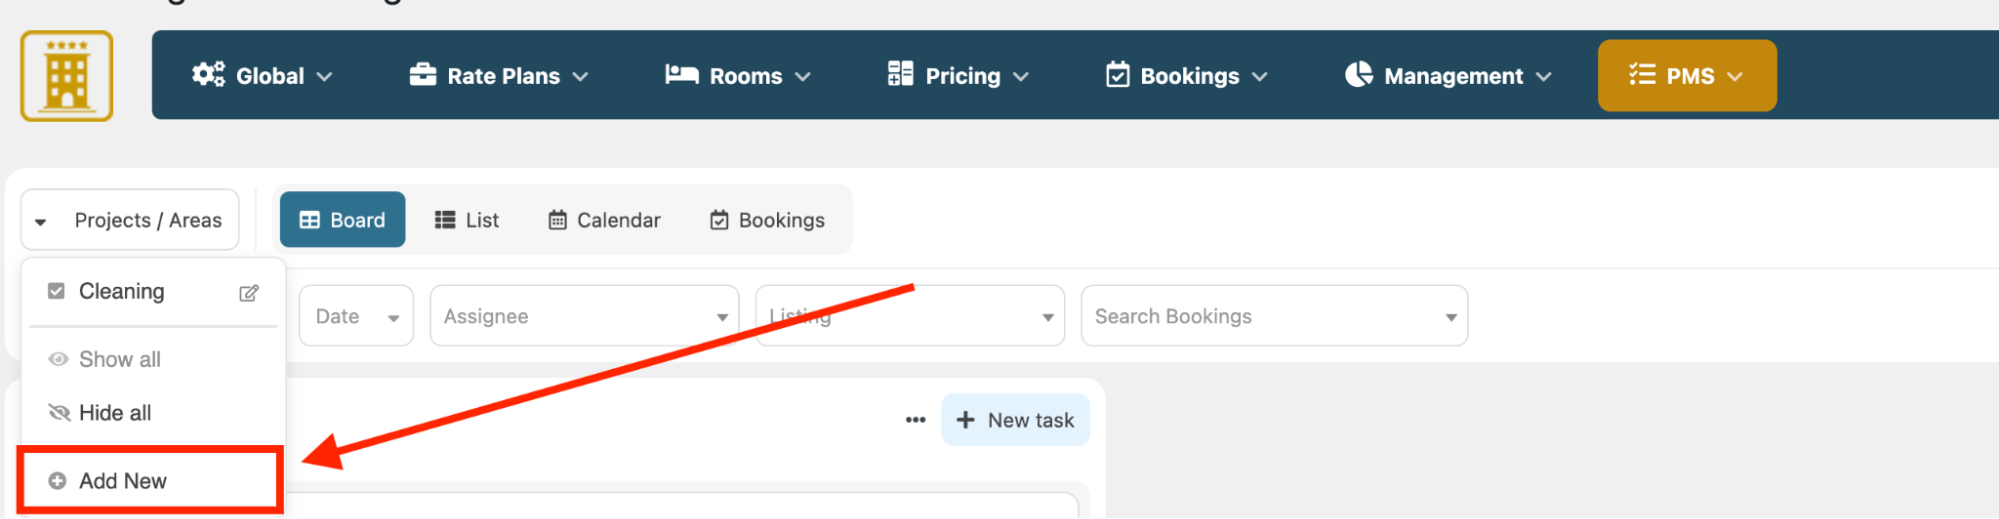
Once you have added your first Project/Area, you can create additional ones by clicking the dedicated “Add New” button, as shown in the screenshot below.
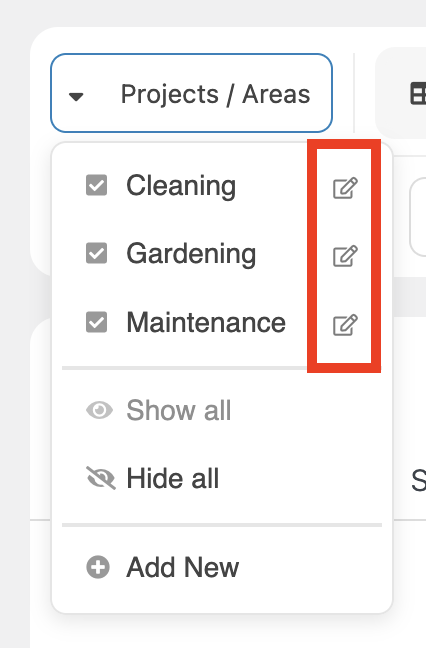
You can modify the configuration of each Project/Area at any time by clicking the edit button near the name of the Project/Area.
Types Overview
As mentioned earlier, there are three distinct Project/Area types, each designed for specific operational needs and equipped with tailored functionalities and parameters. The available types are: Housekeeping & Cleaning, Maintenance and Sprint Board.
Let’s take a closer look at each of them.
Housekeeping & Cleaning
As the name suggests, this Project/Area is designed to assist in the management of the cleaning duties. This project type is equipped with dedicated parameters to optimize cleaning workflows and the assignment of tasks.
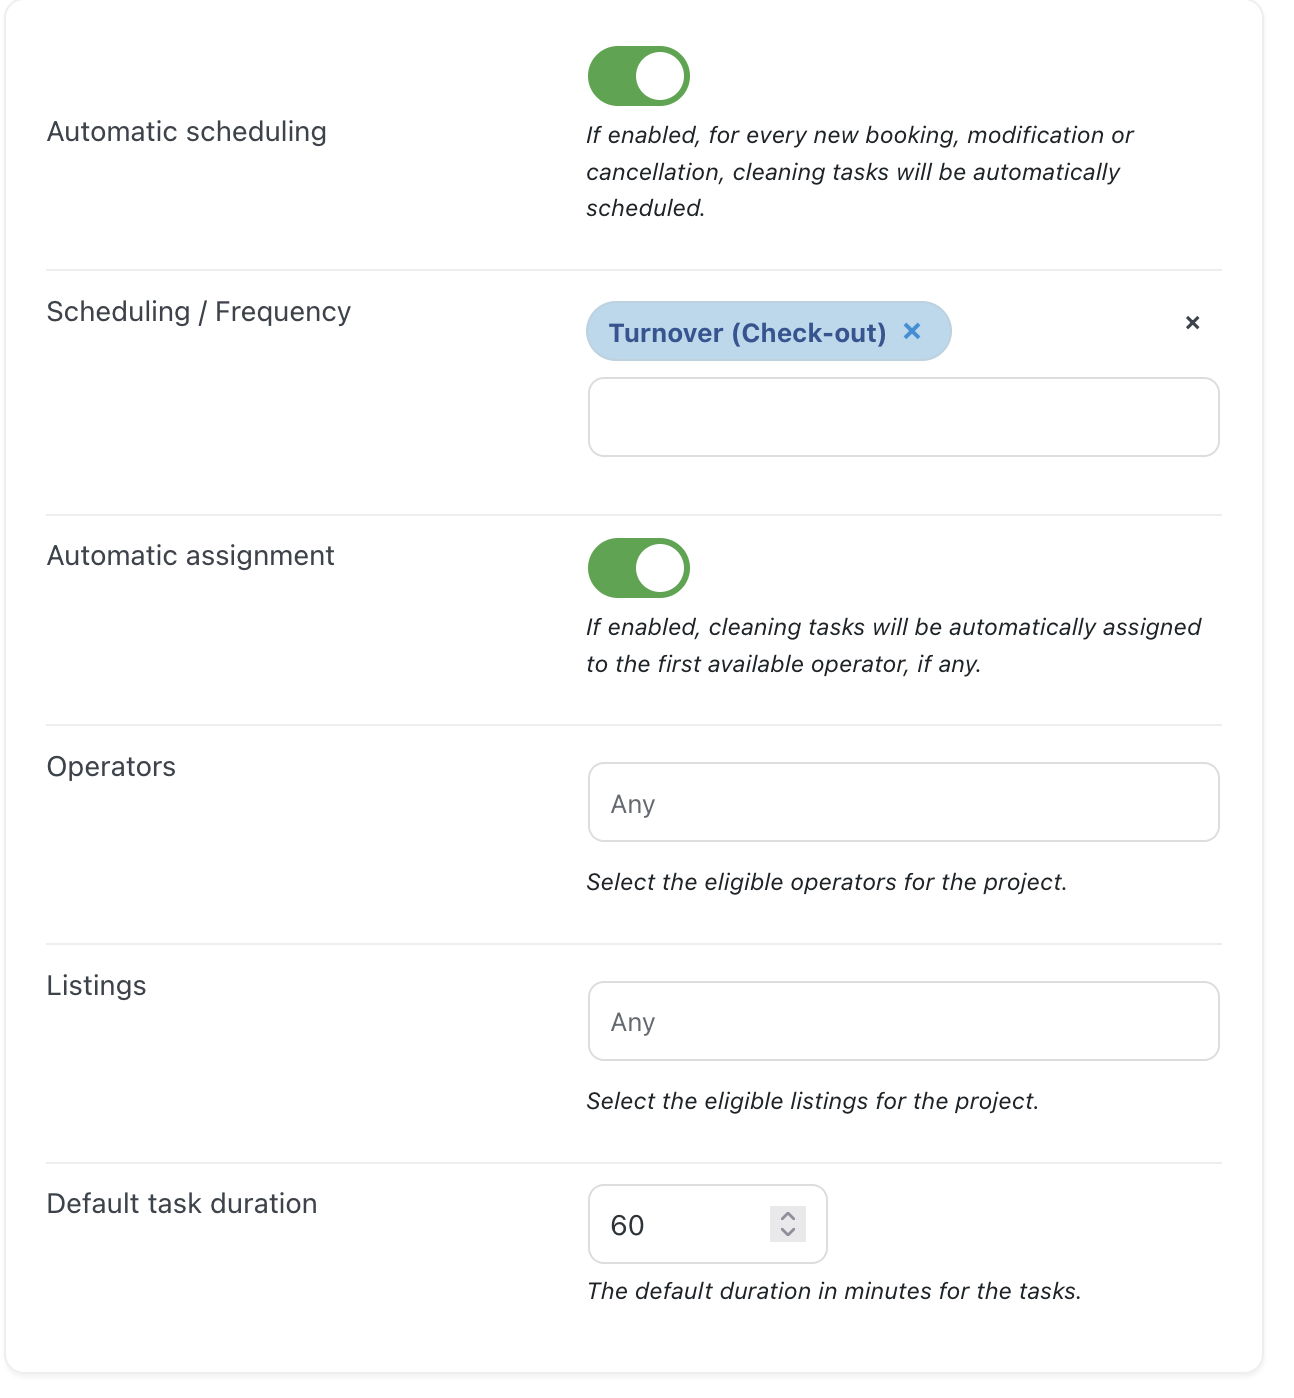
These projects include a set of parameters specifically designed to automate and simplify the management of cleaning tasks. In details:
- Automatic Scheduling: As the name suggests, this option enables the automatic creation of cleaning tasks based on the frequency defined in the setting below
- Scheduling/Frequency: Defines how often cleaning tasks should be generated. You can choose from six available options: Turnover (at every check-out), Daily, Every two days, Every three days, Weekly and Monthly.
- Automatic Assignment: Automatically assigns cleaning tasks to operators. The first available operator will be immediately assigned as soon as the task is created.
- Operators: Select the operators responsible for cleaning duties. Operators must be created in advance via the "PMS > Operators" section in Vik Booking.
- Listings: Specify whether the project/area applies to all listings or only to a selected group of properties.
- Default Task Duration: Set the estimated duration of each cleaning task. This value is used by the Task Manager to calculate operator availability and manage automatic task assignments.
The Housekeeping & Cleaning project focuses on the automatic creation and assignment of the tasks. Once properly configured, the entire process is handled automatically, requiring little to no manual effort.
Maintenance
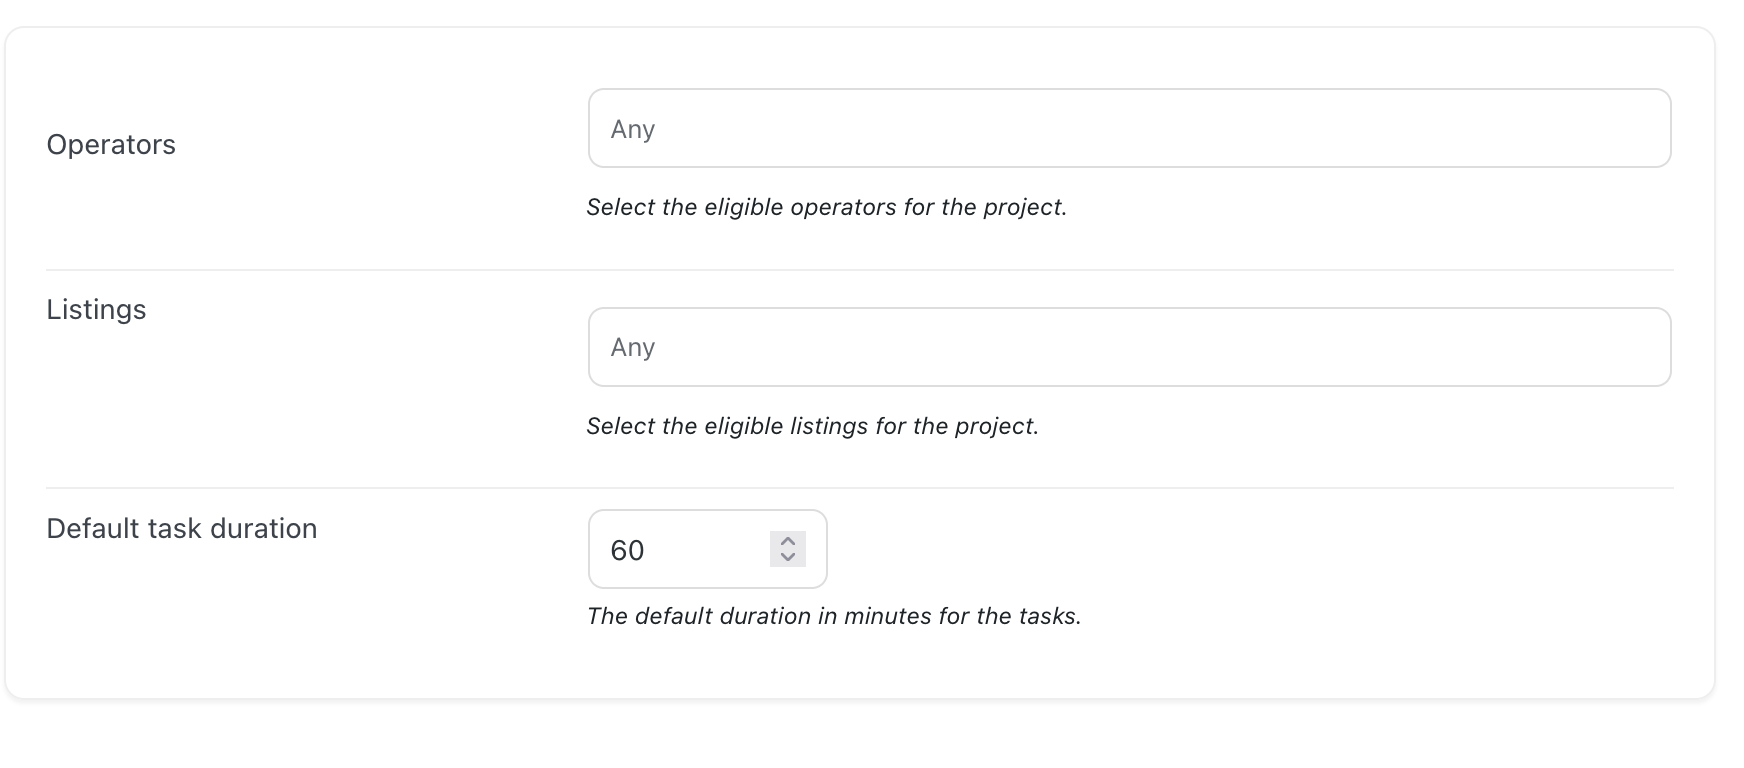
The “Maintenance” Project/Area type includes a few essential parameters that make it suitable for a wide range of general-purpose tasks. As shown below, it features three key settings: Operators, Listings, and Default Task Duration.
Here’s a detailed breakdown:
-
Operators: Select the operators eligible for the tasks. Operators must be created in advance via the "PMS > Operators" section in Vik Booking.
-
Listings: Specify whether the project/area applies to all listings or only to a selected group of properties.
-
Default Task Duration: Set the estimated duration of each cleaning task. This value is used by the Task Manager to calculate operator availability.
Sprint Board
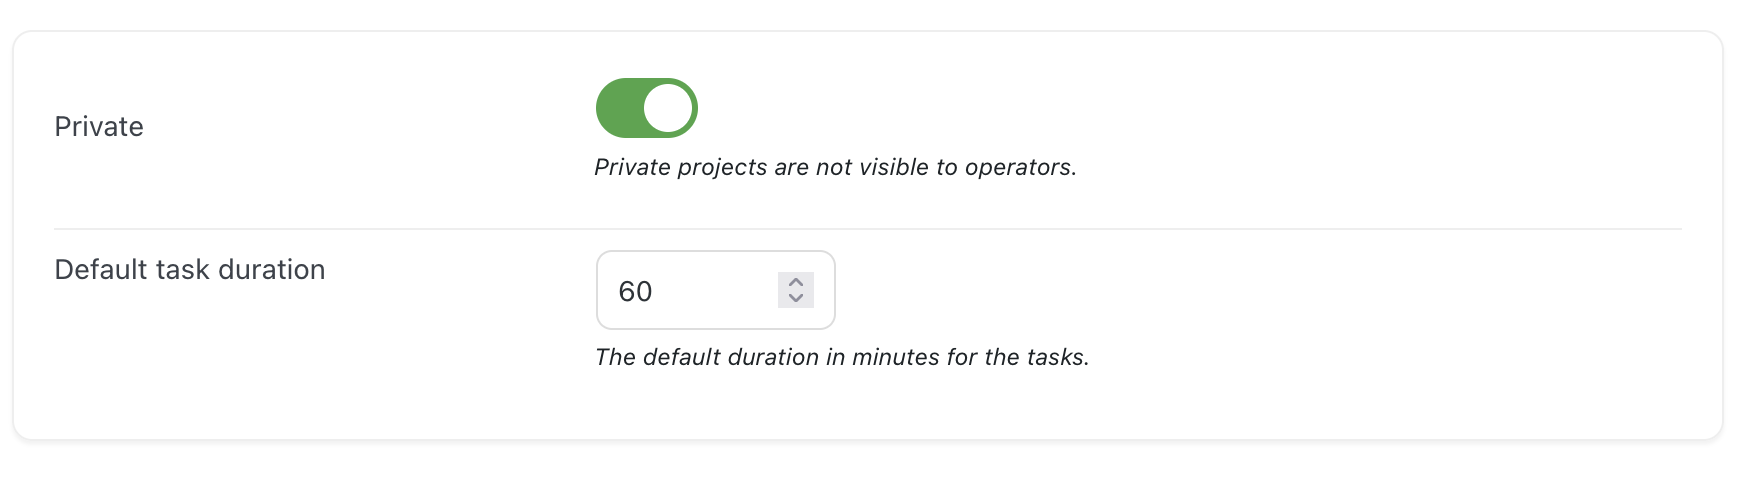
The main feature of the Sprint Board is the ability to create hidden tasks. The board can be set to “Private”, which restricts access to Administrators only, hiding both the project and its related tasks from other Operators.
Projects/Area Management
The Task Manager offers a variety of tools to help manage multiple Projects/Areas efficiently.
From selecting which Projects/Areas to display, to switching between different viewing modes, and applying dedicated filters — everything is designed to make task navigation easier and more intuitive.
-
Project/Area display selection
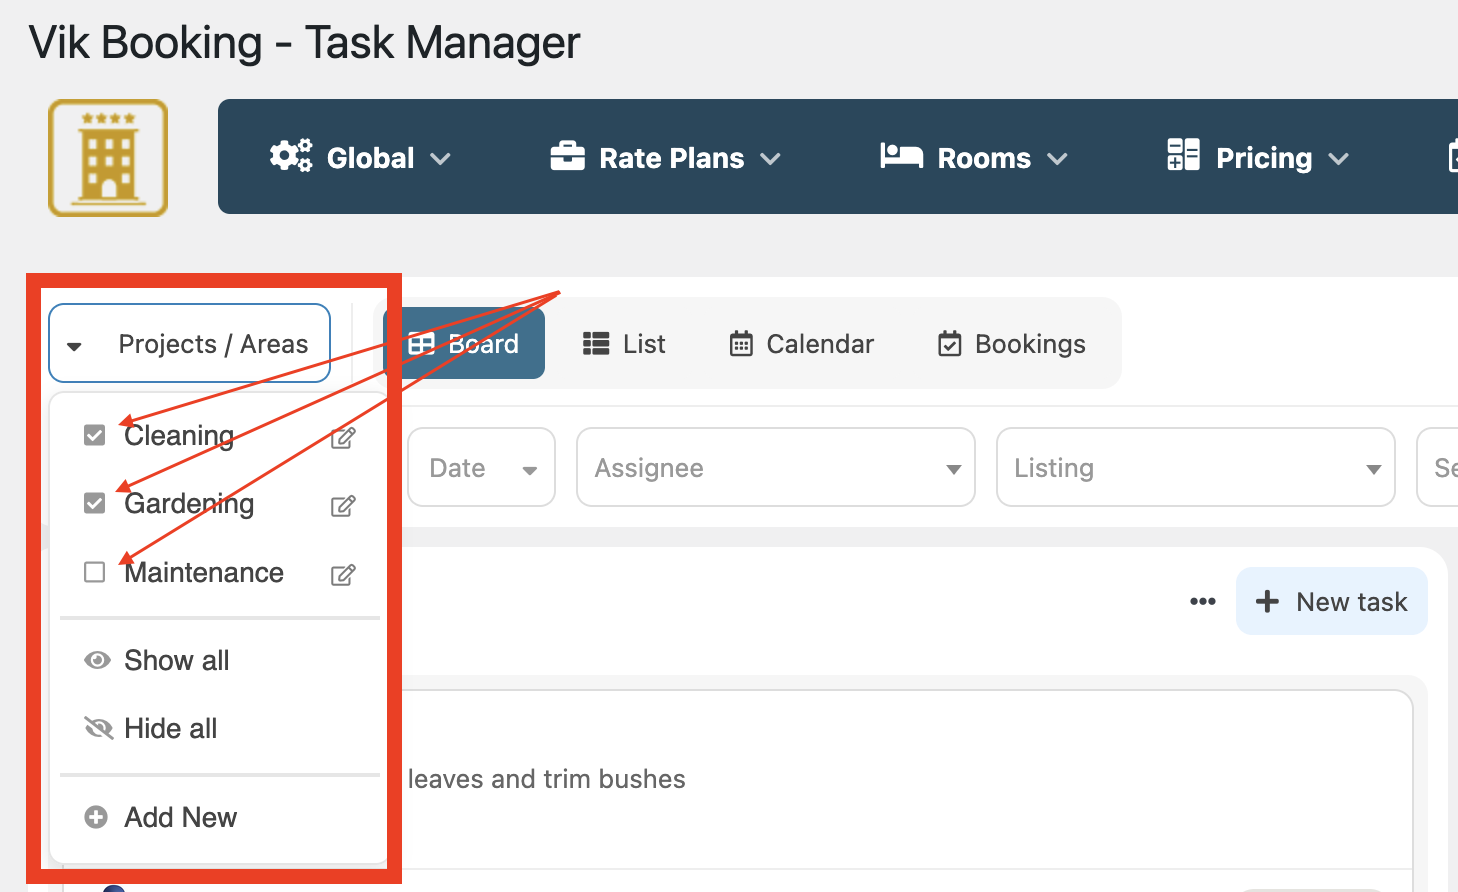
By clicking on the “Projects/Areas” field at the top of the page, a drop-down menu will appear. Here, you can use the checkboxes next to each Project/Area to select the ones you want to view. Multiple Projects/Areas can be selected at the same time for a combined view.
-
Project/Area Visualization
You can choose between 4 different visualizations for your Projects/Areas: Board, List, Calendar and Booking.
Board: This is the classic view. The different Projects/Areas will be displayed separately
List: The List view displays an organized list of all available tasks.Each task includes a dedicated field that indicates its associated Project/Area.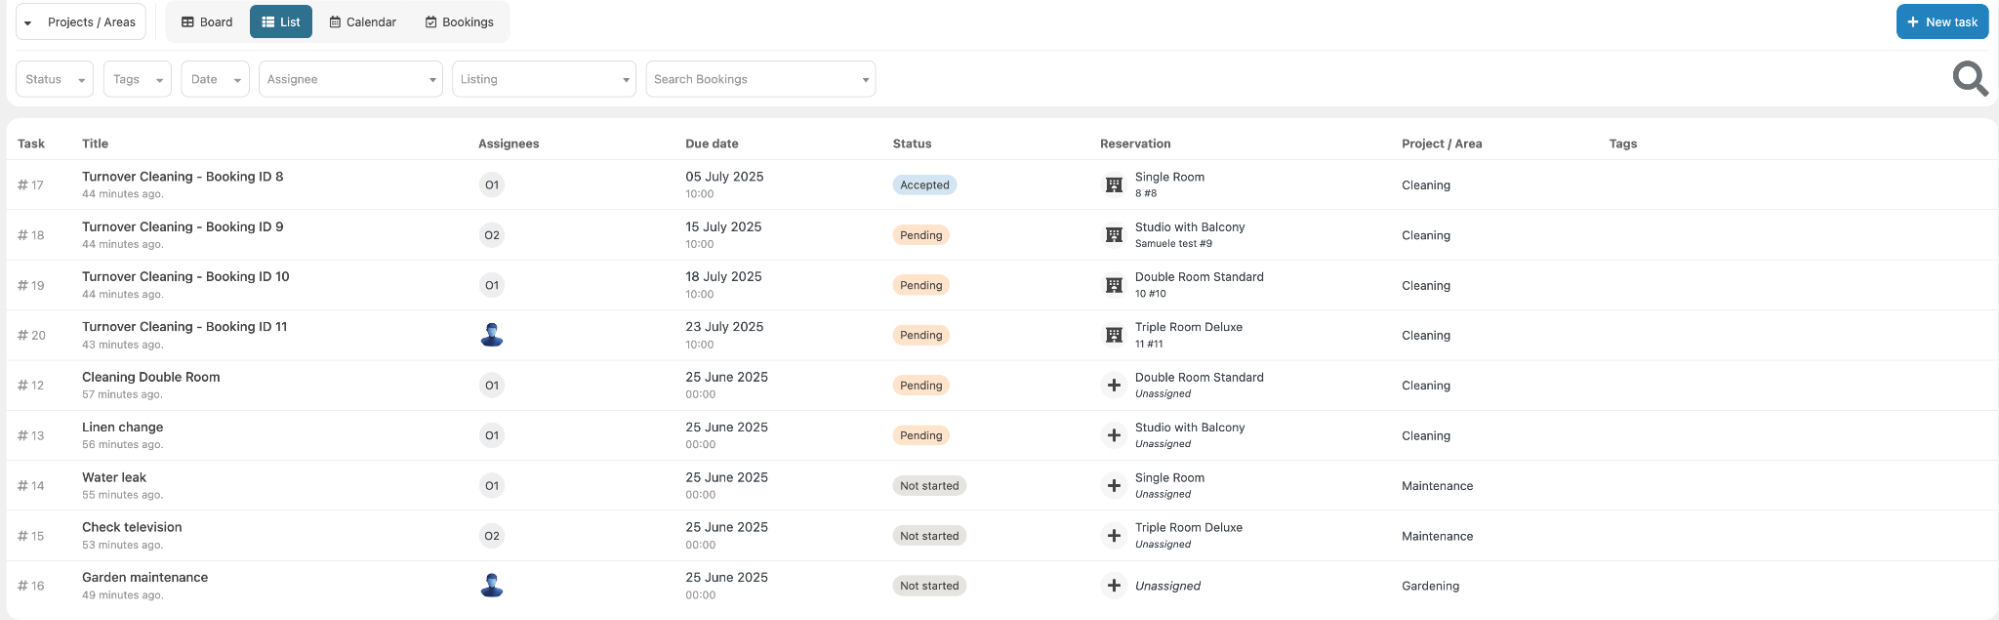
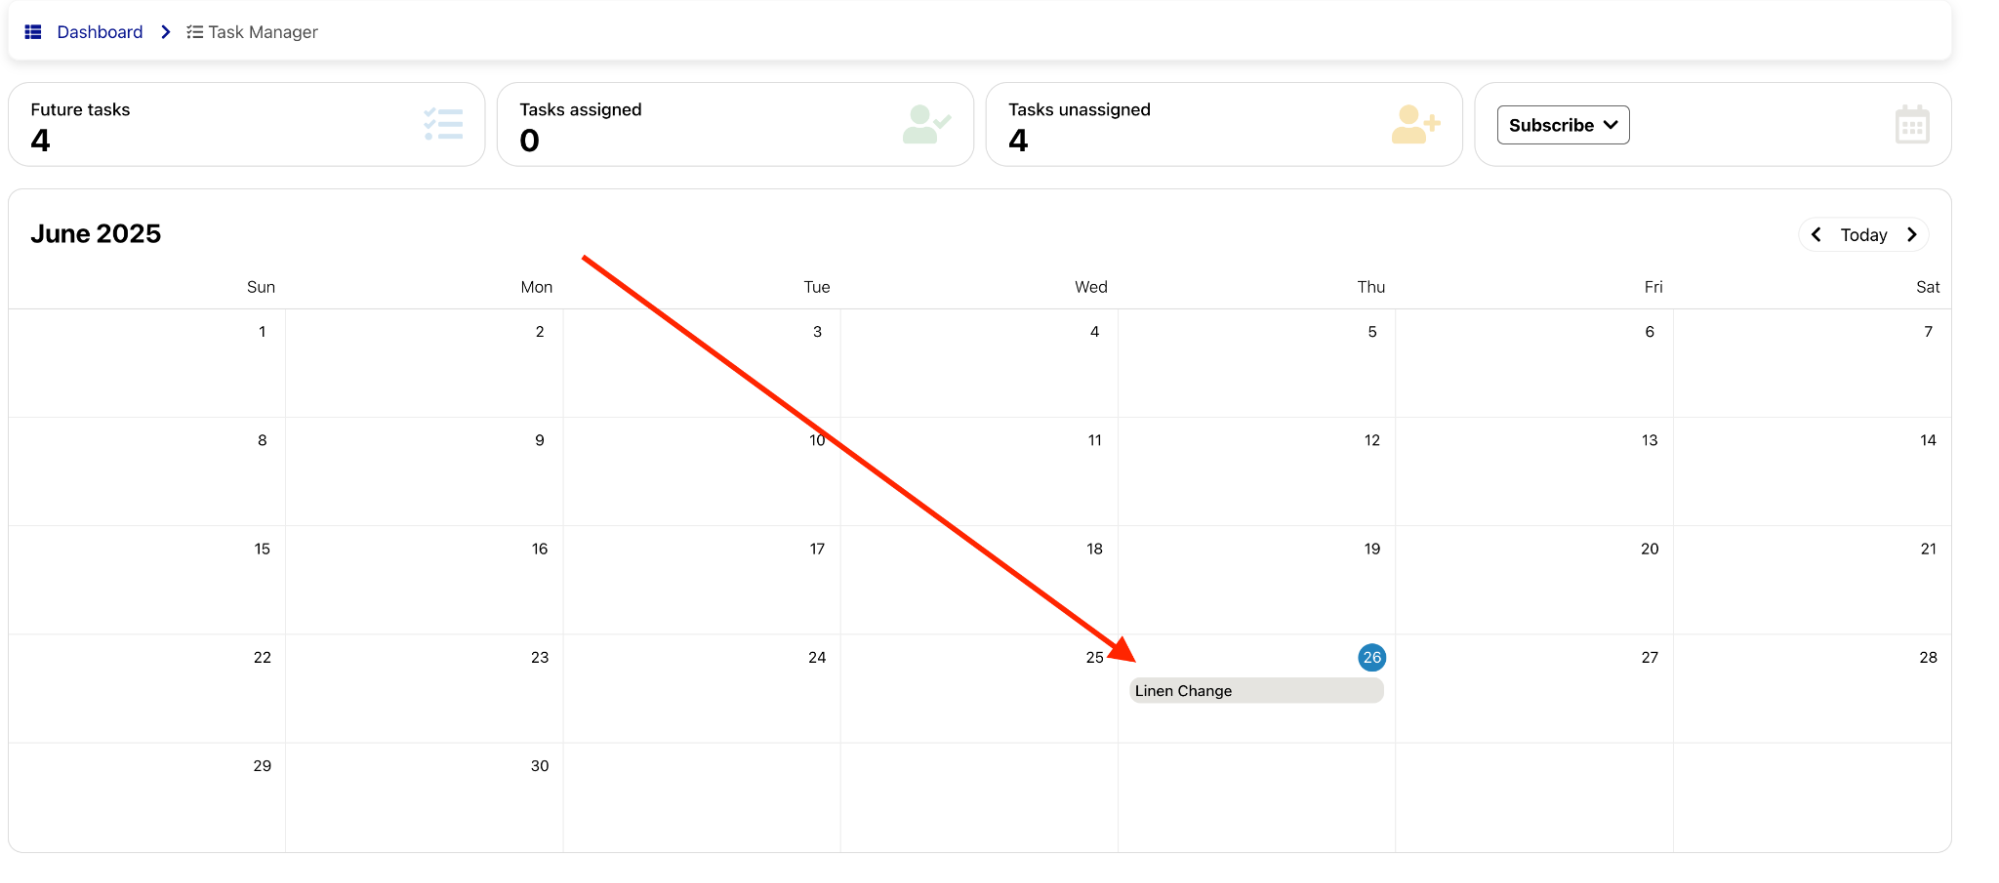
Calendar: The Calendar view displays tasks organized by day, providing a clear overview of which tasks are scheduled for each date.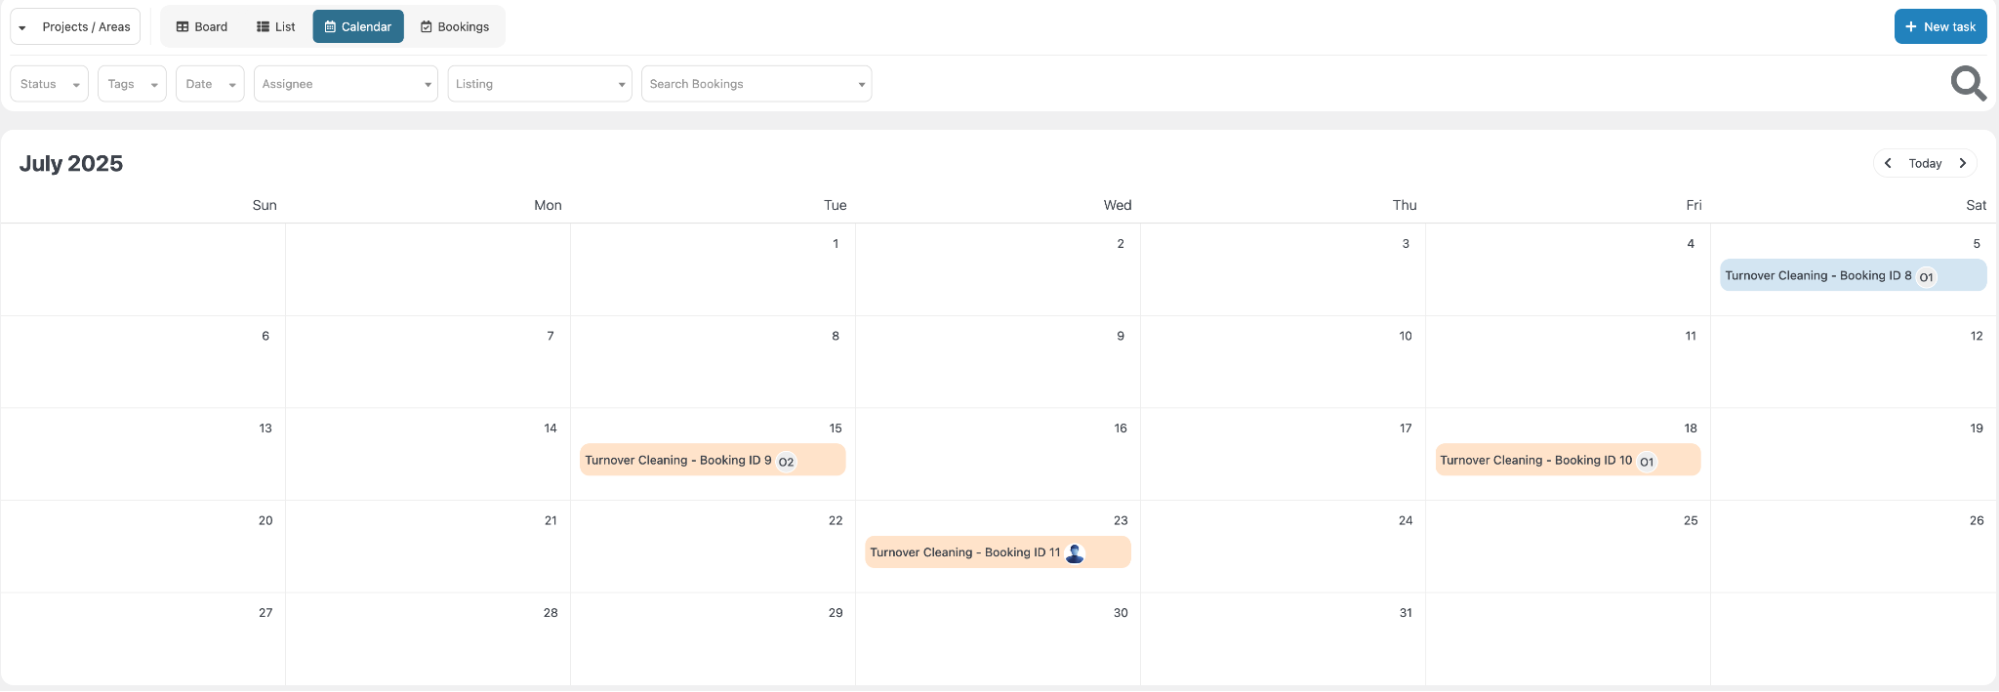
-
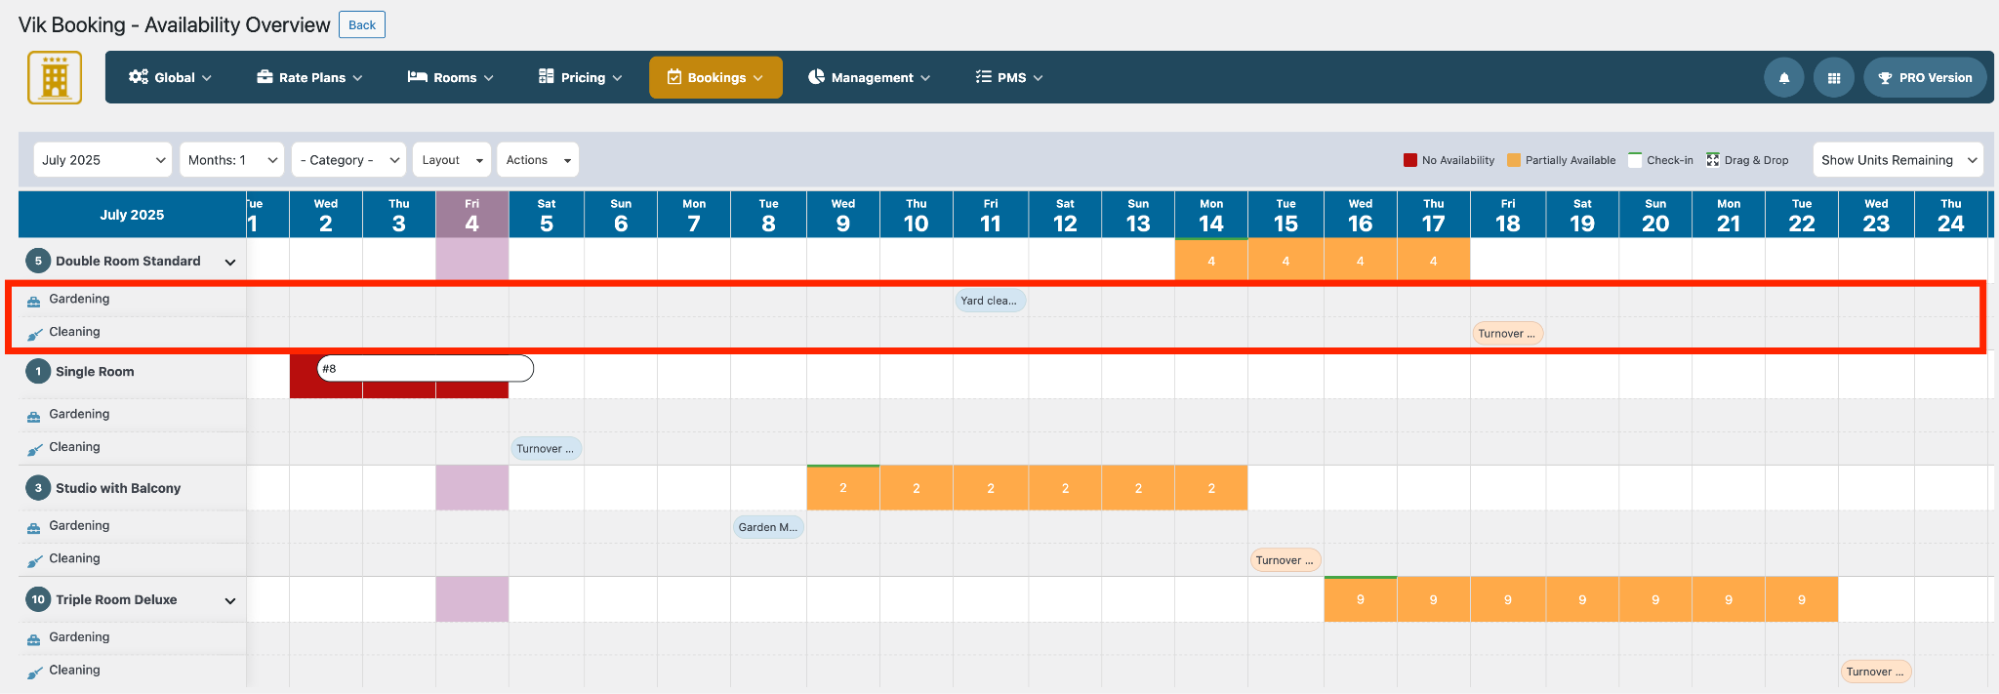
Bookings
This view will take you back to the “Availability Overview” page of Vik Booking. By using the “Action” button at the top, you can select which Projects/Areas to display. Below each room type, a dedicated field will show the tasks scheduled for that room on the selected date.
Creating new Tasks
After creating your Projects/Areas, you can create new tasks by clicking the dedicated “New Task” button. This will allow you to select the Project/Area for which you want to create the task.

Additionally, each view includes its own quick “Add New” button, making it faster and easier to create tasks directly from the current layout.
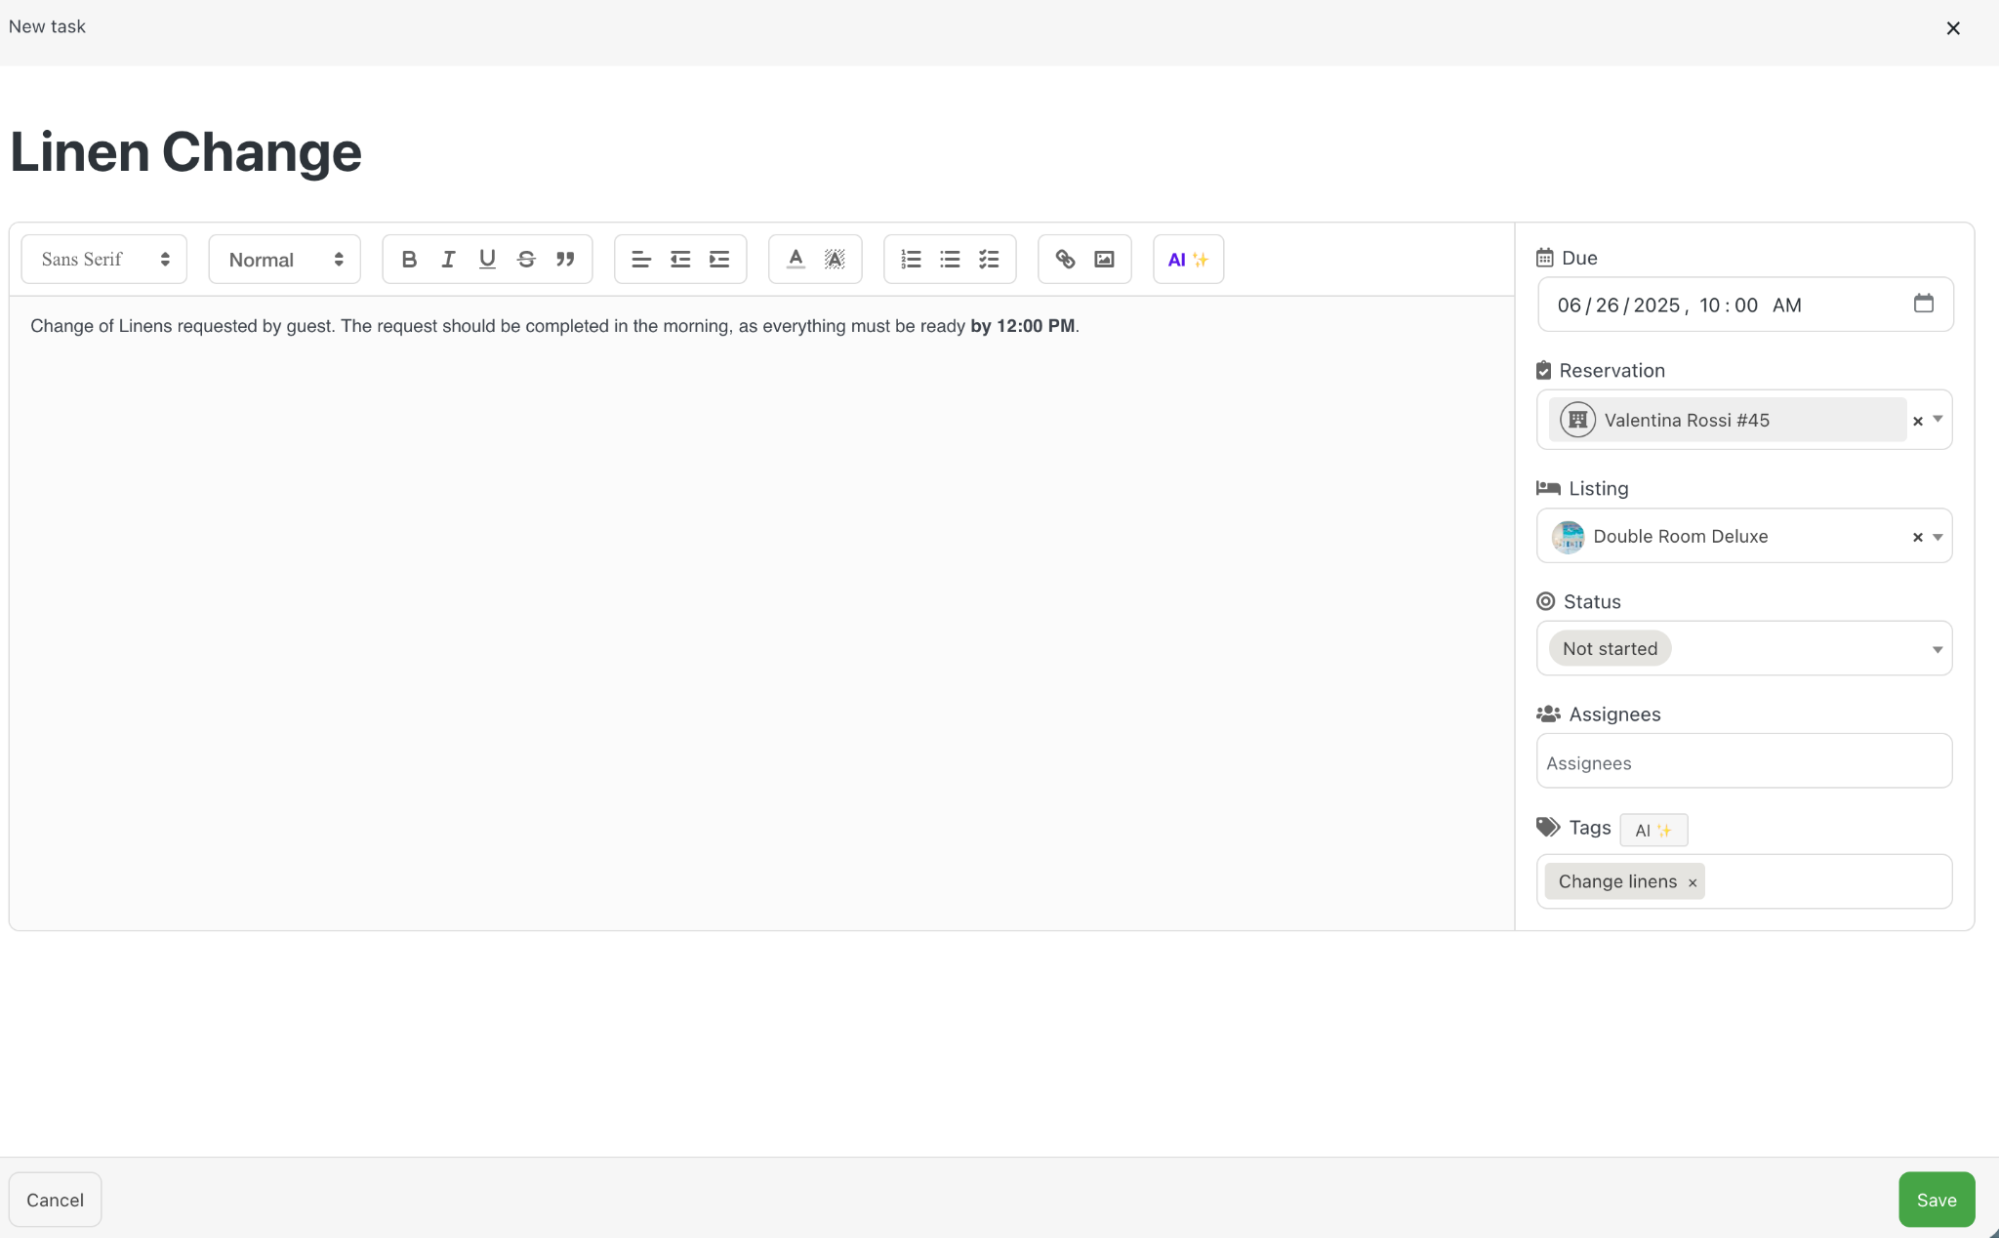
Creating a new task is a straightforward process.
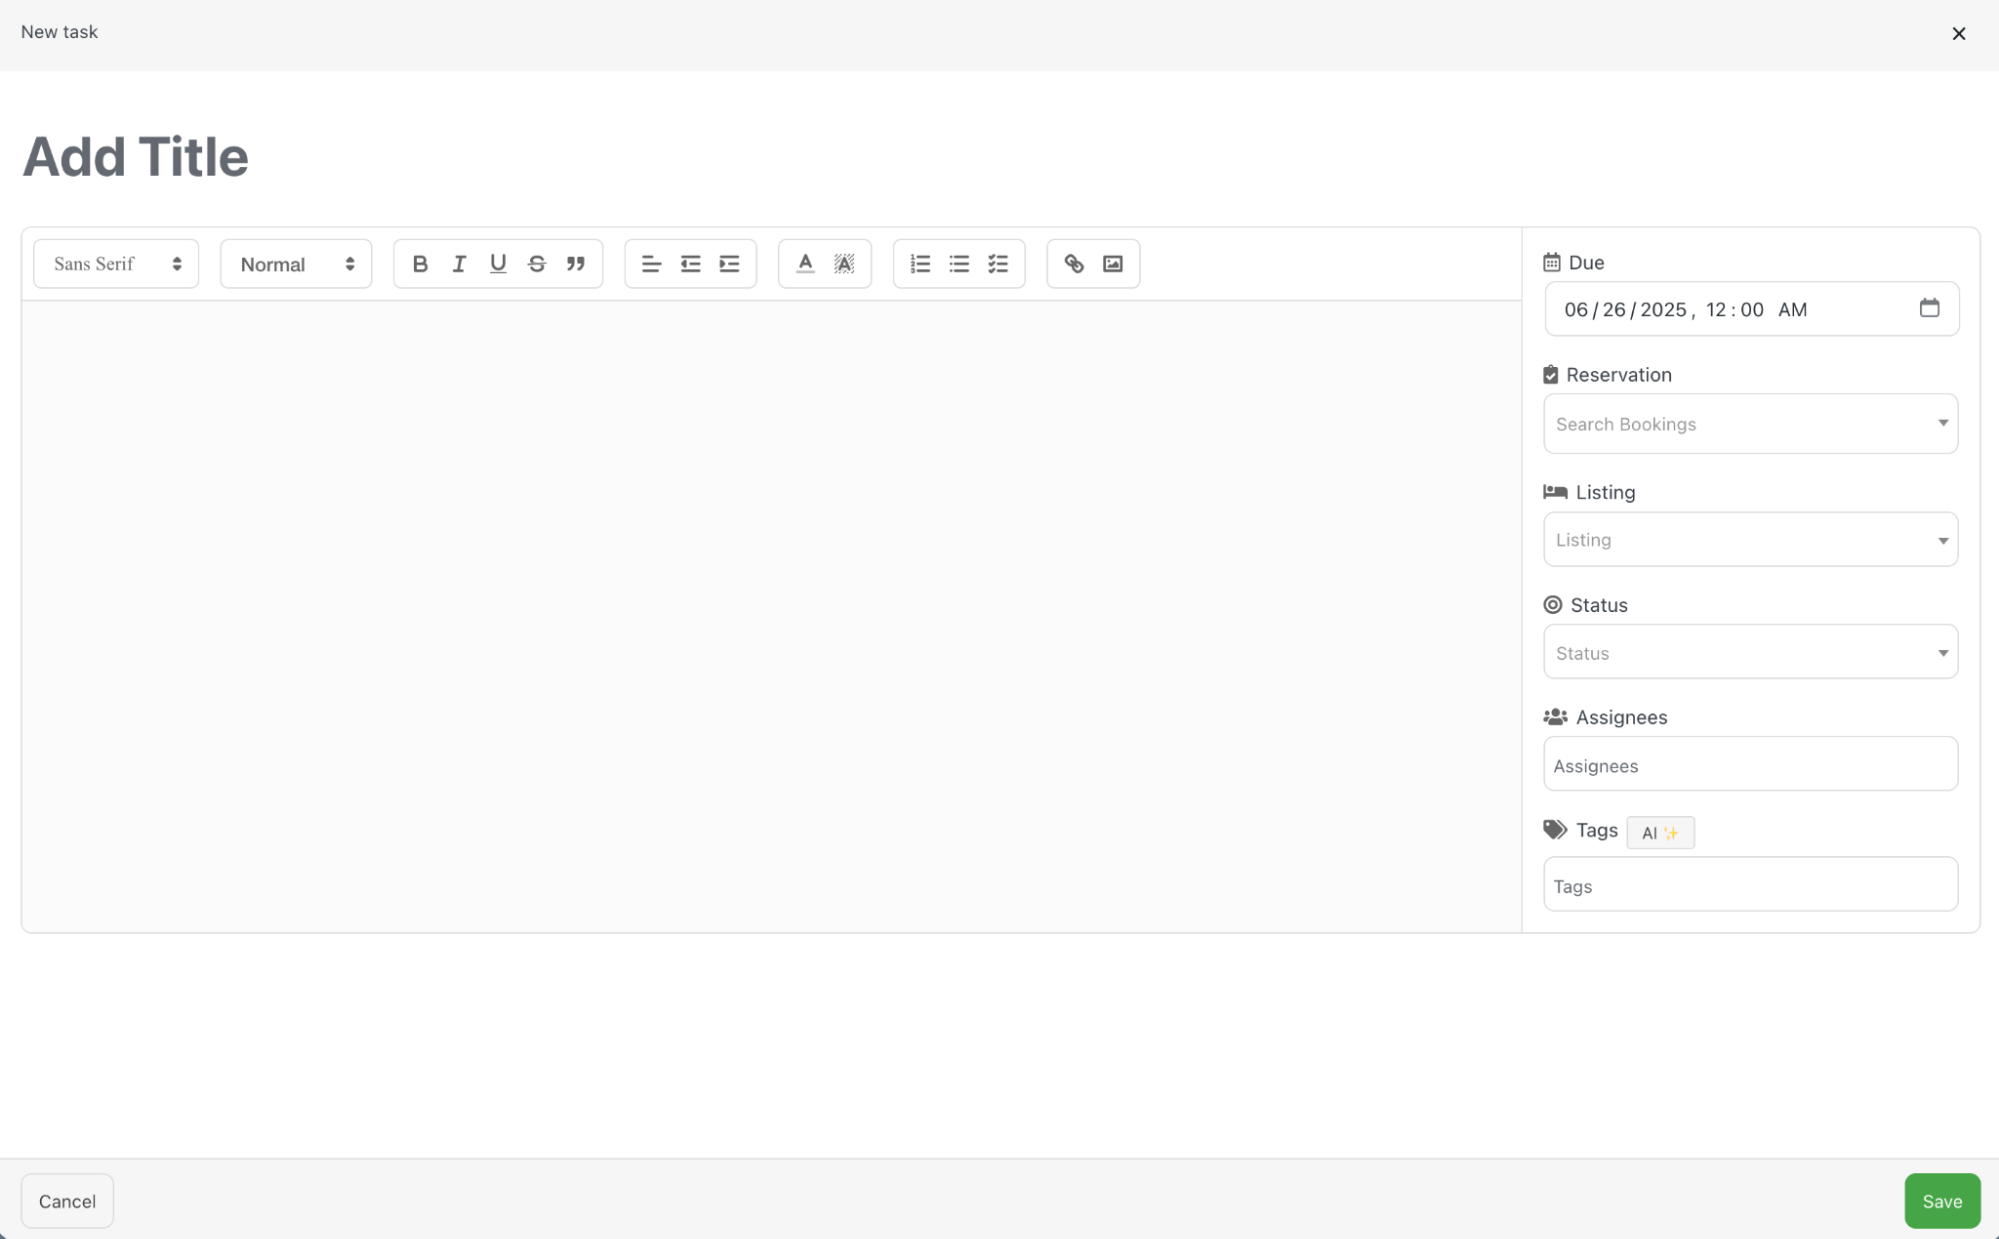
Start by adding a title, which will be used to identify the task. You can then enter additional details or instructions in the description field below, if needed.
On the right side of the screen, you’ll find several parameters that can be configured:
-
Due: Set a specific date and time for when the task should be carried out.
-
Reservation: Choose whether the task is linked to a specific reservation or left unrelated.
-
Listings: Select the listing(s) the task applies to.
-
Status: Set the current status of the task (e.g. Unassigned, Pending, Completed).
-
Assignees: Manually assign the task to a specific available operator. The list of displayed operators depends on those assigned to the selected Project/Area when the task was created. If left unassigned, all operators linked to the Project/Area will be able to see the task on the Front-end and accept it.
-
Tags: Assign one or more tags to the task. Tags are used solely for categorization and convenience — they do not impact the task itself.
Finally, click the “Save” button to create and schedule the task
The Project/Area of type “Project” includes a unique feature that allows the creation of to-do lists.
These to-do lists can be checked off and updated both from the backend and the frontend, ensuring seamless task tracking across the two.

Operator’s Login Area - Front End
All tasks available in the Task Manager will be visible in the front-end Operator login area, based on each operator’s assignments and permissions — with the exception of "Private" Projects/Areas, which remain hidden.
By default, each Area has specific operators assigned to it. Tasks can either be assigned to a specific operator within that Area or left unassigned, allowing all operators linked to the Area to view and access the task.
Operators
Operators can be created from the “PMS > Operators” section in Vik Booking.
When adding a new operator, the system will prompt you to fill in several fields — however, only First Name, Last Name, and Email are mandatory.
Below is an example of how to create a new operator, named “Operator 1”.
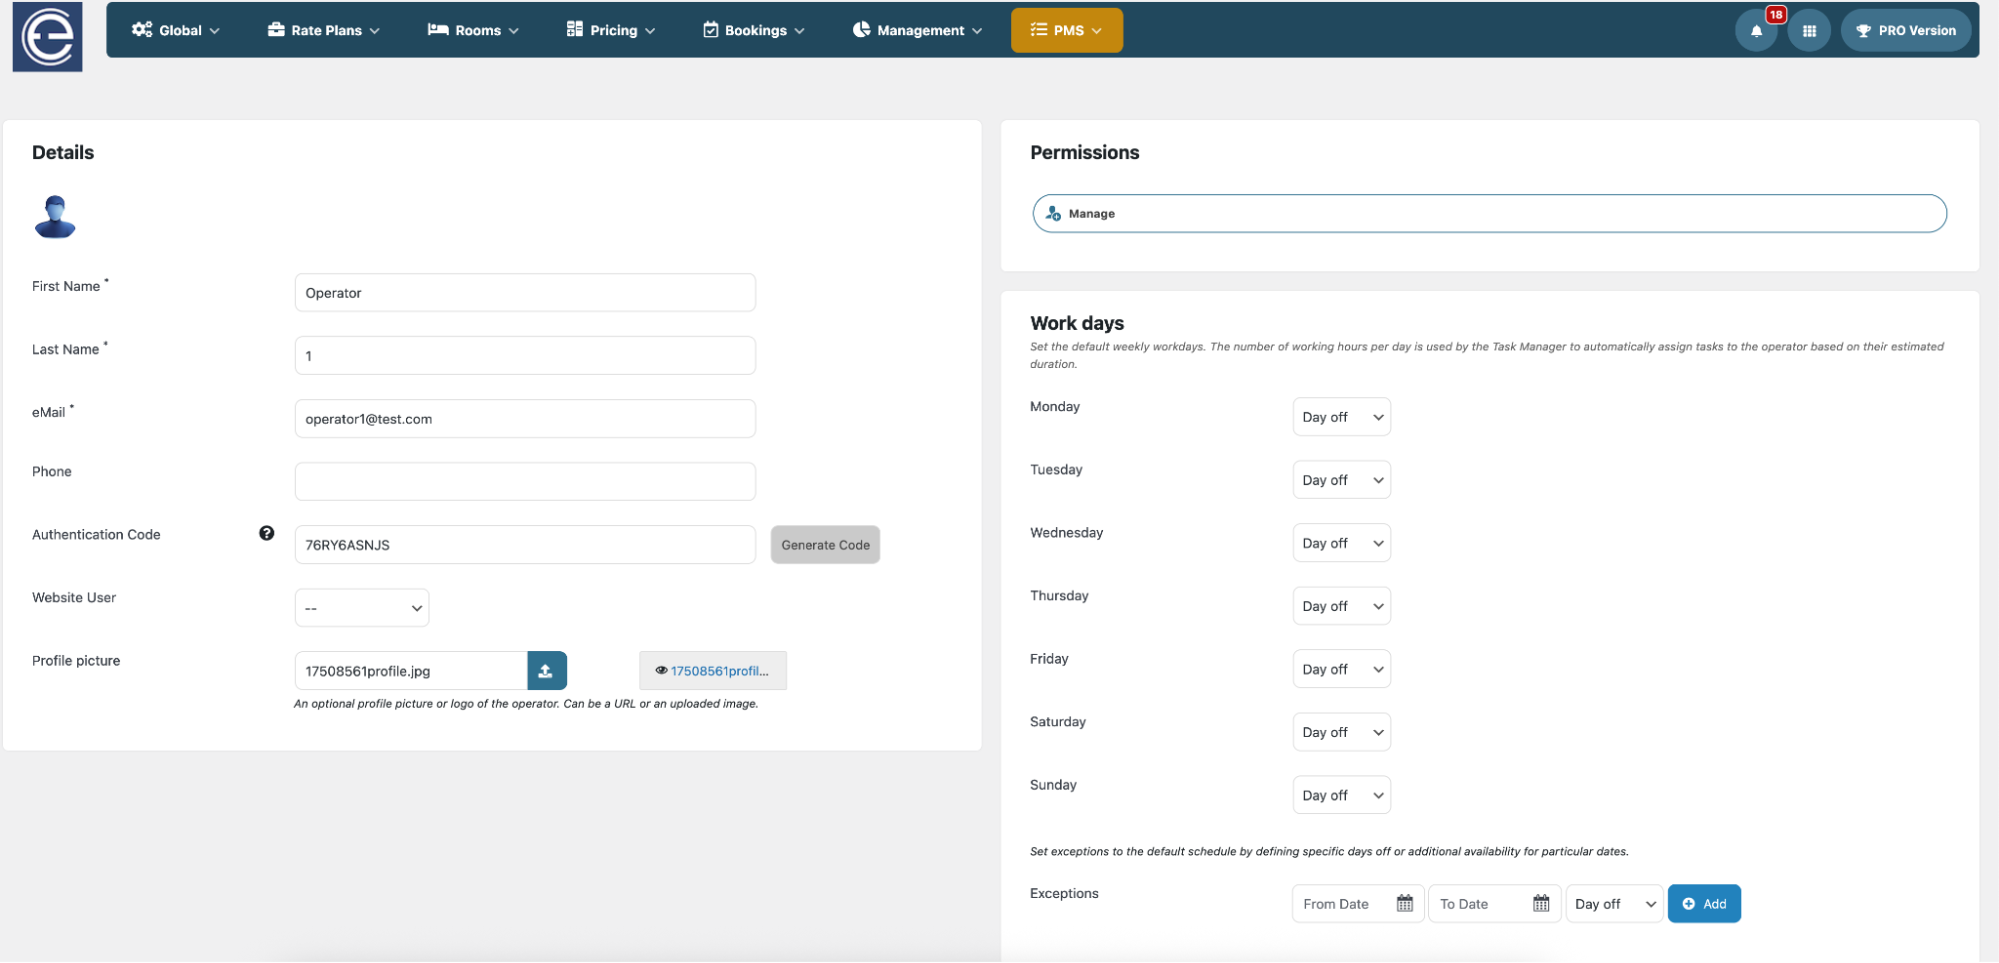
An Authentication Code will then be generated automatically.
This code can be used by the operator to log in through the front-end page rendered by the “Operator Login” shortcode.
On the right side of the screen, you can manage the operator’s permissions, as well as their working days and any exceptions such as holidays or additional working days.
It’s important to configure the Permissions Management section at least once to grant the operator access to the Task Manager.
To do so:
-
Click the “Manage” button located under the “Permissions” tab.
-
Navigate to the “Task Manager” section.
-
A yellow notification will appear, indicating that the selected operator has not yet been granted access to the Task Manager.
-
Make sure the “Accept Task” permission is set to “Yes”, then click “Save” to apply the changes.
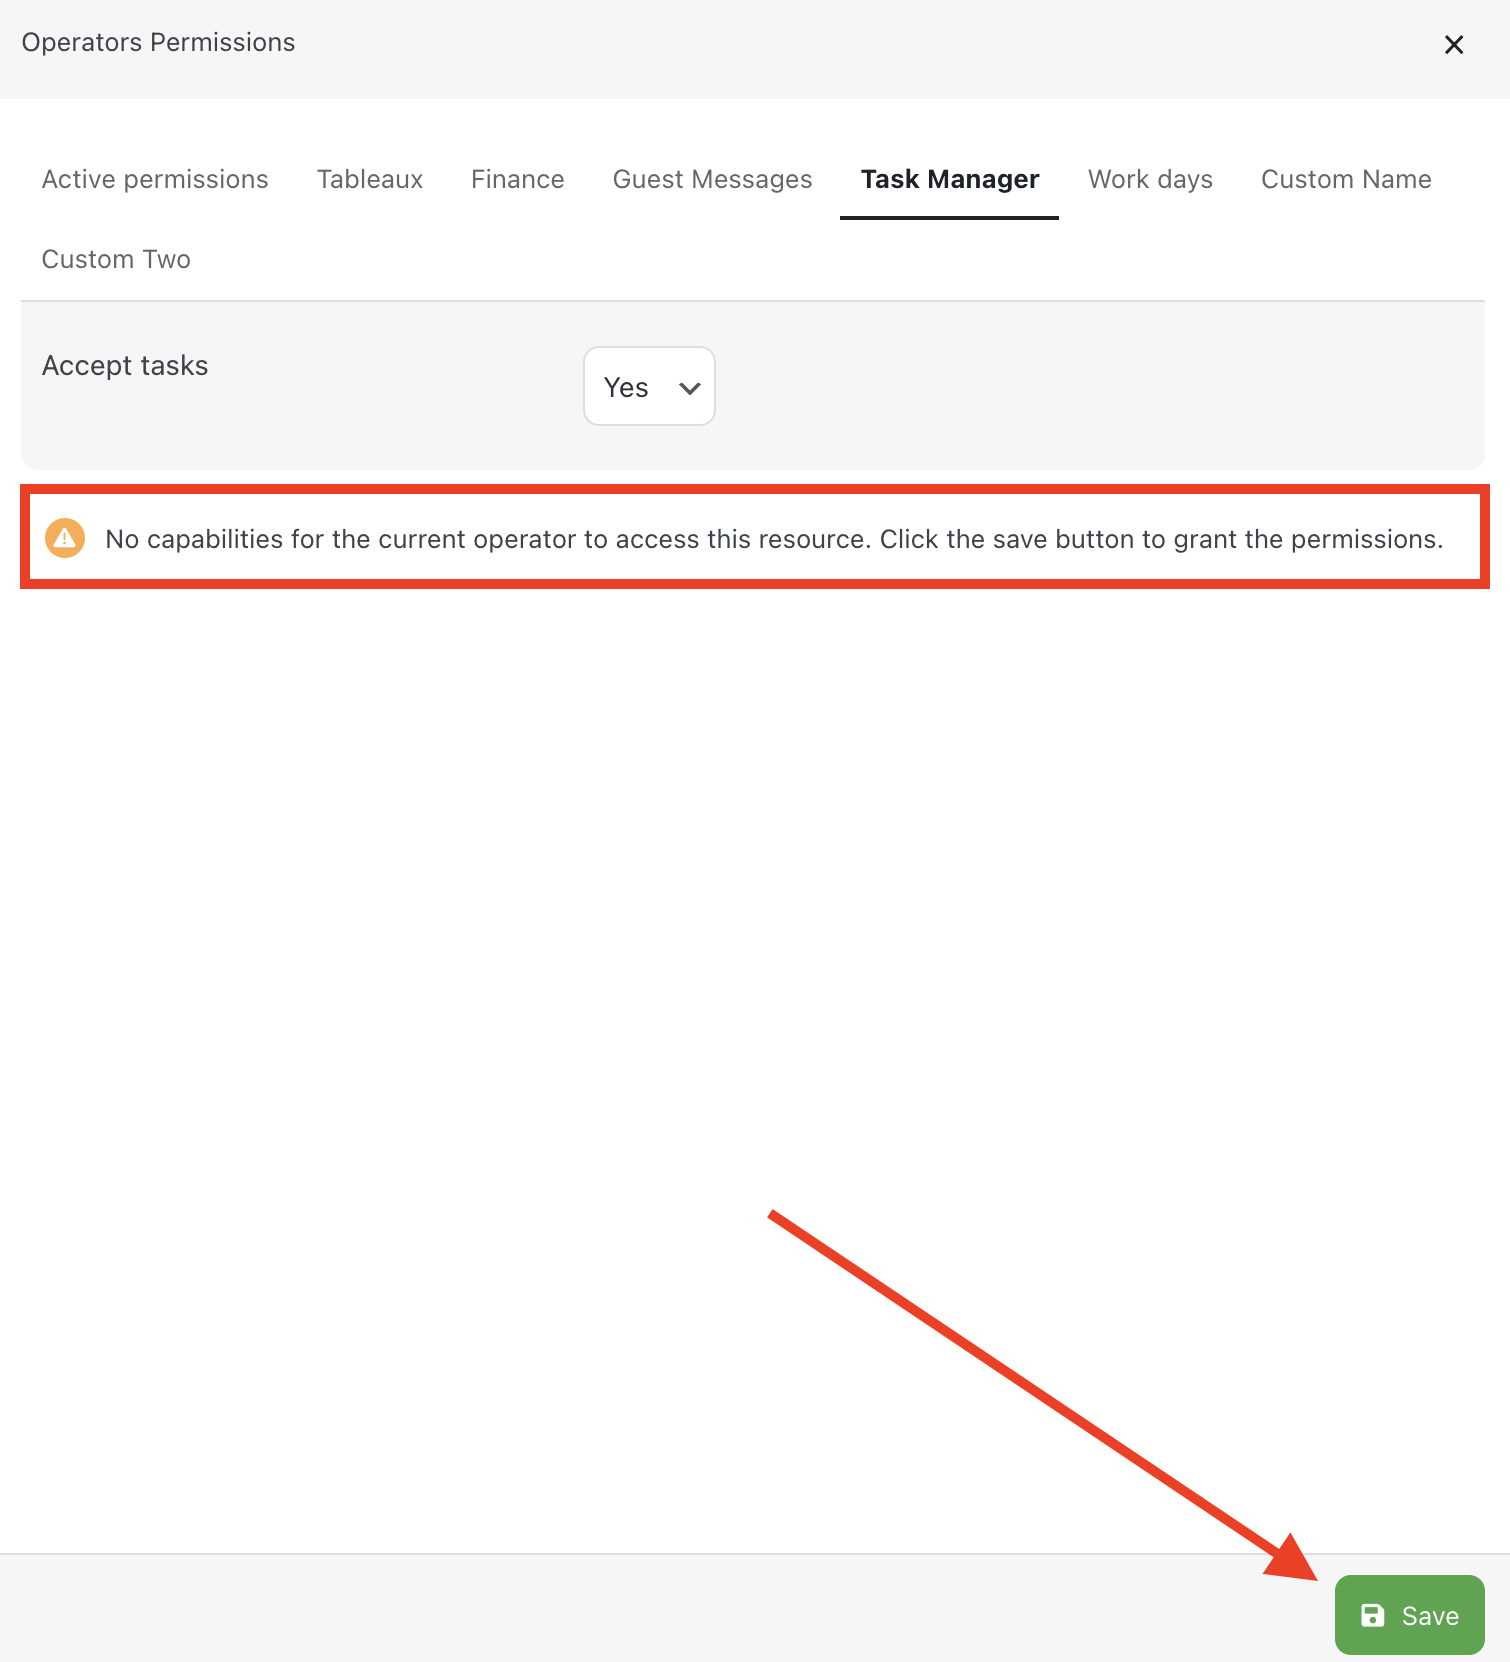
If everything has been configured correctly, the “Task Manager” will appear in the first tab, “Active Permissions”, confirming that the operator has been granted access.

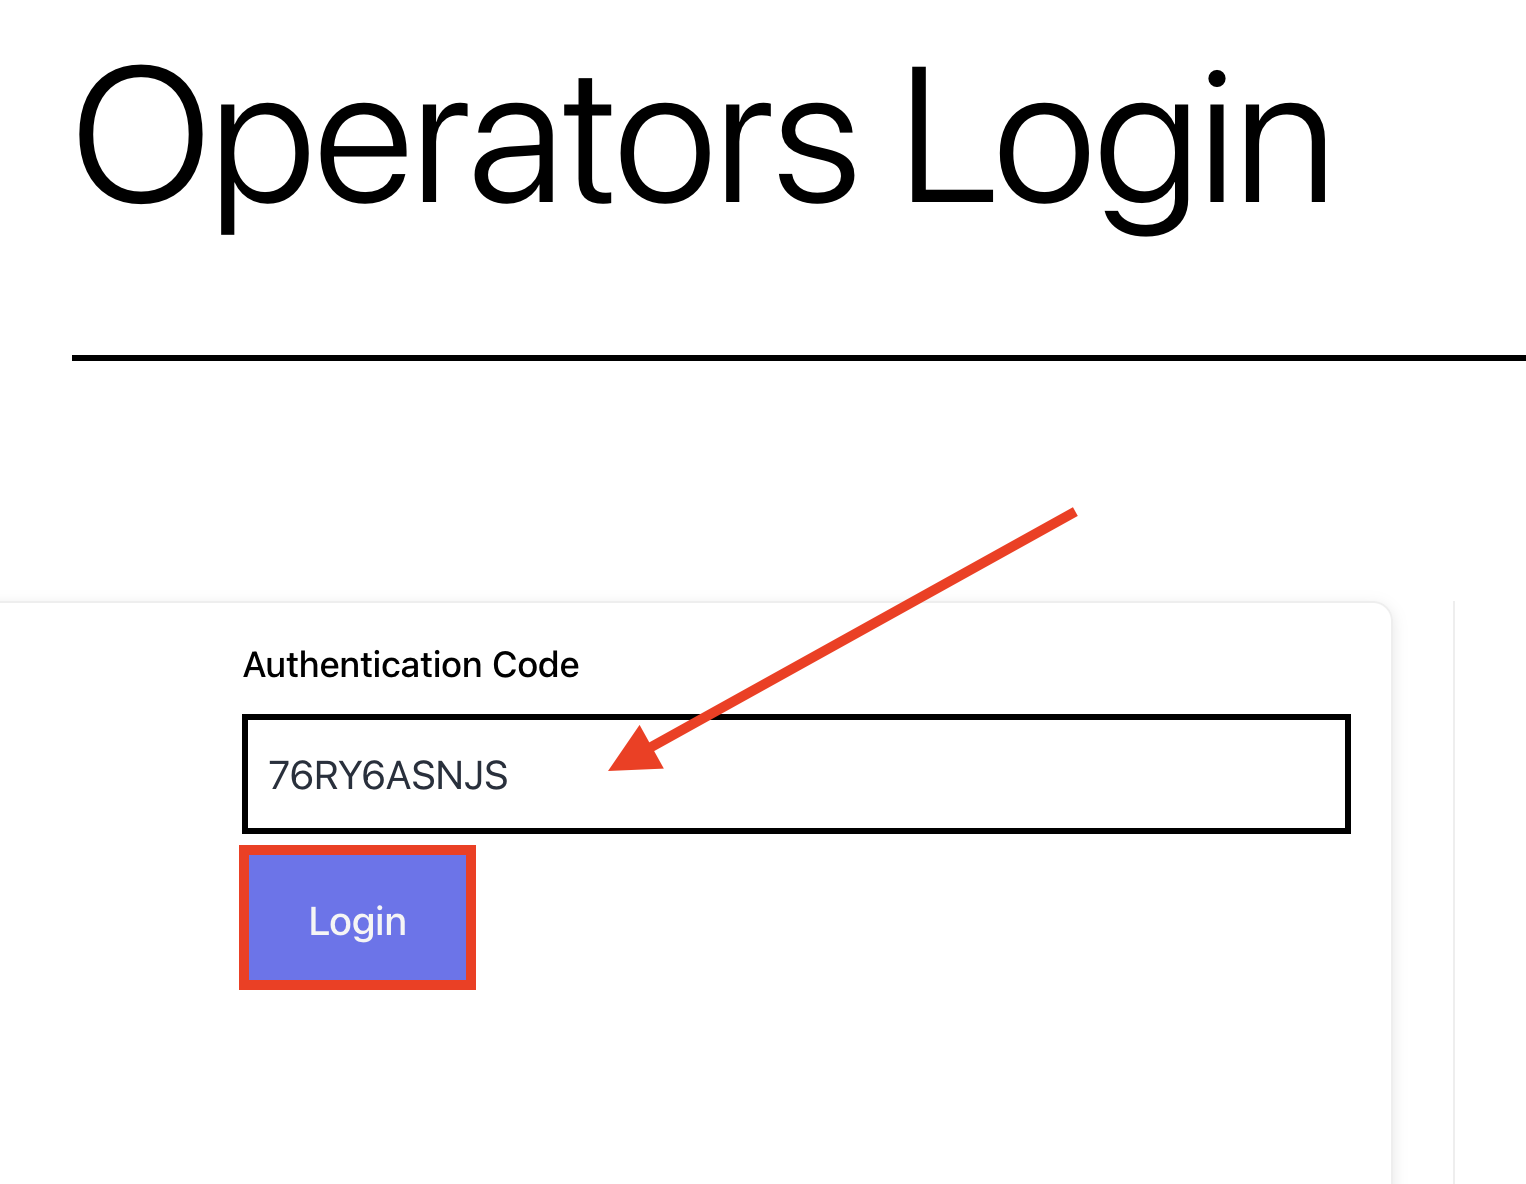
Front-end Operator’s Login page
Operators created in Vik Booking can use their assigned Authentication Code to log in through the “Operator Login” page, where they can access the tools and sections they've been granted permissions for.
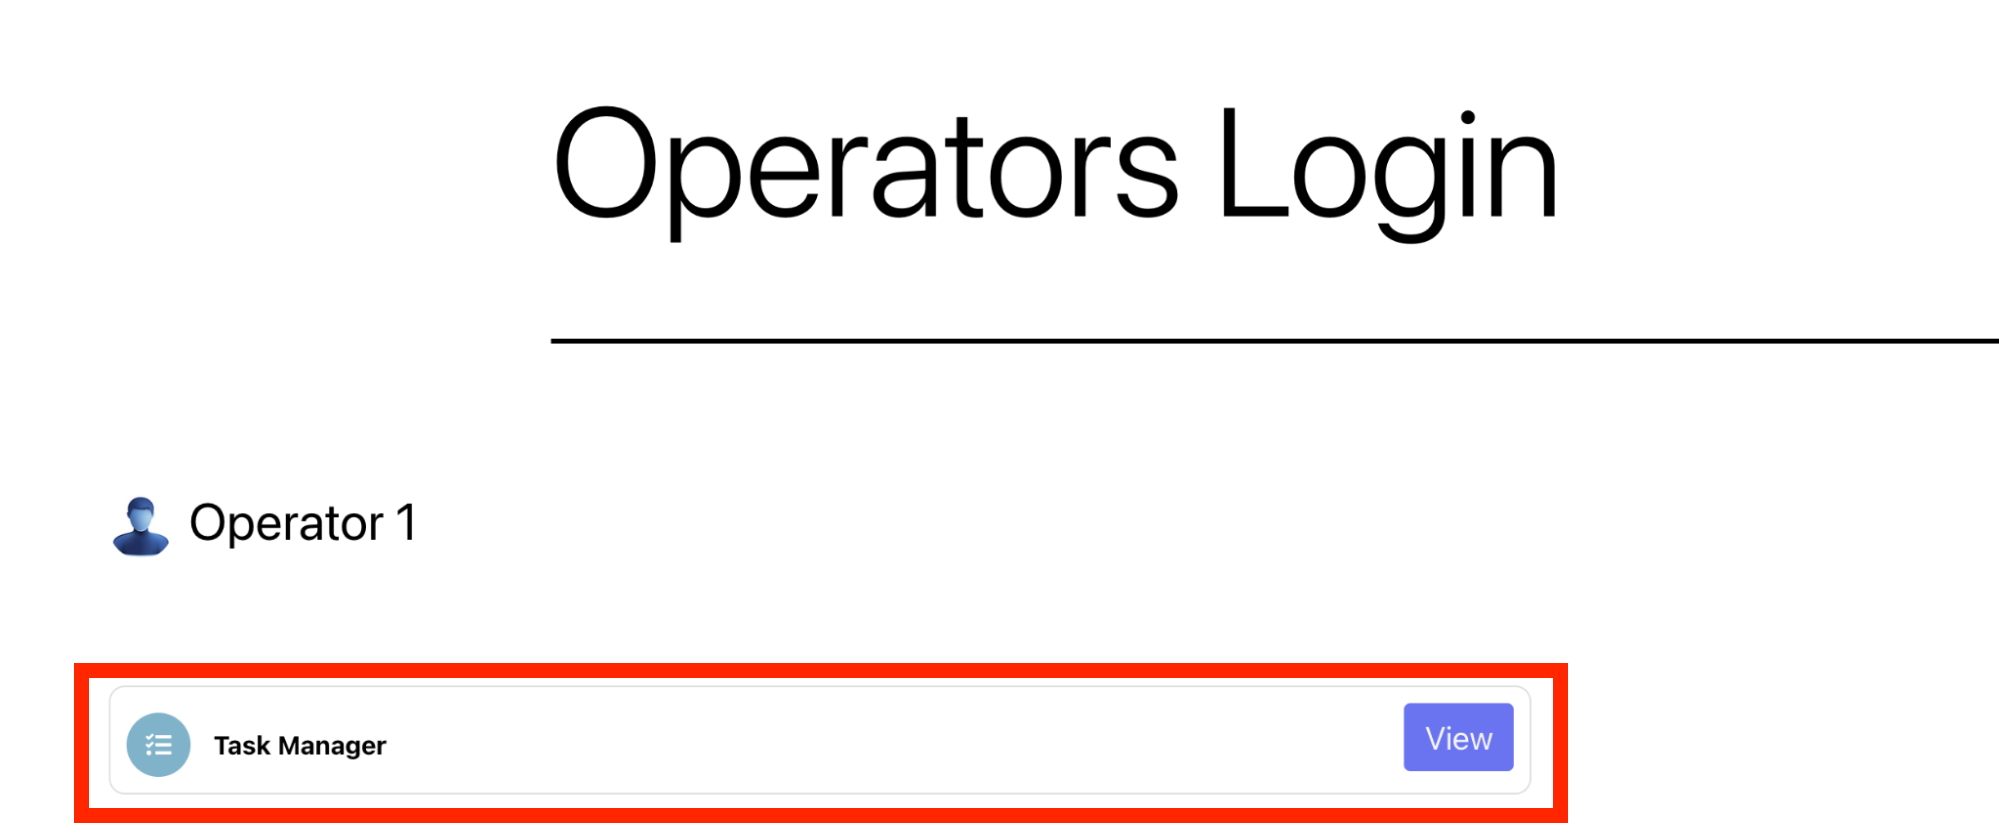
Continuing with the previous example, Operator 1 is now able to access the Task Manager.
Task Visualization in front-end
Let’s look at an example by creating a task (status “Not started”) that we will leave unassigned.
Let’s now log into the Operator Area as Operator 1 to see how the unassigned task appears. Obviously, tasks that are assigned manually will only be visible to the specific operator they were assigned to.
Unassigned tasks will be visible to all operators assigned to the corresponding Area. Any operator can click on a task to view its details.

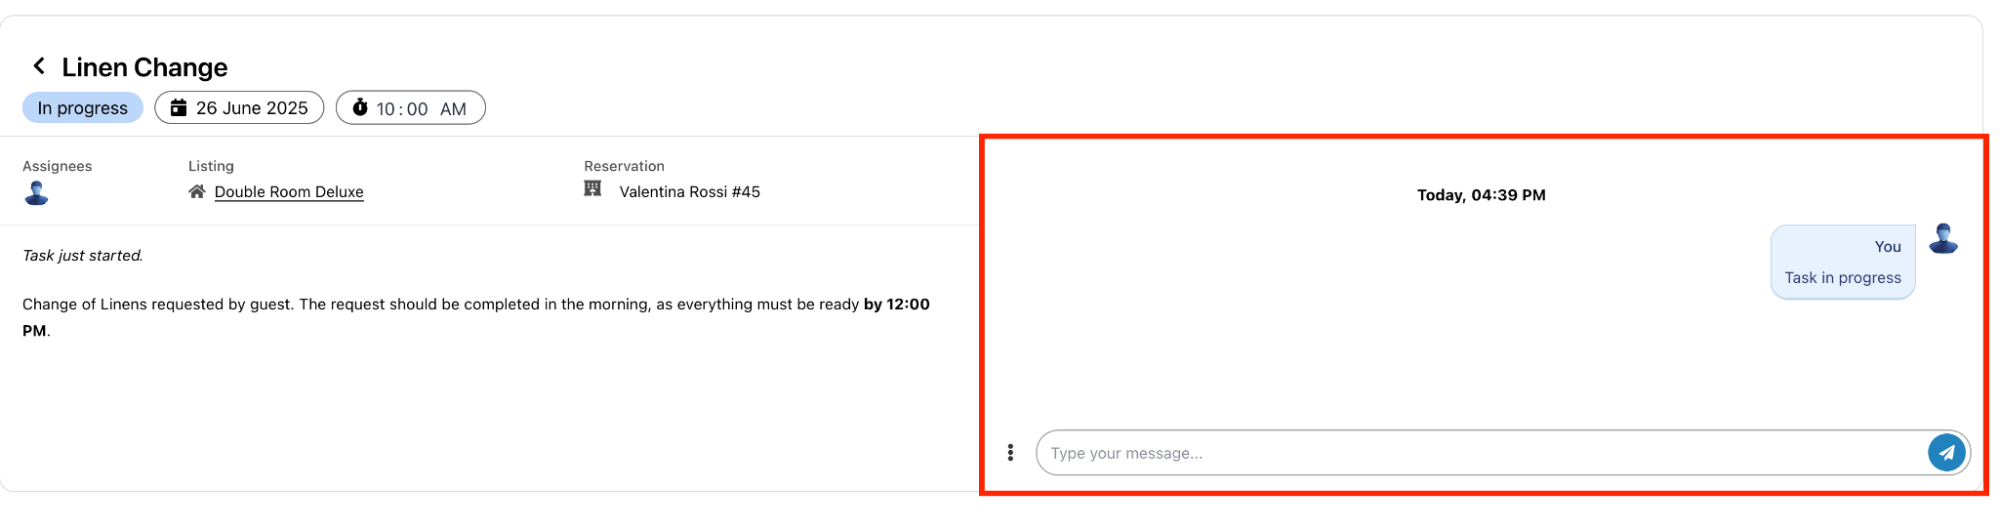
By clicking on the status, operators can change it.
Setting it to “Accepted” or “Ongoing” will automatically assign the task to themselves.
On the right side of the screen, a chat panel is available for communication with the administration. The chat also allows operators to upload photos, if needed (3 dots icon).
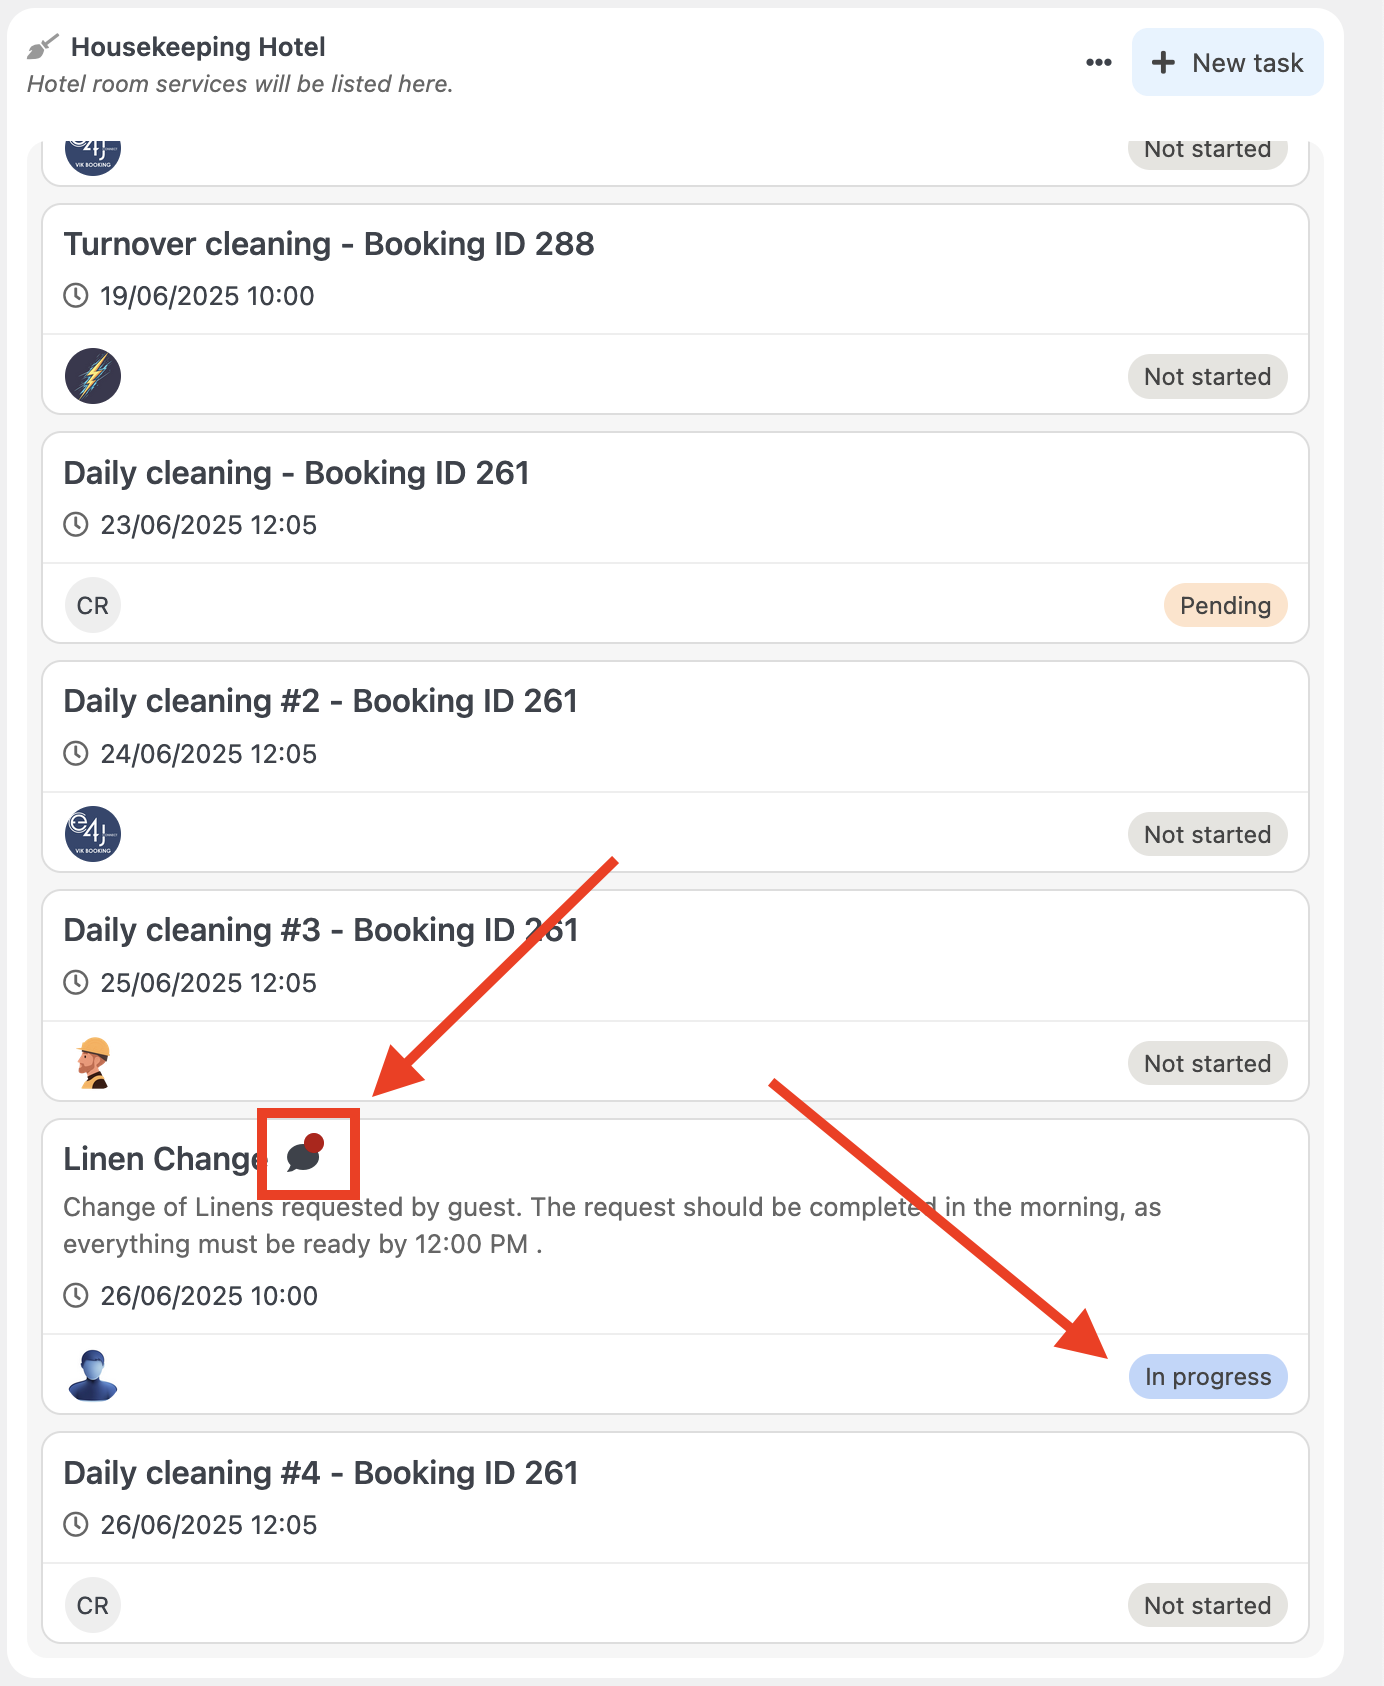
When the status is updated, the task is automatically synced with the backend.
In the overview, the new status will be immediately visible, along with a message icon if there are any unread messages in the task's chat.
Opening the task will display all its details. The operator who accepted the task will appear as the assignee (1), and the “Started” field (2) will indicate the exact time the task status was updated. Finally, the message balloon icon (3) at the top can be used to open the task's chat panel.
![]()
Finally, once the operator has completed the task and updated the status to “Completed”, the “Finished” field will be automatically populated with the corresponding date and time.
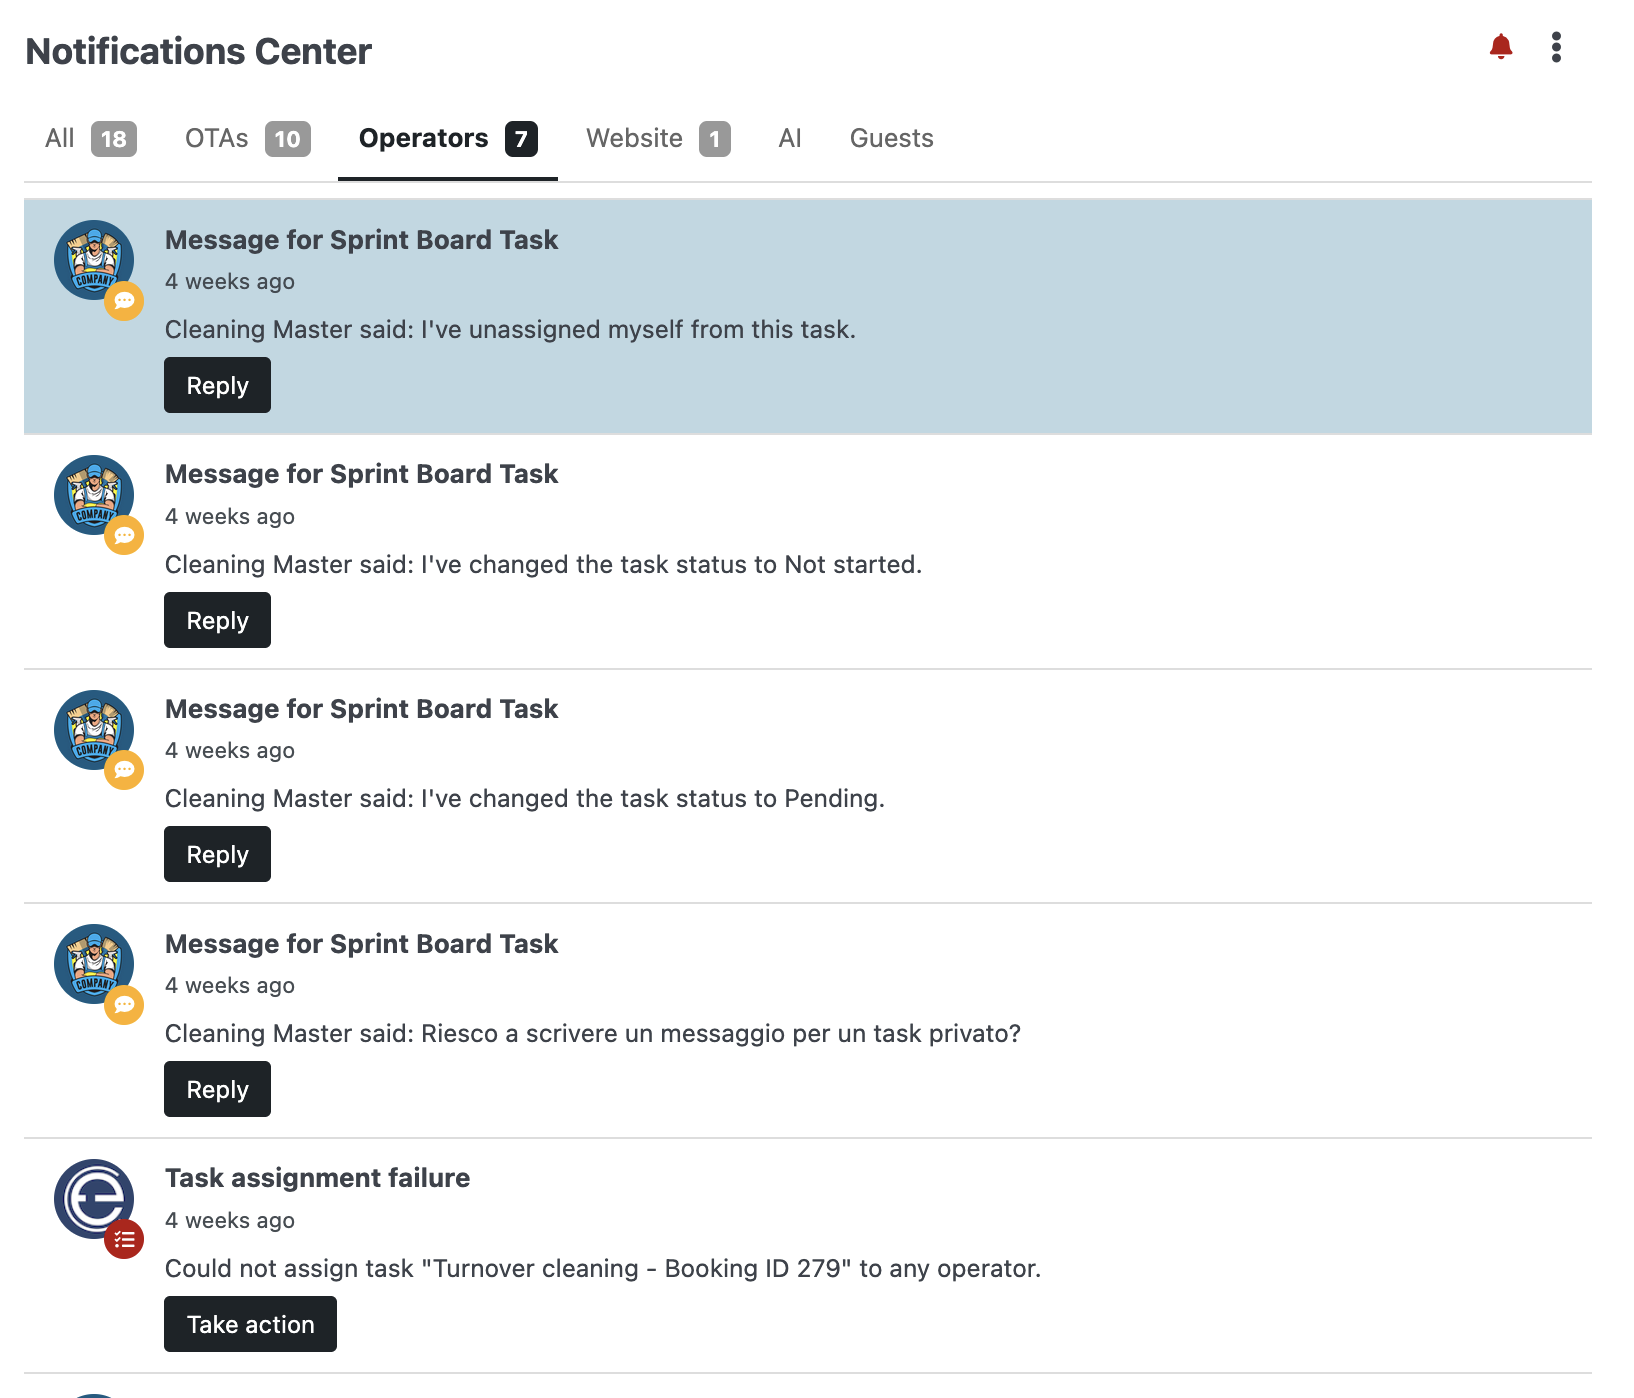
Notification Center - Operator’s Tab
The Notification Center has been enhanced with a new tab called “Operator”, which displays all updates related to the Task Manager.
This includes status changes, new messages, and, when applicable, errors—allowing you to keep track of all relevant task activity in real time.
iCal Calendars
Once logged into the Task Manager, operators can access an export function to sync their tasks with external calendars via iCal.
Integration options are available for Apple Calendar, Google Calendar, and other third-party systems that support the iCal format.
Additionally, a download button is available to export an “.ics” file manually.
