Your cart is empty!
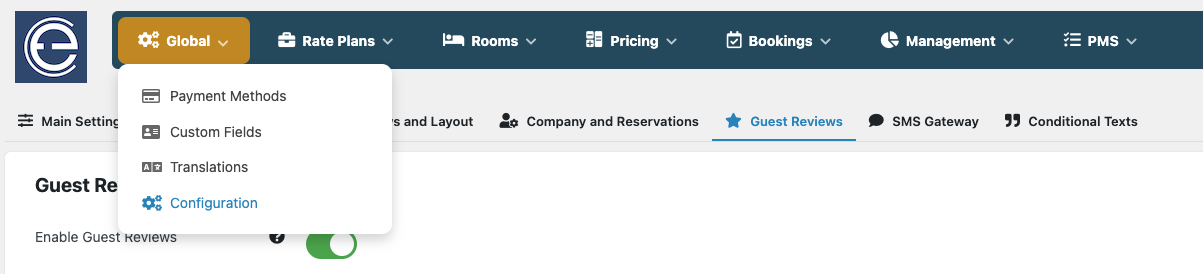
Global
Configuration
The Configuration of VikBooking is divided into 7 tabs
Tab Main Settings
Booking:
- Channel Manager Auto-Sync - This parameter is only for those who are using the complementary plugin Vik Channel Manager. If enabled, any new booking generated via back-end or any booking modification, confirmation or cancellation, will be sent to the channel manager automatically in background, without needing to click any extra button. For example: you modify the dates of a booking and the update request will be sent automatically to all the channels connected to your API Key. Strongly recommended to be left ON to avoid issues with manual updates.
- Booking Enabled - With this option you can enable or disable the Booking service, an offline message is available
Note: if you want to give your guests the option to send a booking inquiry, read our article in the knowledge base here.
- Admin e-Mail - The eMail of the administrator that will receive the notifications for new bookings as well as payments. Multiple addresses are supported only if separated with a comma. Leave no white spaces between the commas
- Sender e-Mail - The eMail address set as sender. Some servers do not allow to send email messages with equal sender and recipient addresses.
- Manage Checkin and Checkout times - check-in time is supposed to be at a later time than check-out
- Check-in/out Date Mode - choose the right date format for your clients.
- Bookings for today at any time - if disabled, bookings for today's date after the check-in time will not be allowed
- Enable Coupons - if enabled, the form for entering the coupon code will be displayed at the booking summary page
- Enable Customers PIN Code - if enabled, when users are not registered or logged in and no cookies are available, customers will be able to enter their PIN code to get the billing information fields populated automatically. For every new reservation the system will create a new customer record with the information collected through your Custom Fields, and in their notification email, their PIN code will be included. In order to create a new customer record, your Custom Fields should be set up to collect some basic information, such as the Name and Last Name, the Email and the Country of residence. These are the basic details needed to create a new customer from each front-end reservation, or to update their information for their next bookings. The PIN code serves as an authentication system, just like the Booking Confirmation Number, but without a login. In fact, if you set up a new page on your website of type "Bookings List" (by creating a new Shortcode of this type first), guests will be able to find or see their reservations even by entering their PIN code. The PIN code will also send a cookie to the browser of the guest making the reservation, but this is only needed to auto-fill the previous information in the custom fields. If the cookies are disabled, guests can enter their PIN code from the apposite input field displayed in the booking confirmation page, but still for the sole purpose of auto-populating their previous information.
- Token Form Order Submit- This is a security measure that saves a crypted value in the session. It's an invisible token generated within the PHP session, and it may not work with some Themes that handle the PHP Session differently. There are many other security measures in place, and so it is safe to turn off this setting in case it gives you problems creating new bookings via front-end.
- Require Login - In Vik Booking it is possible to let the users make new reservations with or without an account to your website managed through WordPress. This can be controlled by turning on and off the configuration setting "Require Login". If this setting is on the user will be forced to register or login before saving the order but then the new user creation or the login will be handled by WordPress. Usually, most of our clients keep this setting off to avoid asking to the guests to remember the login credentials for your website. It is way faster to make a reservation without a login/account.
- Pre Check-in Enable - If you want to allow guests to pre check-in
- Pre Check-in days in advance - If you want your clients can make the pre check-in any time before their arrival, let the setting to 0. If you want to allow pre check-in till some days before their arrival, set your desired number. If the parameter is set to 2, a customer can make the pre check-in until 2 days before the arrival.
- Upselling Extras - This setting allows you to upsell your extras/options services to clients that have a confirmed and not cancelled reservations till the check-out date. This way it will be possible for customers to order extra services for the rooms already booked and add them to their reservations. This will be valid both for website and for OTAs reservations downloaded by Vik Channel Manager. Click on “View in front site” in the Booking Detail Page of an existing reservation with check-out in the future to see how customers can choose to add services to their reservation from the front-end.
- Orphan dates calculation - set the calculation methods for dates considered as orphans. For more details about this function see our Knowledge Base .
- Minutes of Waiting for the Payment - When the booking status is Stand-By, the rooms chosen are kept as locked for this amount of minutes. During this period it will look like the rooms were already paid. Once these minutes will expire, unless the bookings has been confirmed, the rooms will become available for booking again
- Minutes of Waiting for Auto Removing Unpaid Reservations - If enabled and greater than zero, customers will see a countdown with the time remaining to place the payment. When the countdown reaches the end, the reservation is automatically removed if not yet confirmed (paid).
Search Parameters:
- Days in Advance for bookings - the closest allowed arrival date for bookings will be set to today plus this number of days
- Minimum Number of Nights - a global minimum number of nights for bookings. If this changes depending on the period, leave this to 1 and use the Restrictions
- Number of Rooms - the maximum number of rooms that can be booked with one order. This will affect any search form
- Number of Adults - the min and max number of adults that any search form will display in the drop down menu for bookings
- Number of Children - the min and max number of adults that any search form will display in the drop down menu for bookings
- Maximum Date in the Future from today - this will generate the maximum date in the future allowed for bookings. By default is 2 years
- Multiple Rooms booking Layout - choose the layout of multiple rooms booking for the front-end, between Classic or Compact. For more information about the Compact Layout see our Knowledge Base
- Availability for Multiple-rooms search - choose the type of search engine to use for displaying the rooms in the search results when users are booking more than one room. Properties with a low number of units available for their rooms/apartments like 1 or 2, should set this to Dynamic. This way if there is one unit available only for some dates and the users are searching for two rooms where the same room can suit the party/request, the system will hide this room for the choice of the second room when this is chosen as first room.
- Interactive Map Booking - only if the Dynamic search layout is enabled and all your rooms contain geolocal informations, the search result will display an interactive Google Map where guests can book their preferred room units based on localization (Available only if the parameter multiple rooms booking layout is set on "classic").
- Suggest solutions when no availability - if enabled, in case of no rooms found from the input parameters, the system will display the closest available dates, or other possible booking solutions. For example, if you don't have any rooms that accept 5 adults in one room, the system will suggest to book multiple units in the available dates. We suggest to enable this function.
- Choose Rooms Category - if enabled, any search form will display a drop down menu for filtering the rooms by Category
- Show Number of Children - Choose whether to ask the number of children in the search forms. If disabled the children will not be mentioned
-
Booking Split stay:- With this parameter enalbed, guests will be hosted in different rooms during their stay. The system will split the days of the journey in different rooms for the selected dates.
- Nights/Transfers ratio (if split stay is enabled):-The ratio is used to determine when a split stay should be suggested or not. This parameter is useful to avoid proposing too many rooms transfers during the journey.
System:
- Appearance - You can set the light/dark mode for the back-end. If set on auto the system will switch between the two modes according to the device’s settings
- Appearance (front-end) - Apply the Appearance settings to the front-end
- Google Maps API Key - This is needed to enable the Geographic Information (Geolocalization) options for your rooms
- Enable Multi-Language - if enabled, the internal translations will be used
- SEF Router - if enabled, the internal router will be used for rewriting the URLs with the alias of the rooms
- Load Bootstrap CSS - choose whether VikBooking should load Bootstrap for a better rendering of the pages
Backup:
- Export Type - this function is useful to generate a backup of your Vik Booking configuration. The Export type "Full" will make a backup of all contents inside your Vik Booking, including reservations, customers records, and more. The Export type "Management" will only contains the general setup, with no records for contents like reservations or customers details.
- Folder Path - This is the path where the backup archives (ZIP files) will be saved on your website or server installation. The path can be inside or outside the root directory of your web-server. If you are unsure of what path to use, we suggest following the instructions in the comment below the path field so that you can append any custom folder to your installation base path. Something like "/your/server/installation/base/path/my-custom-backups
- Manage Backups - Will show the list of backups. By clicking on "New" you can create a new backup or upload an existing one.
Tab Prices and Payment
Currency
- Currency Name - the name of the default currency. This should be the 3 Chars-Code of your currency (USD, EUR, GBP etc...)
- Currency Symbol - the symbol of your currency. HTML entities are allowed i.e. € will produce the Euro symbol
- Transactions Currency Code - some payment gateways like PayPal will use this setting. This must be the ISO-4217 Currency Code of your country, 3 chars long like USD, EUR, GBP...
- Number of decimals - define the number of decimals that should be used for the numbers format. Some currencies do not have decimals
- Decimals Separator - define the character to be used to separate the decimals. Usually a comma or a dot. The dot " . " is used by default (90.95)
- Thousand Separator - define the character to be used to separate the thousands. Usually a comma or a dot. The comma " , " is used by default (100,000.00)
Tax and Payments
- Prices Tax Included - if this setting is disabled and a tax rate exists and is assigned to the tariffs, taxes will be added to any price.
- Show Tax in Summary Only - if enabled, all taxes will be displayed in the booking summary, the last step of the booking process. Otherwise any previous steps will display the prices with the taxes applied
- Allow Multiple Payments for one Order - if enabled, when the total amount paid is lower than the booking total, customers will be able to place other payments for the remaining balance
- Pay Entire Amount - when disabled, users will be asked to leave a deposit to confirm the booking, either a percentage amount of the booking total or a fixed amount
- Payment Transaction Name - some payment gateways require a name for each transaction. Define the default text to be used
Tab Layout
- Calendars first day of the week - choose the first day of the week that any calendar will display. Some countries prefer Saturday or Sunday to Monday
- Number of Months to Show - this is to define the default number of availability calendars that each room will display in the details page
- Show Partly Reserved Days - when rooms have more than unit available, if only some units have been booked, the remaining units will be displayed in Yellow/Orange as partially available/reserved
- Templates - in this section you can find the templates of the main files of Vik Booking that you can modify and customize.
- Front Title - Usually a heading tag placed on top of the pages in the front end, this can be your company name. This value can also be empty.
- Front Title Tag - You can write a tag for the style of the title (h3)
- Front Title Tag Class - you can write here a Css class for the style of the title.
- Page Text -You can write an opening and closing text for the page where the user makes the reservation with the form.
- Closing Page Text - This text will be placed right below the search form.
- Bookings Color-Tags - Create and assign color tags to each booking.
- Preferred Colors - Select your favorite colors to adjust the predefined front-end styles. This way, the appearance of the elements (titles, buttons, font colors and backgrounds) on the various pages of the booking process can match the design of your theme or property.

Tab Company and Reservations
- Terms and Conditions - Use this text field to enter your global Terms and Conditions. The text will be used also for the generation of the PDF Check-in Document at the Registration.
- Company Logo and name - The name and logo of your company, a jpg, gif or png image file that will be included in every document generated.
- Footer Text Order eMail - This HTML text can be placed in every order email at the bottom of the page.
- Disclaimer- a text showed in the page of the front site when the user is selecting the the type of rate and the options. This should not be used for the Terms and Conditions. Read the Custom Fields section for further information.
Bookings Color-Tags
It's possible in VikBooking to add the option to define different colors per booking. You can easily set them and assign them to different bookings and different booking statuses. You should go into the 'Configuration' page, click on the 'Views and Layout' tab, then on the right there should be a list of names with color tags next to them, and a drop down selection menu.
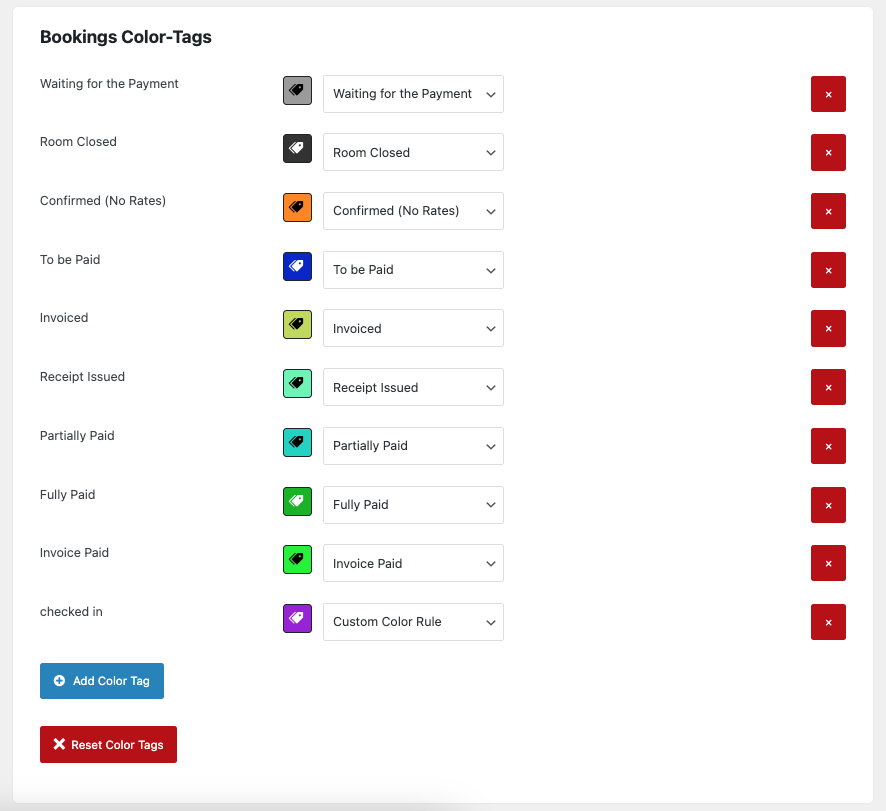
Each of these represents a color that can be applied to these statuses:
- Custom Color Rule - A Custom Rule you can assign to whichever booking you wish.
- Waiting for the Payment - This tag is applied to all unpaid bookings that temporarily block the room.
- Room Closed - This tag is applied to all bookings created from the 'Calendar' view to close rooms for a certain number of days.
- Confirmed (No Rates) - This tag is applied to bookings for rooms that don't have any rates or that don't cost anything at all.
- To be Paid - This tag is applied to bookings that have the Total Paid at 0 or not specified.
- Invoiced - This color is applied to bookings for which an Invoice has been generated.
- Partially Paid - This color is applied to bookings in which the Total Paid is less than the Total to Pay.
- Fully Paid - This color is applied to all bookings which have been fully paid.
- Invoice Paid - This color is applied to bookings for which the booking has been fully paid and invoiced.
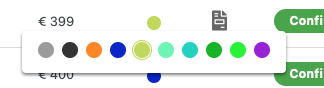
To change the color related to each status, simply click on the colored tag box, and a color picker window will appear. All of these colors (Except Custom Color Rule) are applied automatically depending on the status of the booking described above. All bookings created will have a color assigned based on these rules. To apply a color manually, instead, you will need to visit either the 'All Bookings' page, or the 'Availability Overview' page.
From the 'All Bookings' page, you can click on the column to the right of the 'Total' column. If you do, a list of the colors defined in the configuration page will appear.
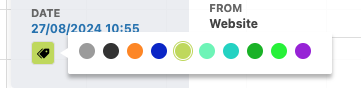
In the 'Availability Overview', you should hover your mouse on a booking and a transparent window will appear, with a color tag image in it. If you click on it, you will be able to change the color tag. Custom Color Rules can be applied to bookings only manually.
SMS Gateway
This tab lets you enable and configure an SMS Gateway to use for any SMS notification to the customers, and/or to the Administrator. Vik Booking comes with a few pre-installed gateways to send messages with certain providers. You will need to choose the right SMS provider for you, create an account from their site, and then enter the credentials in Vik Booking to start using this function. Please notice that credit for sending SMS messages should be purchased from the provider's website. Our company is not related to any particular SMS Provider. Lastly, the SMS framework could be extended to send SMS messages through your preferred provider if not available in the list.
Tab Guest Reviews
NOTE: this function is available only if the Vik Channel Manager is installed
- Enable Guest Review: whether to enable your guests to leave a review;
- Review message minimum chars: set a limit of words for the message. When this parameter is set to 0, the comment will be optional. Insert -1 to avoid that the customer leave a message;
- Reviews approval: set an “automatic” or “manual” reviews approval method;
- Review type: choose to let customers rate per service or per global experience. If you chose the Service rating you can add in the list your customized service/field to be rated.
The possibility to leave a review starts from the day of the check-out onward. From the front end of the reservation detail, the customer will see a tab where to insert their message. Go to the Booking Detail Page of an ended reservation and click on “View in front site” to see how this will be displayed.
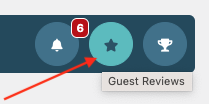
In the “Bookings” Menu -> “All Bookings”, you will see a little golden star near the name of the customer that left a review.
Click on the star to see the review. Here you can also check if the review already got a reply or not. If not, you can click on the little eye icon under “DETAILS” to reply to the customer.
To see all the reviews you got, both from the website and from channels, click on the Guest Reviews button in the Dashboard. A notification icon will appear each time you receive a review.
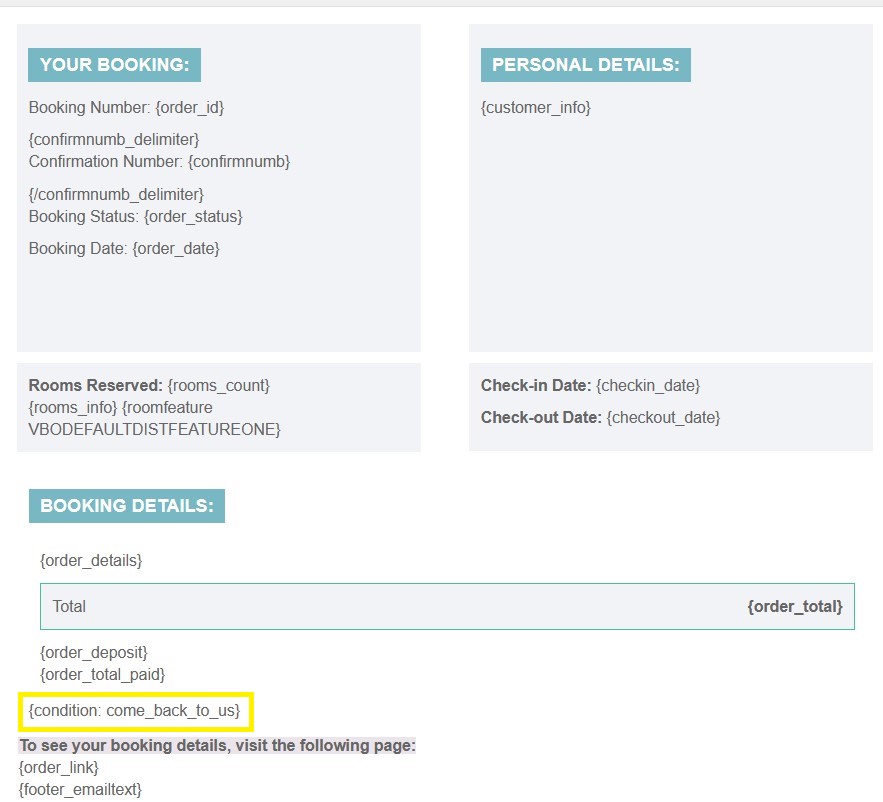
Tab Conditional Texts
In this section you can create your custom messages and texts for your guests based on specific needs or conditions:
- Conditional Text Name - the title of the custom text will be the name you want to add to this task, useful to remember what it is for. It won’t be shown to guests. Based on the title, the system will automatically create a tag that will be inserted in the template you want.
- Conditional Message - in this box, you must insert the custom text which will actually be shown to your customers. The editor supports HTML and CSS format, so you can customize the graphic of the text as you prefer.
- Add Rules - the rules are precise conditions that should happen in order to let the custom message appear. They work as filters assigned to your text.
Below you can find two examples of conditional texts:
- You need to make a special offer only for the existing customers by giving them a dedicated coupon for their next stay.
By adding the rule of type “ Number of Nights” and a rule of type “Returning Customers”, if the guest that books a room on your website meets both conditions, then he will receive this custom message.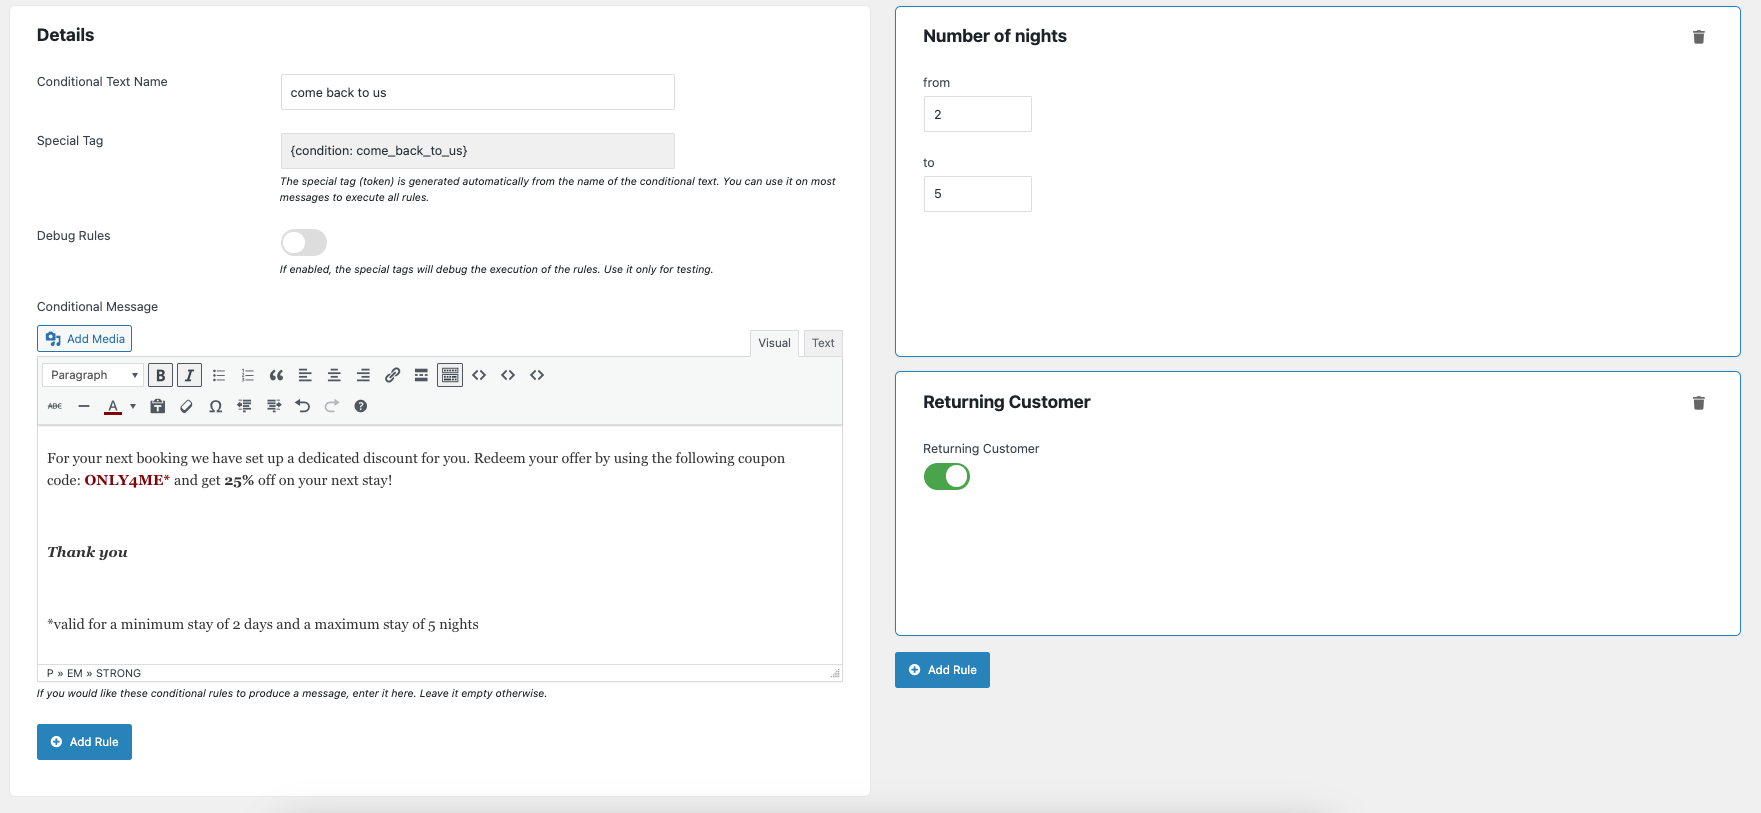
- You need to give additional information for a particular room, for example, in case of apartments or villas that sometimes do not have a reception point, we would like to let you know how to collect the key for that kind of accommodation.

We added the rule “Rooms” and selected among the list of all rooms, the room we want to give this information for.
With this rule, any customer that will book this kind of Room will receive this message.
PS. In case the context needs plain text and not HTML tags, you need to insert "[sms]" or "[plain text]" inside the body of the message (no matter at which point of the message, our plugin will strip that string). You'll specify the context of the message so that our plugin can recognize and avoid using the wpautop function for that message.
After saving, you will have the list of all your Conditional texts created.
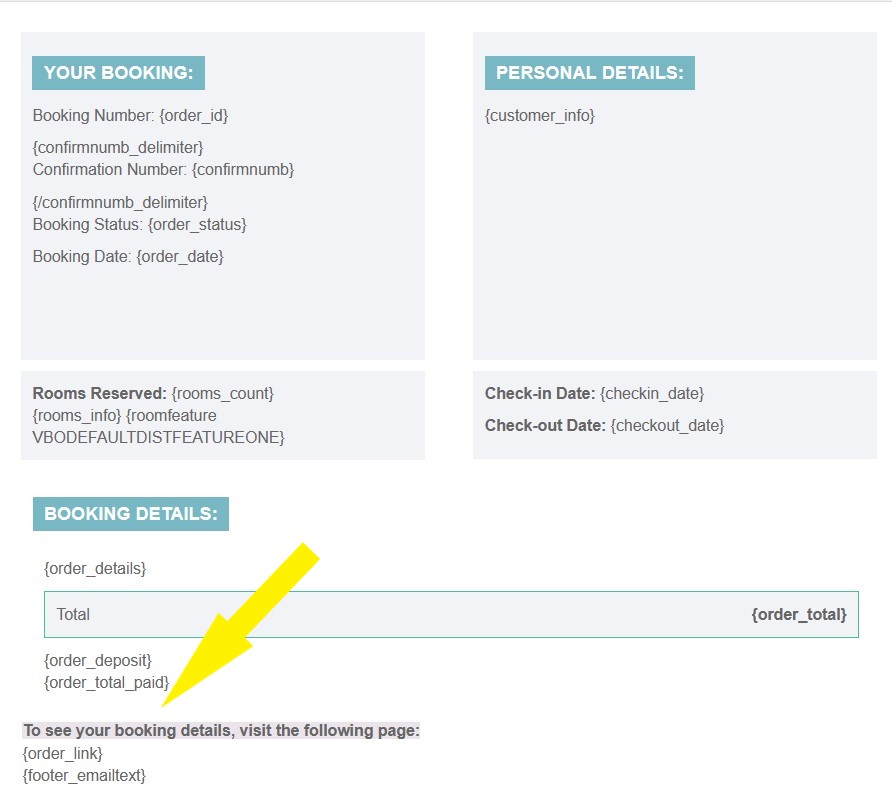
Remember to assign this text to a precise template where you need to display it: click on the desired template name among the three proposed: “Customer E-mail”, “Invoices”, or “Check-in Document”.
When you choose the template, it will be opened in an interactive way, and you can insert your custom message by simply clicking on the position you prefer. When you click on a precise point of the template, the special tag will be added.
 |
 |
Custom Fields
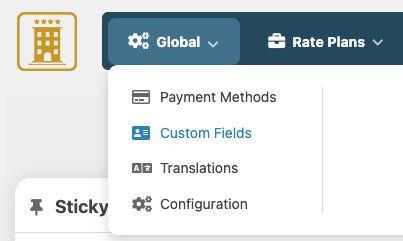
From this task you can manage all the fields that the users will have to fill in before saving the order.
During the first installation of VikBooking, some fields are created by the program but it's always possible to manage these fields.
The field types are:
- Text - the user will have to fill in an input text field
- TextArea - a text area with more rows will be shown
- Select -a select menu is shown in this case, you can create all the select options from the same task
- Checkbox - a checkbox field will be displayed
- Country - a list of countries in a drop down menu
- Separator - this field is not an input field but just a text separator. It can be used for dividing the Purchaser's Information from the Billing Information. If the text of this field is longer than 30 chars, a different style will be applied to it. Some people use for writing extra information.
The field name is the label that will be next to the input field or the text of the separator.
A field can be required or not, in this case the system will check that the user provided something for that information.
If the field type is Text and the setting Is Email is On, that email will be used to send the order email. Make sure to have only one custom field of type Text, Required and marked as "is eMail". There is no need to have more than one because the system will validate that the email is valid. A field like "confirm email" would be useless just like having more than one field marked as email.
It is strongly recommended to have at least two custom fields of type text, required and marked as "is Nominative". The system will use this to get the first and last name of the customer.
Another important setting of the fields is the Popup Link. This function is usually used when the field type is Checkbox and the user has to accept something, the Terms and Conditions for example. The popup link is a page that is opened in a modal box every time the user clicks on the label of the field. The modal box is "modern" popup that is never blocked by any browser and leaves the user in the same page.
Usually the link should be a WordPress page link, or to a static HTML file in your server.
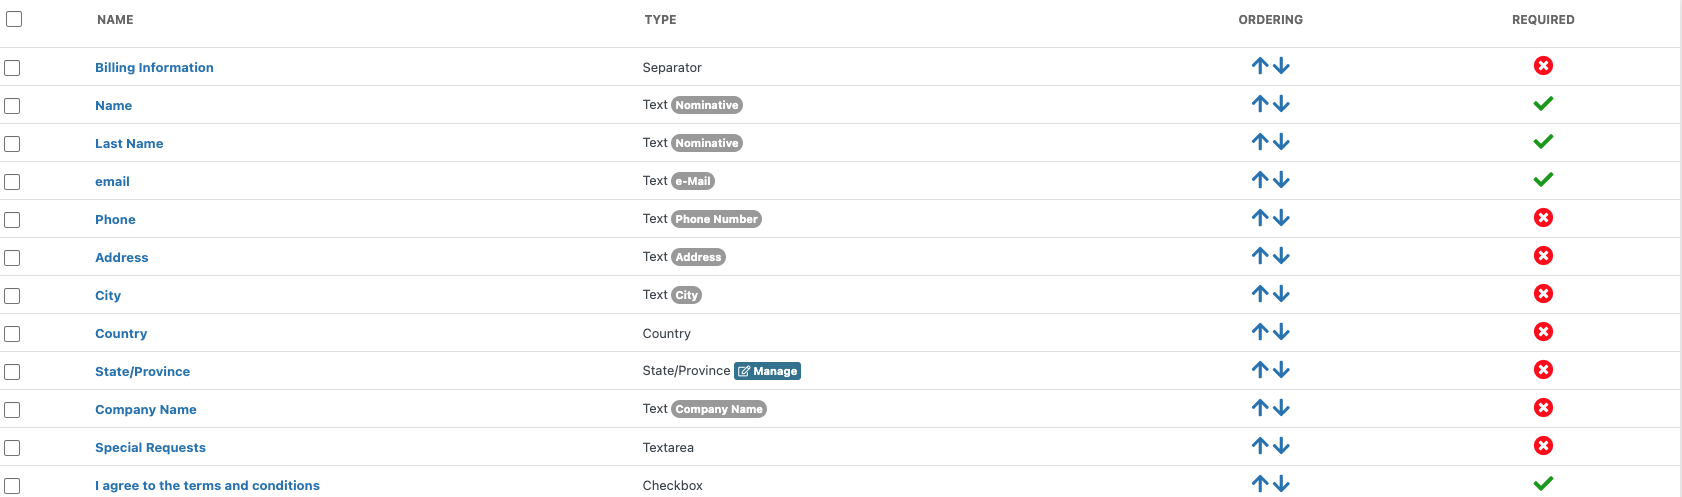
Here is a screen shot that shows a correct configuration of the Custom Fields. It is important to keep a correct configuration in order to let the system add customers to the database and to use all the management functions correctly (Invoices, SMS, Cron Jobs etc..):
Customers
The Customers page will let you manage all the customers of your property. This function is useful to keep track of all your clients who made a booking for their stay so that they will be able to find their billing information populated at the next bookings.
One customer record will store the following information:
- First Name - first and, optionally, middle/second name of the customer.
- Last Name - the customer's last name.
- Company Name - the name of the company, in case of a company.
- VAT ID - the VAT number of the company.
- eMail - the primary email address of the customer.
- Phone - the phone number of the customer inclusive of the prefix.
- Address - customer address.
- City - the city of residence.
- ZIP - the ZIP code of the city of residence.
- Country - the country of residence of the customer.
- Gender - male or female. Useful for the Reports.
- Date of Birth - the customer's date of birth.
- Place of Birth - the customer's place of birth.
- ID Type and Number - stores the customer's ID details.
- Notes - internal notes for this customer, only visible to the administrators.
- WordPress User - in case the customer has a login name for the website, a relation between the WordPress Users can be created.
- PIN Code - the unique personal identification number of the customer, 5 digits, integer number. This code is used for storing information in a cookie sent to the customer's browser so that at the next bookings the custom fields will be populated automatically. The PIN code is sent to the customer together with the booking confirmation email.
Every time a customer makes a booking, the system will create a record for the new customer, unless a record for the same email address was already saved. However, in order to have the system store the customers records in the database, you need to have the Custom Fields configured correctly:
the system requires to have two custom fields of type Text, Required and marked as Nominative; one custom field of type Text, Required and set as eMail; optionally you can have one custom field of type Text, marked as Phone Number and one field of type Country. Setting up the Custom Fields as in the demo website back-end is what we recommend for every new version, and for compatibility with the Reports functions.
Translations
With the Translations page you can translate any content of the database that was created through VikBooking such as the names and the descriptions of a Room, the names of the Rate Plans, the Characteristics or the Custom Fields.
We strongly discourage the use of third party extensions to manage the translations. Through the VikBooking functions you can translate any contents created with this plugin, so there's no need to use third party extensions that could just slow down your website and cause conflicts.
Multi-Language Contents
Wordings like "Book Now", "Room", "Confirm Booking" etc... do not need to be translated through this function because those are handled by the gettext functions, and you can modify the PO and MO files.
This page will list all the Languages that you have installed on your WordPress website. For installing new languages use the WordPress configuration page, then click on the 'Site Language' select and choose a 'non-installed' language to install.
Please notice that the default language for the front-end Site, configured from the settings page, should be the one that you use for entering the default names and descriptions of the Rooms and everything else. Basically, all the contents that you create with VikBooking should be in the same language as the Default one set from the settings page of the administrator section for the Front Site.
By choosing a content type from the drop down menu on the right of the page, the system will load the original translations for that content (Rooms, Categories, Types of Price, Characteristics, Options, Special Prices, Custom Fields, Payment Methods etc...) and you will be able to create a translation for any other language than the default one for the Site.
There is a configuration setting for allowing the Multi-language contents so make sure this is enabled.
Language Definition Files
Please follow the Knowledge Base's guides on translating our plugins. You can find them here.
Payments

From this task you can manage the methods of payment for your website. Paypal, Bank Transfer and Offline Credit Card are pre-installed but disabled by default after the installation.
The method of payment chosen by the customer will affect the status of the booking that can be either Pending (Stand-By) or Confirmed.
In case all the methods of payment are disabled, every booking will be considered by the system as Confirmed and the user will not be asked to select any method of payment.
In case the payment option requires the validation of a payment, the setting Auto-Set Order to Confirmed must be DISABLED or the status will be set to Confirmed before requesting the payment or before starting any transaction. Payment options like PayPal where a payment is required should have that setting DISABLED while you can enable it in case you want the booking status to be Confirmed when that payment option is selected.
The payment option Bank Transfer is a flexible method for giving the customers certain instructions for the payment through the Notes field such as your Bank Account Number (IBAN). Some Properties offer a payment solution for paying upon arrival. In this case it will be sufficient to rename the Bank Transfer to anything like "Cash" or "Pay Upon Arrival". In this case, properties should decide what status to apply to the bookings where the customers chose to pay by cash or upon arrival. Bookings not Confirmed will not lower the availability of the rooms on the requested dates, they will just keep them as Locked for the amount of minutes defined in the Configuration.
The Payment Name is the title showed in the front site during the order confirmation when the user has to select a method of payment.
The File Class is a php file that is executed by VikBooking to start the transaction and to validate the payment, do not change this unless you are creating a new method of payment.
VikBooking supports customized methods of payment, by creating a new file class .php in the payments directory you can create your own gateway for your bank.
A method of payment can apply a charge or a discount to the total order. From the setting Charge/Discount you can enter an amount, percentage or value that will be added/deducted from the order total. This can be useful if you want to give your clients a discounts if they are paying by credit card.
The Notes field, is a text displayed in the order page in the front site. Usually the notes are shown only if the order is Standby (Pending), by enabling the setting Always Show Notes, the notes will be displayed in the order page even if the status is Confirmed. For those who use Bank Transfer, this could be useful for showing the information for the payment or other details.